Are you aspiring to 📍perfect your handstand?🤸🤸
No matter where you are on your journey to mastering the challenging skill of the handstand, mobility, and shaping techniques are an absolute must.
Mobility exercises and shaping techniques can transform your handstand prowess and offer numerous benefits beyond the mat or gym. These can help refine and optimize your handstand position, allowing you to achieve excellent stability, control, and aesthetic appeal in your inverted posture.
🤜Improved 📍core strength, increased body awareness, and enhanced overall athleticism are just a few of the rewards awaiting those who commit to the art of the handstand.
In this article, we’ll explore various exercises and screening techniques that can help you improve your handstand form, prevent injuries, and enhance your overall handstand experience.
🏆Section 1: 4 Handstand Shaping Techniques
Before diving into handstands, it’s crucial to establish the correct body-shaping techniques. These exercises will help you understand how to maintain a straight body position, an essential element for achieving a perfect handstand. Here are four exercises that will help you shape your handstand in different dimensions:
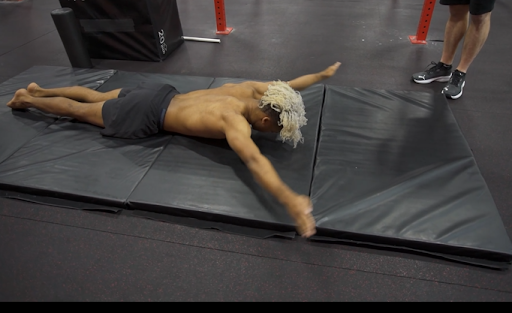
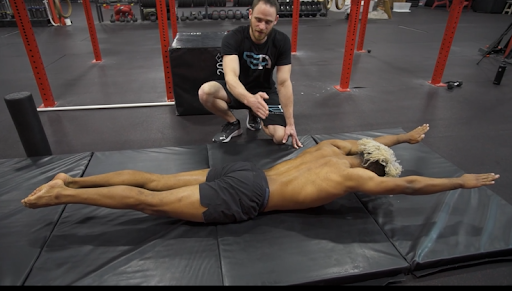
⚡️Handstand Shape
The prone handstand shape exercise continues to refine your body’s alignment and core engagement. Here are the detailed steps:
To execute this exercise effectively, begin by lying face down on the floor and extending your arms overhead, like in a handstand. Ensure that your ears and shoulders contact the ground while maintaining a neutral head position.
With your feet and the back of your hands pressed into the floor, this position introduces a different plane, intensifying the demand for your core engagement.
Throughout the exercise, maintain regular breathing and concentrate on achieving straight, uncurved body alignment, emphasizing the development of a strong and stable core.
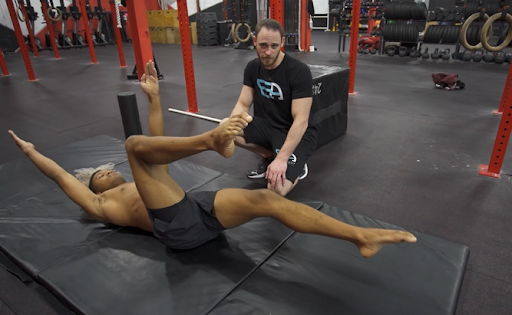
⚡️Supine Handstand Shape
In the supine handstand shape exercise, you begin by lying on your back, replicating the posture of a handstand without the complexities of balance and strength.
To perform the supine handstand exercise, lay flat on your back with your legs extended and your arms resting at your sides. Visualize yourself in a handstand position, even on the ground.
Flex your wrists as if you’re about to place your hands on the floor, and maintain straight arms throughout the exercise. Keep your ears and shoulders in contact with the ground, ensuring a grounded foundation.
Align your head with your spine, maintaining a neutral position. As you maintain this posture, focus on breathing rhythmically and under control. Your goal is to achieve a perfectly straight body, emulating the form of a handstand, arching, or bending.
This exercise helps you refine your body’s alignment and core engagement, which are crucial for mastering a handstand.
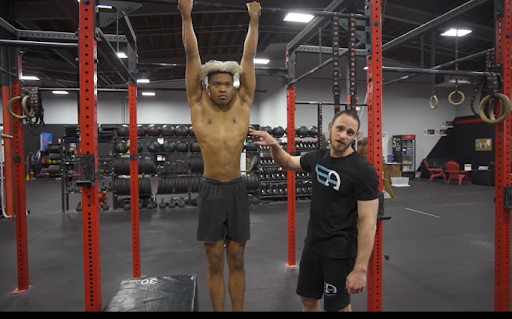
⚡️Hanging Handstand Shape
The hanging handstand exercise emulates the inverted handstand position and serves to refine body alignment while suspended from a horizontal bar.
To execute this exercise effectively, begin by hanging from the bar with your hands positioned shoulder-width apart, fully extending your arms to mimic the handstand arm position. Ensure your head is in a neutral position, aligned with your spine, and draw your shoulders and ears closer together.
Maintain a straight torso and hips to minimize swinging, and straighten your legs while keeping them together. Create a slight hollow or depression in the ribcage to achieve optimal alignment.
Throughout the exercise, focus on controlled breathing to enhance your mastery of this challenging handstand variation.
⚡️Standing Handstand Shape
The standing handstand exercise is one of the most demanding, requiring precise body positioning for success.
To perform this exercise effectively, stand upright with your feet hip-width apart. Place your hands on the floor, shoulder-width apart, mirroring the handstand position, and extend your arms fully, emphasizing their straightness.
Ensure your shoulders and ears maintain contact, and keep your head in a neutral position, avoiding the creation of a shoulder angle or arching your back. You aim to achieve a straight line from head to toe, elevating your shoulders by pushing into the floor, squeezing your glutes, and keeping your feet together.
These four exercises provide a comprehensive foundation for achieving a handstand by perfecting body shape, alignment, and strength without balancing. Gradually mastering these aspects will set you on the path to executing a successful handstand with greater confidence and control.
🏆Section 2: Wrist Screening and Exercises
Before progressing further, assessing your wrist and shoulder mobility is essential, which plays a significant role in handstand success.
⚡️Wrist Screening-Your Secret to Nailing the Handstand
Wrist screening is essential when it comes to mastering the art of the handstand. Before you try to do a handstand, you should make sure your wrists are strong enough. The way you do this simple but important test can make or break your handstand experience.
Here are ways to screen your wrist for handstands:
1. ✊ Hand Position
Start in a dog position and take it one hand at a time. It’s all about that hand being flat on the floor, with the heel of your palm firmly planted. Then, tilt your wrist forward, aiming for that sweet spot between 80 to 90 degrees angle.
2. ✊ Feeling the Mobility
During wrist screening, you might sense a few things:
- A bit of a stretch in your forearm
- Maybe even some wrist discomfort, like your bones are getting too cozy.
The goal? Figure out if you can comfortably hit that 80 to 90-degree range without any red flags.
3. ✊ Don’t Forget to Double-Check
Here’s a pro tip: don’t rush. Evaluate each hand independently. Favoring one side can throw your balance off when you finally attempt that handstand.
If your wrist isn’t up to snuff—say it’s stuck at a weird 110-degree angle or the heel of your hand is playing hide and seek—it can mess up your handstand game.
Poor wrist mobility can leave you struggling to find your balance, leading to awkward shoulder leans or over-arched bodies.
⚡️Exercises
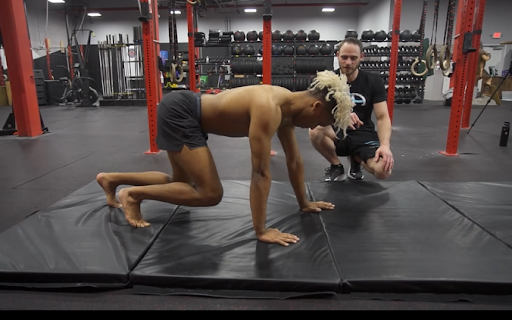
1. 🤜 Mastering the Tripod
If you’re on a quest to conquer handstands, there’s an essential stepping stone you shouldn’t overlook: the tripod. Tripods and headstands offer an excellent way to mimic the wrist angle you’ll encounter when upside down in a handstand.
In this initial tripod position, bring your elbows and knees close together. Paying close attention to the wrist angle, you find it closely resembles what one would experience in a well-balanced handstand, appearing almost vertical when observed from elbow to hand.
Once this setup feels proficient, it’s time to level up by transitioning to a straight-body headstand.
This addition adds more similarity to the handstand experience, all while avoiding the full-body weight-bearing characteristic of handstands. It serves as an excellent introduction and mobility test, allowing you to assess whether your body is in the right position for the eventual handstand.
The Movement Athlete app also includes many helpful headstand progressions. You can check out the app for this. These progressions are valuable stepping stones to developing the skills needed for a successful handstand.
2. 🤜 Wrist Push-Ups
A wrist push-up is an exercise that focuses on strengthening the muscles in the forearm and wrist while improving wrist flexibility and stability.
Starting in a dog position, these exercises primarily target the wrist flexors, strengthening the forearms. The forearm muscles push the heel of the hand off the ground in the initial phase.
Once this becomes manageable, you can gradually lean your shoulders forward, intensifying the exercise. If you are seeking an advanced twist, transitioning to a straight body plank, extending the legs, and lifting the wrists off the floor provide an even greater test of forearm strength.
These wrist push-ups not only enhance forearm muscle endurance but also play a crucial role in preparing the wrists for the demands of more complex exercises like handstands.
These wrist push-ups not only bolster forearm muscles but also help you prepare for more advanced feats, making them an indispensable component of any wrist conditioning routine.
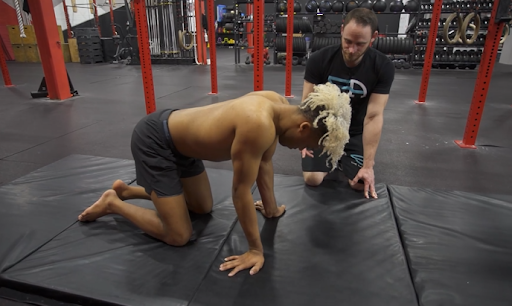
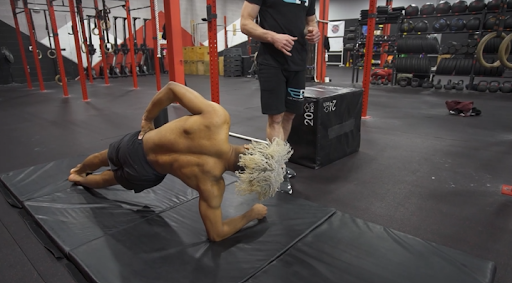
3. 🤜 Quadruped Walk
The quadruped walk helps condition your wrists for handstands. As you walk forward, you’re adding weight to your wrists. Focus on extending your wrists during this exercise, engaging the entire front, side, and anterior sides of your forearms and hands.
4. 🤜 Wrist Stretches

Incorporating wrist stretches into your routine can significantly improve mobility. Start in the dog position and rock forward and backward, gradually increasing your range of motion. You can also turn your hands so your fingers face toward your knees for a deeper stretch. Hold each position for about 30 seconds.
Related article: 📍The Ultimate Guide To Wrist Mobility For Calisthenics
5. 🤜 Elbow Bends
Another effective wrist stretch involves keeping your palms flat and bending your elbows. This stretches the wrists and forearms in different ways, helping to address tightness and improve flexibility.
6. 🤜 Traction
While most of our focus has been on compression, don’t forget about traction. Incorporate some traction into your routine to complement the compression exercises you’ve been doing.
Notice that the stretches and movements primarily involve compression—pushing things together and building strength. While compression is key for handstands, it’s equally important to introduce a bit of traction. This balance between compression and traction can enhance your handstand practice, promoting flexibility, strength, and overall wrist health.
Traction involves gently pulling your hand away from your wrist to create more space in the joint. This can be particularly beneficial in counteracting the compression work associated with handstands.
Incorporating these wrist mobility exercises into your training routine can help you achieve the proper range of motion required for handstands. Remember, maintaining wrist health is crucial for handstands and upper body strength and stability.
🏆Section 3: Overhead Mobility Screening for the Shoulder
To further enhance your handstand journey, you can shift your focus to assessing and improving your shoulder mobility. Adequate shoulder mobility is crucial for achieving and maintaining proper handstand positions. Here’s how to evaluate and enhance this vital aspect of your handstand practice:
Overhead Mobility Screening
To begin, you can perform an overhead mobility screening using a wall as a reference. Ensure your entire back, from the lower back to the shoulders and head, is in contact with the wall.
Now, lift your arms overhead, mimicking the handstand position, and attempt to reach the wall at a 180-degree angle. If you encounter resistance or tightness, it could indicate issues in the shoulder, lats, or perhaps a lack of strength. The goal here is to get as close as possible to the wall while actively lifting your arms.
Here are some exercises to improve shoulder overhead mobility:
1. 👍Lat Stretch
Tight lats can be a standard limitation in overhead mobility. The lat stretch, also known as the latissimus dorsi stretch, is a flexibility exercise specifically targeting the latissimus dorsi muscles, which are large muscles in your upper back.
This stretch involves extending one arm overhead, bending the elbow, and gently pulling or pushing to increase the stretch along the side of your body.
- PVC Pipe Stretch
Try the overhead PVC pipe stretch, holding the pipe in the grip position with your elbows aligned with your shoulders.
Slightly round your torso and move your glutes toward your heels. You should feel a stretch in your lats. If this stretch is effective, it can help address any lat-related mobility issues.
- Lat Foam Roll
Foam rolling, a self-myofascial release technique, targets muscle knots, tension, and tightness in various muscle groups, including the lats.
To foam roll the lats, lie on your side with the roller positioned horizontally under your armpit. Slowly move your body down the side of your torso, pausing at tight spots to release tension. Foam rolling the lats can improve shoulder mobility and reduce muscle soreness.
2. 👍Thoracic Rotations
Isolating the upper thoracic area is essential for improving shoulder mobility. Maintaining good thoracic mobility is important for overall physical health and can enhance your performance in various activities. Use a foam roller under your knee to prevent lower body movement.

With your hands together, make semicircular motions, always aiming to touch the floor. This exercise targets the upper thoracic area and helps enhance mobility.
3. 👍Pec Stretch
Tight pec muscles can restrict overhead mobility. Perform a pec stretch by lying face down and extending one arm to the side. Bend it at a 90-degree angle.
Roll your torso toward the extended arm, feeling the stretch in your chest muscles. Hold the stretch for 20 to 30 seconds on each side, focusing on controlled breathing and avoiding excessive stretching.
4. 👍Active Flexibility Exercises
Active flexibility exercises are crucial for enhancing shoulder mobility. Try the overhead lift with a stick.

Keep your arms straight and shoulder-width apart, lifting the stick without arching your spine. Perform a set of 10 repetitions, holding the last one for 10 seconds. This exercise targets the anterior deltoids and upper back.
5. 👍Floor Angels
Another effective exercise is floor angels, where you move your arms through a semicircular range of motion while lying on your back.
Maintain proper alignment and focus on isolating the upper back and shoulders. Avoid arching your body during this exercise.
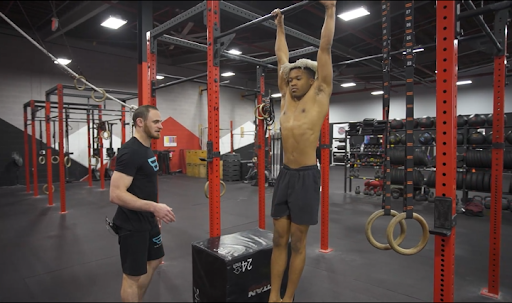
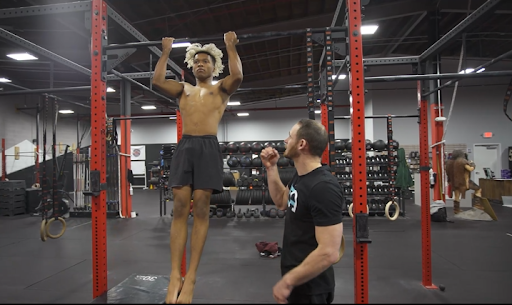
6. 👍Hanging in an Under Grip Position
In addition to the lat stretch, incorporating hanging under the grip can be highly beneficial for handstand training.
Hanging in an undergrip position, such as on a pull-up bar, helps to decompress the spine, elongate the upper body, and improve overall shoulder mobility. It can serve as a complementary exercise to the lat stretch, targeting the same muscle groups while providing a different range of motion.
By hanging in an under-grip position, you promote better alignment and enhance balance, stability, and overall shoulder health, which are crucial for achieving and maintaining a successful handstand.
7. 👍Negative Chin-Ups
Negative chin-ups can aid in stretching the lats. Start from the top position and slowly lower yourself down. The eccentric phase of the exercise helps lengthen the lat muscles. Incorporate these into your routine to further address shoulder mobility.
Remember that even if you can already achieve a 180-degree position in a handstand, these exercises are essential because maintaining shoulder mobility is ongoing. Neglecting it can hinder your progress in handstands and other advanced skills.
🏆Section 4: Core Work and Body Line Fundamentals
As you delve further into your quest to master the handstand, you’ll discover an essential aspect of handstand training – core strength and body line fundamentals. These exercises won’t just help with balance; they’ll also shape your handstand and boost your endurance.
1. Body Line Exercises
Maintaining a straight and controlled body line is one of the keys to a stable handstand. These exercises include excellent warm-ups and supplementary drills to refine your handstand technique.
Here are some essential body line exercises to incorporate into your training:
- ☑️ Dead Bug Exercise
This exercise targets your core muscles and helps improve your body awareness. Lie on your back with your arms extended toward the ceiling and legs lifted with knees bent at 90 degrees.
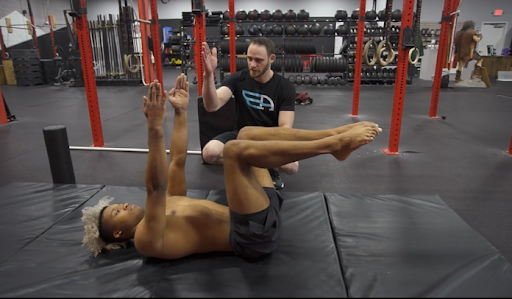
As you become more adept in this static dead bug position, consider progressing through various forms of the exercise to further challenge your core and enhance your coordination:
- ☑️ Marching Dead Bug: In this variation, you isolate and move your legs one at a time while coordinating these movements with your breath. It adds a layer of complexity to the exercise, requiring better control and coordination.
- ☑️ Alternating Arm Reach: Extend one arm overhead while keeping the opposite arm and leg close to the ground, then switch sides. This variation intensifies the challenge by engaging multiple muscle groups simultaneously.
- ☑️ Extended Dead Bug: As you become more proficient, extend both arms and legs simultaneously, hovering them just above the ground without touching them. This advanced form demands exceptional core strength and balance.
These progressive variations of the dead bug exercise allow you to continually challenge your core strength and body control, gradually preparing you for more complex maneuvers, including handstands. Remember to maintain proper form and consistency in your breathing throughout these variations for optimal results.
Slowly lower one arm and the opposite leg toward the floor while keeping your lower back flat. Alternate sides and focus on controlled movements and breathing.
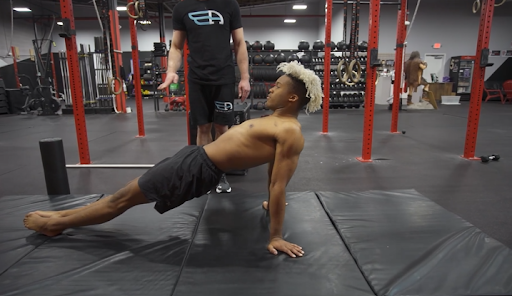
- ☑️ Arch/Hollow Holds
These exercises are fundamental for building the core strength necessary for a stable handstand. The arch hold involves lying face down with arms and legs extended, lifting your chest and thighs off the ground.
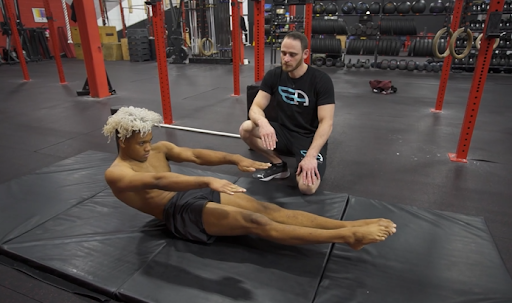
The 📍hollow hold is the opposite, with your back rounded and your arms and legs lifted off the ground.
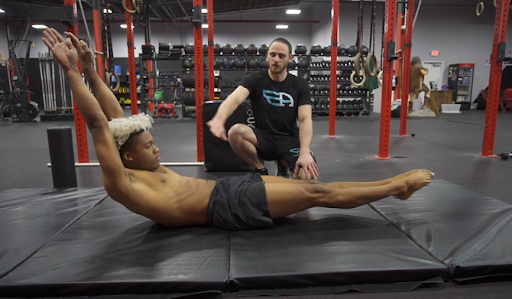
Both exercises emphasize maintaining a tight and controlled body position.
2. Core Work
Remember that core strength forms the foundation of a solid handstand. It provides the stability and control you need to balance effortlessly. 📍Plank variations are excellent for building overall core strength and stability. You can incorporate some plank variations into your routine:
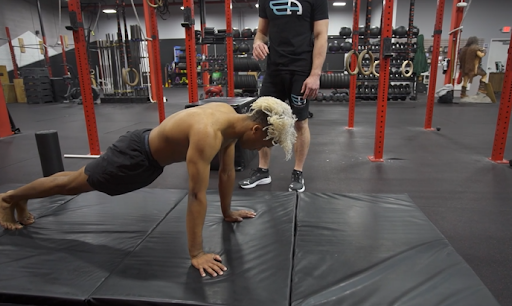
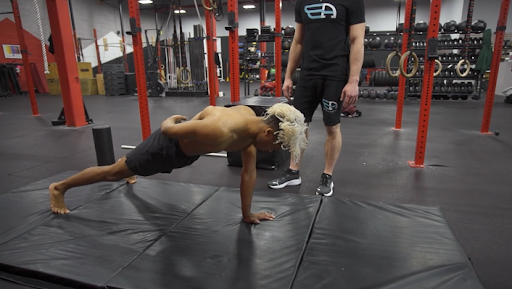
- ☑️ Standard Plank:
Begin in a push-up position with your elbows on the ground and your body in a straight line from head to heels. Hold this position while engaging your core muscles.
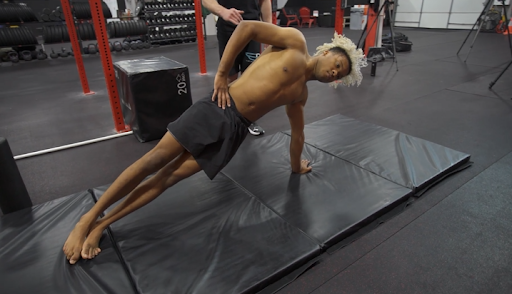
- ☑️ Side Plank
Lie on your side with your elbow directly beneath your shoulder and lift your hips off the ground, creating a straight line from head to feet. This exercise targets your oblique muscles and helps with lateral stability.
- ☑️ Single-arm plank: This adds an extra layer of complexity by redistributing your weight onto one hand, further challenging your balance and stability. For those seeking an even greater challenge, a variation includes bringing your legs closer together, maintaining parallel alignment with the floor, and making the exercise more demanding.
These plank variations serve as valuable tools in building a strong foundation for handstands, enhancing your core strength, and promoting overall body control.
- Check out Part 1 of the video to see how the above routines are done: (Video link, part 1)
- Click here to watch the second half of the video:(Video link, part 2)
🙌Advantages of Handstand Mobility Exercises and Shaping Techniques
Engaging in handstand mobility exercises and shaping techniques offers a multitude of benefits, including:
- ✅ Improved Balance: Enhances overall balance and body control.
- ✅ Increased Strength: Strengthens the upper body and core muscles.
- ✅ Enhanced Flexibility: Boosts flexibility in shoulders and wrists.
- ✅ Core Stability: Handstands engage your core muscles extensively, contributing to improved core strength and stability, which is beneficial for other physical activities and daily life.
- ✅ Mental Focus: Sharpens concentration and mindfulness.
🧐Frequently Asked Questions:
🔎Why are mobility exercises important for handstand training?
Mobility exercises make you more flexible and increase your range of motion. This makes getting into and staying in the right handstand position easier while lowering your risk of injury.
🔎How can I incorporate mobility exercises into my handstand training routine?
Add dynamic mobility exercises to your warm-up and static stretches to your cool-down. Consistency is key for improving handstand mobility.
🔎What is the significance of body shaping techniques in handstand training?
Body shaping techniques ensure a straight, balanced handstand, promoting stability and control. They’re crucial for handstand progression and control.
💥Conclusion
Your journey to handstand mastery is ongoing. It’s not just about achieving the handstand; it’s about perfecting it, making it straighter, and sustaining it longer. Additionally, it’s about addressing any discomfort or pain that may arise during your practice.💯
These exercises are carefully selected to assist you on your handstand journey, regardless of where you are in your training. They serve as tools to help you straighten your handstand, increase your endurance, and minimize discomfort.
🔥Check out the Movement Athlete app for more handstand mobility and shaping techniques. Do you want to get started with calisthenics? The Movement Athlete app offers a lifelong, progressive, effective, and adaptive program to help you achieve your fitness goal.

