Join the tribe of Movement & Calisthenics Athlete – people just like you that are working with their own body weight to get strength, lose fat build muscle, recover from injuries and live their best lives!
The Back Lever is a challenging gymnastics skill, but with the right tips and tricks, you can get it done!
Check out these 10 recommendations from a Back Lever PRO to help you improve your Back Lever.
Achieving back lever with Calisthenics
Angelo Gala, a fitness professional from Boston, had a few things to say in his article “My Journey to the Back Lever.”
Posted in August of 2013 on the Progressive Calisthenics Certification blog, he shared, “Very rarely do people care about the benefits provided, they’re simply romanced by the “fun factor.”
Demonstrate to the same person a back lever and you may see a pair of glazed eyes appreciating the skill, but not quite aware of the work required to get there.”
He wanted to emphasize how much hard work goes into achieving the back lever, and that calisthenics is not simply fun and flashy moves.
Check out how he detailed the progressions that worked best for him, but at the end of the day, constant improvement is key for anyone.
There are many sources of information and tutorials on how exactly to do the back lever, but we’re here to give you ten very simple and expert tips on how to improve the back lever, as well as making it a little bit easier to achieve.
10 Back lever tips to improve
There are many sources of information and tutorials on how exactly to do the back lever, but we’re here to give you ten very simple and expert tips on how to improve the back lever, as well as making it a little bit easier to achieve.
Hand close together
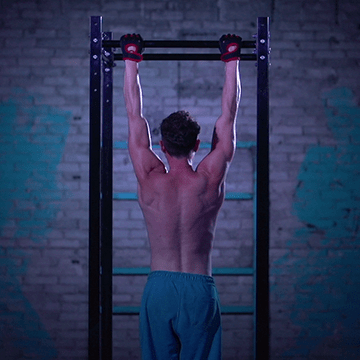
One expert tip that people tend to take for granted is that when using a bar, putting your hands as close together as you can help you carry your weight better. It’s quite similar to what is taught when learning moves in yoga that require you to balance your hands and arms or in other calisthenics moves such as pull-ups, push-ups, or even front lever as well. The wider your hand position is, the harder the exercise. If you place them closer, you’ll notice that becomes a lot easier. Aim to hold with at least the hands shoulder-width apart.
Beginning with a pronated (overhand) grip with palms facing away your body is ideal since it has less strain on your biceps and shoulders compared to the straight-arm hold with an underhand/supinated grip with palms facing your body.
Practice skin the cat
School of Calisthenics on how to perform the skin the cat. Weird name but effective exercise.
The “Skin the Cat” move is one important way to practice getting into the right rhythm of the back lever, among other things. It causes you to carry your own body weight and be able to make repetitions of the move, relying on your arm muscles and taking control of your core. You can view it as a preparatory exercise for the back lever.
You can also include the German hang as demonstrated by Bodyweight Warrior, Tom Merrick. You’ll notice that the german hang exercise is an isometric hold of one phase of skin the cat.
It might feel like an awkward position at first, but that’s just because it’s a typically untrained position. Once you get the hang (bad pun intended) of the hanging position, it will feel more natural.
Start out with the right progression
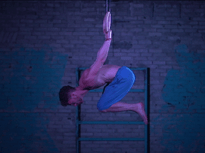
Like any other calisthenics skill work, you need to work on the right simple progression suitable for your current skill level. The lever progression is a long list and it’s just the reason why progressing can be more productive.
Choose the right progression for you. If you’re struggling to hold a position, consider easier variations. If you find yourself holding a position for 30 seconds with ease, move to the next progression.
Take the back lever progressions seriously and try not to skip steps to safely build strength. Start slowly and gradually progress.
Tuck back lever
Advanced tuck back lever
Frog back lever
Pike straddle back lever
Straddle stance back lever
One legged back lever
Half lay back lever
Full extension
Squeeze
Might be an obvious tip, but it sure makes all the difference. Coaches say squeeze with all your might, almost feeling like you can’t breathe (but of course, you need to breathe!), to let your mind know you’re in control of your body as well.
Full-body tension is essential for every calisthenics move that some people might forget to keep in mind. It’s easy to focus on the movement itself and forget about the muscles engaged.
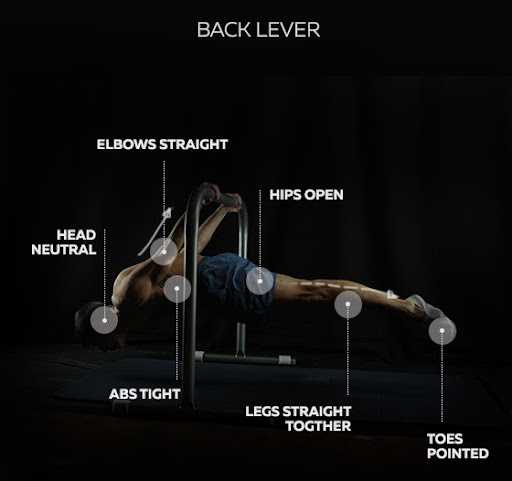
The back lever is a whole-body exercise with the intensity to a high degree. The entire body is working to hold your body in one straight line in an inverted position parallel to the ground so keep everything tight. Keep every muscle fiber working for maximum performance.
Bar or rings
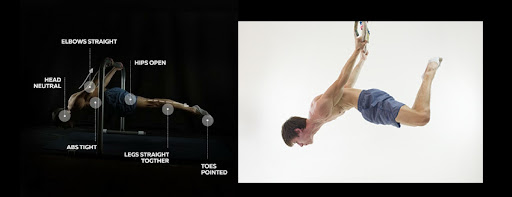
Something that is not the same for everyone is if using a bar or rings makes it easier when asking how to improve the back lever. The difference begins from the dead hang.
The Skin the Cat move, for example, requires you to simulate a backflip by flinging your legs up and over your head. This can be done with ease if using rings but requires you to bend your legs when using a bar to flip your legs overhead.
Our tip is to see what works best for you in terms of form and balance. Just take note of the pros and cons of each option.
Gymnastics rings can move freely which is good for the joints and overhead space is great when flipping over. The drawback is the instability which adds a degree of difficulty to the exercise.
The bar is stable and rigid which makes doing back levers on it easier, but the same rigidity requires you to be more mobile as mentioned earlier.
You can read more regarding the difference of the two equipment in a more general sense in the article below:
Keep you back flat
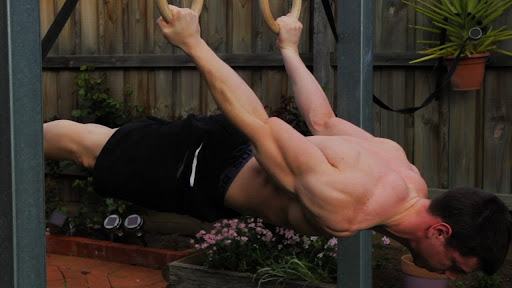
Now, moving on to more form-related tips, the first is to keep your back flat. It’s a general tip for everyone doing exercises because it helps you engage your core better, the number one factor in achieving the back lever.
Keeping your back at its flattest and approximately parallel to the ground also protects you from straining it.
The lever requires good mobility and strength. You can slowly lower your way to the proper position. Protract your shoulders and avoid the body alignment lower than parallel.
Keep your arms straight
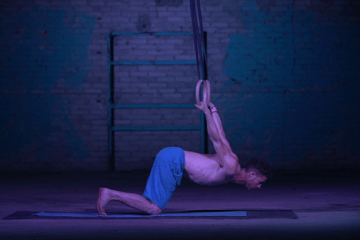
The next three are closely related to keeping your back flat. Keeping your arms straight gives you good balance, and allows you to maximize the arm muscles you need to hoist yourself above the ground. It also ensures that you are in the optimal horizontal position to engage your core.
Plus, it looks just so much cooler when seeing a full back lever with proper form, body straight, and straight arms.
Look ahead
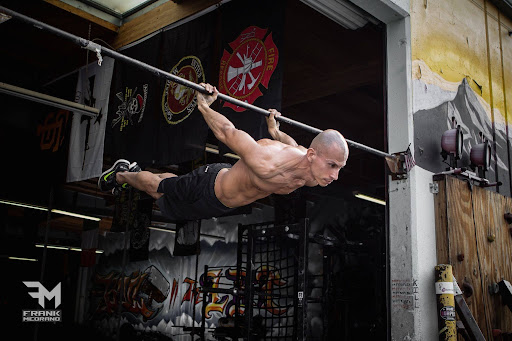
The calisthenics legend Frank Medrano exhibiting the proper head position.
Looking ahead, or keeping your head up, helps you feel more in tune with your body. It engages the right muscles to help you maintain the horizontal posture. It also avoids putting an unnecessary strain on the neck.
It’s also familiar to us how looking straight down or letting your head fall makes the blood rush to our head, and that’s also what we want to avoid. Getting dizzy or feeling nauseous will surely prevent you from maintaining the back lever.
Point your toes
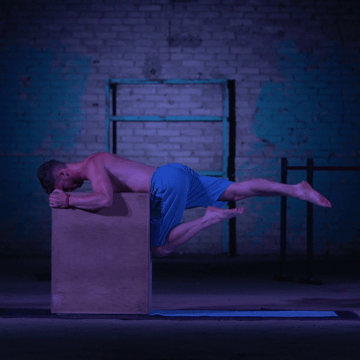
Leg extensions with pointed toes to simulate the leg engagement for back lever.
Earlier, we gave the tip that squeezing your body makes things easier for you. Whatever leg position; straddle position, tucked back lever, fully extended leg, knees bent, all have a different feel on the lever position.
But how do you make sure your legs are squeezed to the max? Point your toes. It lengthens the body for the perfect horizontal alignment while also serving as a cue to squeeze your legs.
Try it for yourself. Point your toes now even while you’re just sitting or standing. You’ll immediately feel the contraction of your legs.
Have a spotter
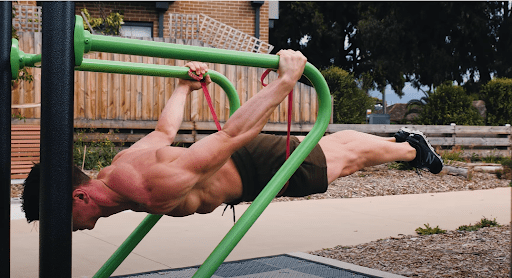
Daniel Vadnal of FitnessFAQs showing how it’s done!
Lastly, if you aren’t part of a class or don’t have a personal trainer, we highly recommend you train on how to improve back lever with a friend or two. This person will serve as your spotter, to help identify the mistakes in your form, or to remind you of the tips we’ve reminded you of above.
But maybe training with a friend is not always an option. Luckily, you have an alternative to it!
First, in replacement for the spotting, you can use resistance bands to assist you in your progression. Using bands help bridge gaps and develop strength for the succeeding progression until you reach the full-back lever.
In the highly advanced technological age that we’re in, most people have smartphones capable of video.
Just take a video and check your form. Check if you did stay tucked, shoulders are in the correct position, your body is in a straight line.
Aside from the form check, the video can serve as a reference on your fitness journey so you can stay motivated as you progress in the back lever position.
Verdict
Overall, doing the back lever improves the coordination of the different muscle groups in your body such as lats, pectorals, biceps, triceps, low back, and abdominal which do not usually jive with one another to perform other actions. Nonetheless, you can learn how to totally maximize all these muscle groups to hold a solid position in the back lever.
If you’re just starting out or would like to know more, The Movement Athlete provides a free assessment that is surely worth your while.
There are many people who started by just wondering “how to improve back lever” and turned into great success stories. Always keep yourself updated and informed about the back lever, and all the exercises you want to try out. We can’t wait to see you on that list of success stories!
READY TO GET ON THE JOURNEY OF A LIFETIME?
See what our users are saying:
“Would you rather have the ability to boast of bench pressing 300 pounds or to do a one-arm pull-up? To me, pulling my entire body up with one arm is much more impressive. – Michael -The Movement Athlete User”
“The Movement Athlete is not the kind of program that demands you to be this physically fit to be able to perform. Instead, it caters to your own strengths and capabilities and keeps track of your progress.”
“Stick with it! It is hard at first, especially if you are stuck on a lower-level, high rep exercise. But persevering is worth it! Finally reaching each goal is so exciting.”

