
Are you ready to embark on a journey that will take you from ground zero to gravity-defying heights?
Picture this: you, hanging confidently from the bar, effortlessly defying gravity with each fluid motion. But before you soar, you’ve got to start somewhere, right? That’s where pull-up progressions come in, they’re the ticket to pull-up prowess.
Buckle up, as we delve into the exhilarating world of pull-up progressions
✨Pull-ups as Basic Calisthenics Exercise
If calisthenics had a hall of fame, 📍pull-ups would be right at the entrance, welcoming you to a world of strength and versatility. These classic power moves are the foundation of bodyweight training, offering a dynamic workout that engages multiple muscle groups simultaneously.
As you hang from the bar and pull your body upward, you’re not just working your back, arms, and shoulders; you’re also challenging your core stability.
Pull-ups come in various grips, from the classic overhand grip (pronated) to the palms-facing-you grip (supinated) and the neutral grip. Each grip targets different muscles, adding a dash of variety to your routine.
Not only do pull-ups sculpt a strong upper body, but they also improve your grip strength, posture, and even contribute to enhancing your overall body awareness. It’s like giving your body a crash course in coordination and control!
👊10 Progressions for Pull-Ups
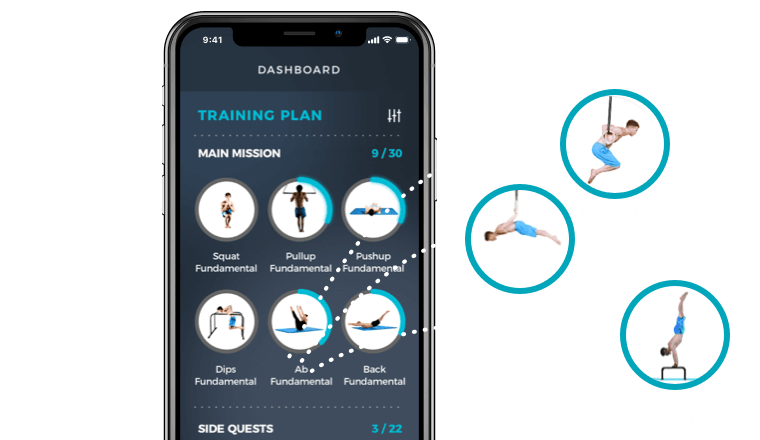
Here are the progressions for pull-ups that will get you from low bar pulls to free hand pull-ups. To learn more about progressions for pull-ups download the Movement Athlete app. It has a full set of microprogressions if you want to learn all of them.
1. 🔥Scapular Pull-Ups
Scapular pull-ups are a progressive method for advancing pull-up skills. Begin with low bar pulls and adjust the bar height for the desired challenge. Position yourself so that your feet are on the floor, your hands are on the bar, and you are looking up at the ceiling.
The higher you set the bar, the easier this will be, and the lower you set the bar, the more challenging it will be. And to do this, place your arms slightly wider than shoulder width, your feet in front of you, and your body rigid.
Pull your chest towards the bar with straight arms, forming an upper back arch. Lower while protracting shoulder blades. Begin with controlled reps and sets, gradually increasing intensity.
Benefits include enhanced upper body strength, better shoulder control, and preparation for full pull-ups. Consistent dedication is key to noticeable progress and mastery of advanced variations.
2. 🔥Jumping Chin-Ups/Pull-Ups
The second progression focuses on the jumping chin-up or jumping pull-up progression. An important aspect here is to have the level of the floor in a good spot in relation to the bar. This ensures that your jump allows you to reach the top of the pull-up.
You’ll make use of your legs to ensure you achieve the complete range of motion required for this exercise. This progression allows you to harness leg power to assist in mastering the pull-up movement.
Jumping Pull-ups
Jumping Chin-ups
3. 🔥Leg-Assisted Holds
Another progression is the leg-assisted chin-up or pull-up hold at the top, using a band for support. Loop the band onto the bar and step into it with one foot to assist your pull-up. With the band’s help, you’ll reach the top position more easily.
As you clear your chin over the bar, focus on holding this pose for around 10 to 15 seconds, maintaining a strong posture. Pay attention to squeezing your shoulder blades together during this hold to create stability.
This progression emphasizes the scapula pull-up, vital for the pulling motion, before incorporating your arms. For deeper understanding and guidance, explore the Movement Athlete app.
As you progress through assisted pull-ups and holds, prioritize the initial shoulder blade squeeze before pulling up to ensure a smoother, more controlled movement.
Leg Assisted Pull-up over the bar hold
4. 🔥Chin Over the Bar Hold
This progression marks a substantial step towards mastering the pull-up movement.
Utilizing a box or elevated surface, you’ll jump to the top of the pull-up, which is the position where your arms are bent. Once you achieve this topmost point, you’ll focus on maintaining the chin-over-the-bar posture for a duration of 10 to 15 seconds. This demands a considerable degree of upper body strength and control.
Include a short break before starting over. After coming off the bar, use the box or elevated surface to jump back up to the top position for your next repetition. Hold this position still to make sure your upper body muscles are working hard.
This stage of the progression reinforces your capability to control and hold your body weight in the peak pull-up position, an essential skill for achieving a complete pull-up. During this phase, gradually increase your hold duration to build strength for more advanced movements.

Leg Assisted Chin-up over the bar hold
5. 🔥Leg-Assisted Chin-Up/Pull-Up
The fifth progression involves leg-assisted chin-ups or pull-ups using an elevated surface. Begin in a straight arm hang with bent legs and feet on the surface.
Straighten your legs while pulling with your arms for the motion, then reverse. Minimize leg assistance to engage the arms and back.
Note that pull-ups have a wider grip, while 📍chin-ups use a narrower grip. This step enhances upper body strength and pull-up technique. Emphasize controlled movements for steady progress.
Leg assisted chin-up
Leg assisted Pull-up
6. 🔥Assisted Negative Pull-Ups/Chin-Ups
Next are the assisted negative chin-ups or pull-ups. This step also involves the use of a band.
Start by looping the band over the bar and stepping in. Execute your pull-up, which should feel quite manageable with the band’s assistance. The real emphasis here, however, is on the negative portion of the movement—the eccentric phase where you lower yourself down.
Start this negative phase slowly, aiming for 10–15 seconds as you descend from the hang position. After completing the negative phase, repeat by pulling yourself back up, either at a normal pace or even slightly faster.
Remember, the primary focus here is on executing a slow and deliberate negative movement. This approach challenges your muscles in a different way and contributes significantly to your overall pull-up progression.
Assisted negative Chin-ups

Assisted negative Pull-up
7. 🔥Negative Pull-Ups/Chin-Ups Unassisted
The seventh progression is unassisted negative pull-ups or chin-ups.
Begin by jumping to the top of the bar, as in previous progressions. With your entire body weight, focus on the controlled descent.
Gradually lower yourself down without assistance, aiming to reach the straight arm hang position for both chin-ups and pull-ups. This technique cultivates strength during the lowering phase and plays a vital role in building pull-up proficiency.

Negative chin-ups
Negative pull-ups
8. 🔥Bent Arm Hold
In the eighth phase of the pull-up progression, you will do the bent arm hold.
Begin by performing half of a pull-up and then maintain this position for 10-15 seconds before descending. This action is meant to be repeated, with the key focus on holding the midpoint of the pull-up.
This technique underscores the importance of showcasing strength and stability throughout every stage of the pull-up, with specific emphasis on the middle portion.
Bent Arm Hold
9. 🔥Full Body Chin-Up
This progression, focus to the full body chin-up from a hang position. Start by gripping the bar with a supinated grip for a chin-up.
Begin from a straight body position, then execute the complete chin-up motion while maintaining a slightly hollow shape. Strive for a full range of motion, aiming to bring your chest to the bar, and then return to the starting straight arm hang position.
This exercise encompasses the entirety of the chin-up movement, playing a crucial role in building overall strength and mastery of the pull-up technique.
Chinups
10. 🔥Free-Hanging Standard Pull-Up
The final progression entails the free-hanging, standard pull-up. Using a proneated grip that’s slightly wider than shoulder width, you perform the pull-up with no additional assistance – no bands or boxes.
Here, your entire body weight comes into play. Engage your shoulders, pull up to the bar at clavicle level, then slowly lower back to a straight arm hang position. Repeat this process for the designated number of repetitions. This stage showcases your pull-up proficiency, involving your full body weight and emphasizing controlled movement.
Pull-up
Check the full video here! 👇👇
👀Why Do You Need Progressions for Pull-Ups?
Imagine trying to run a marathon without ever lacing up your sneakers or practicing a single jog. Sounds tough, right? Just like training for a marathon, mastering pull-ups requires a step-by-step approach. That’s where progression comes in.
✊Progressions are like your fitness best friend, guiding you from where you are to where you want to be. They break down pull-ups into doable stages, letting your body gradually build the strength, stability, and technique needed to ace the full move.
By starting with easier variations and gradually moving to more advanced ones, progressions make sure you don’t skip any steps on your way to pull-up glory.
🧐Frequently Asked Questions
🔎What’s the difference between a chin-up and a pull-up?
Great question! Chin-ups involve a supinated grip (palms facing you), while pull-ups utilize a proneated grip (palms facing away). We’ll be using both interchangeably to cover a range of skills.
🔎How do I start if I’m a beginner?
You’ll kick off with low bar pulls. Place your feet on the ground, grip the bar, and face the ceiling. Adjust the bar height for your comfort level—the higher, the easier. Lower bars mimic a body row, adding a bit more challenge.
🔎What’s the secret to proper pull-up form?
Scapular pull-ups are your foundation. Squeeze your shoulder blades down and together before initiating the pull-up. This engages your lats and back muscles for a smoother motion.
🔎How can I progress to unassisted pull-ups?
We’ve got you covered! Progress through jumping chin-ups, leg-assisted holds, and negative pull-ups. Build strength and control step by step.
💥Conclusion
The journey to 📍pull-up mastery is both exciting and empowering. As our community of movement athletes has shown, personalized training is the key to unlocking your full potential. No two individuals are alike, and your strengths, mobility, and flexibility are unique. The Movement Athlete is designed to tailor your training to your specific needs.
☝️Remember, the path to excellence isn’t always linear. Celebrate every step of your progress and embrace the challenges that come your way. With dedication and personalized guidance, you’ll not only conquer the pull-up but also elevate your overall movement abilities. Keep reaching for the bar—and beyond!
Take Your Assessment now and get a personalized training plan! 💪


0 Comments