
Join the tribe of Movement & Calisthenics Athlete – People just like you that are working with their own body weight to get strength, lose fat build muscle, recover from injuries and live their best lives!
Do you feel like a freestanding handstand is very much within your reach but can’t seem to hold it away from a wall?
Don’t worry. A freestanding handstand isn’t as easy as it seems, but with the proper training, understanding, and right amount of dedication, YOU CAN LEARN THE FREESTANDING HANDSTAND.
In this article, we’re going to talk about the four major reasons why you’re struggling to hold it and how to fix it.
Understanding how to balance your body weight upside down
As bi-pedal individuals, we were not commonly trained to stand on our hands, use our wrists as our ankles, our fingers as our toes, and our shoulder joint as our hip joint.
Balancing freestanding handstands gets easier when you understand that it’s quite similar to standing on your feet and legs.
The main difference is that your whole body and mind aren’t used to the new sensation so staying vertical takes time.
When we stand on our legs, we are so used to the upright position that standing still is easy.
With a free handstand balance, we need to make very minor adjustments to sustain the handstand position in a vertical line.
Even professional hand balancers or a handstand coach will show you that holding a handstand is not completely still but demands very small counterbalancing that is usually done in the hands and wrists. It’s very minimal that watching a professional, it seems like they can maintain it like how we can easily stand but there’s a lot of balancing going on.
But the balancing mechanics are very similar to how we stand in which we will explain further in the article.
4 Main reasons why you can’t hold a freestanding handstand
There are only four main reasons why holding a solid handstand feels like an impossible task. For each main reason, we shall further break it down so you can identify where your issue lies and how you can address it and progress with your handstand journey.
Lack of strength foundation
One common reason why people tend to fail in progressing upside down is the lack of foundational strength.
Sometimes, it’s difficult to hear but maybe you’re just not strong enough to hold your full body weight upside down.
Upper body strength
Even though you don’t need to be crazy strong to hold handstands, there’s a minimum strength needed for your shoulders, arms, chests, wrists, and elbows.
Lacking strength in even one of the muscle groups then you might find yourself crashing face-first into the ground when you kick straight into a handstand.
There’s no specific guideline to practice your handstand, you don’t need X number of push-ups, or X minutes of a plank to begin your handstand training.
But you would need to work on the proper handstand progression so you can build up strength towards the freestanding handstand. Using the suitable progression exercise for you helps develop strength in the muscles and joints such as your shoulders and also creates the body awareness needed to be upside down.
While using progressions also helps build strength, working on the calisthenics fundamentals also boots your handstand progress massively. This means working on your regular push-ups, pull-ups, and even squats, to help create that solid strength foundation for handstands.
Hollow body hold
Your core plays an important core in creating stability especially if you want to hold the handstand with much less effort.
Like with the upper body strength, you also don’t need a freakishly strong core, but it should be decent enough to hold your position in a straight line and be able to easily use a cartwheel bail if ever you lose balance.
Practicing the hollow body holds allows you to create stability in the midsection. This static position has also a similar form to a regular handstand but is done in a horizontal manner instead of standing vertically.
If you have a good 30-second hollow body hold, then you can focus more on your balance. If you lack core strength, then address the issue and focus on the easier progression of the handstand as well.
Lack of mobility foundation
Many are not aware, but mobility plays a massive role so you easily hold a handstand with less effort.
If you lack one of the mobility among the joints below, then balancing the handstand means more strength demands which are a lot harder than it sounds.
Shoulder mobility
The number one mobility requirement is shoulder mobility. You need to be able to raise your shoulders overhead without arching out the upper back. If you have a good overhead range, you won’t need to lean forward with your shoulders on your handstand.
Leaning forward puts unnecessary loading on your anterior deltoids so your handstand will require more strength to balance. This will place you close to a planche position rather than achieving a perfect handstand.
Opening your shoulders through mobility work will help your stack your shoulders directly on top of the rest of your body to make balancing a lot easier.
It also helps you avoid the banana back handstand.
Thoracic mobility
Lack of spine mobility will not allow you to stack your body in a straight line which as we said earlier, will force you to use brute force to stay balanced.
Improving your thoracic mobility goes together with your overhead shoulder range. Practice these two points to make balancing much easier.
Wrist mobility

During a handstand, there’s a lot of stress placed on the wrist extension position. Sustaining this position can be difficult if your wrist range is not prepared and can open up to potential injury.
Wrist flexibility and mobility keep this small joint safe from abuse when learning the handstand.
Lack of technique awareness
Another major reason why you’re probably not progressing with your handstand balance is a lack of awareness of the proper technique.
There are many forms of handstands, but the straight line handstand is the easiest to learn and offers a solid foundation for many other handstand forms.
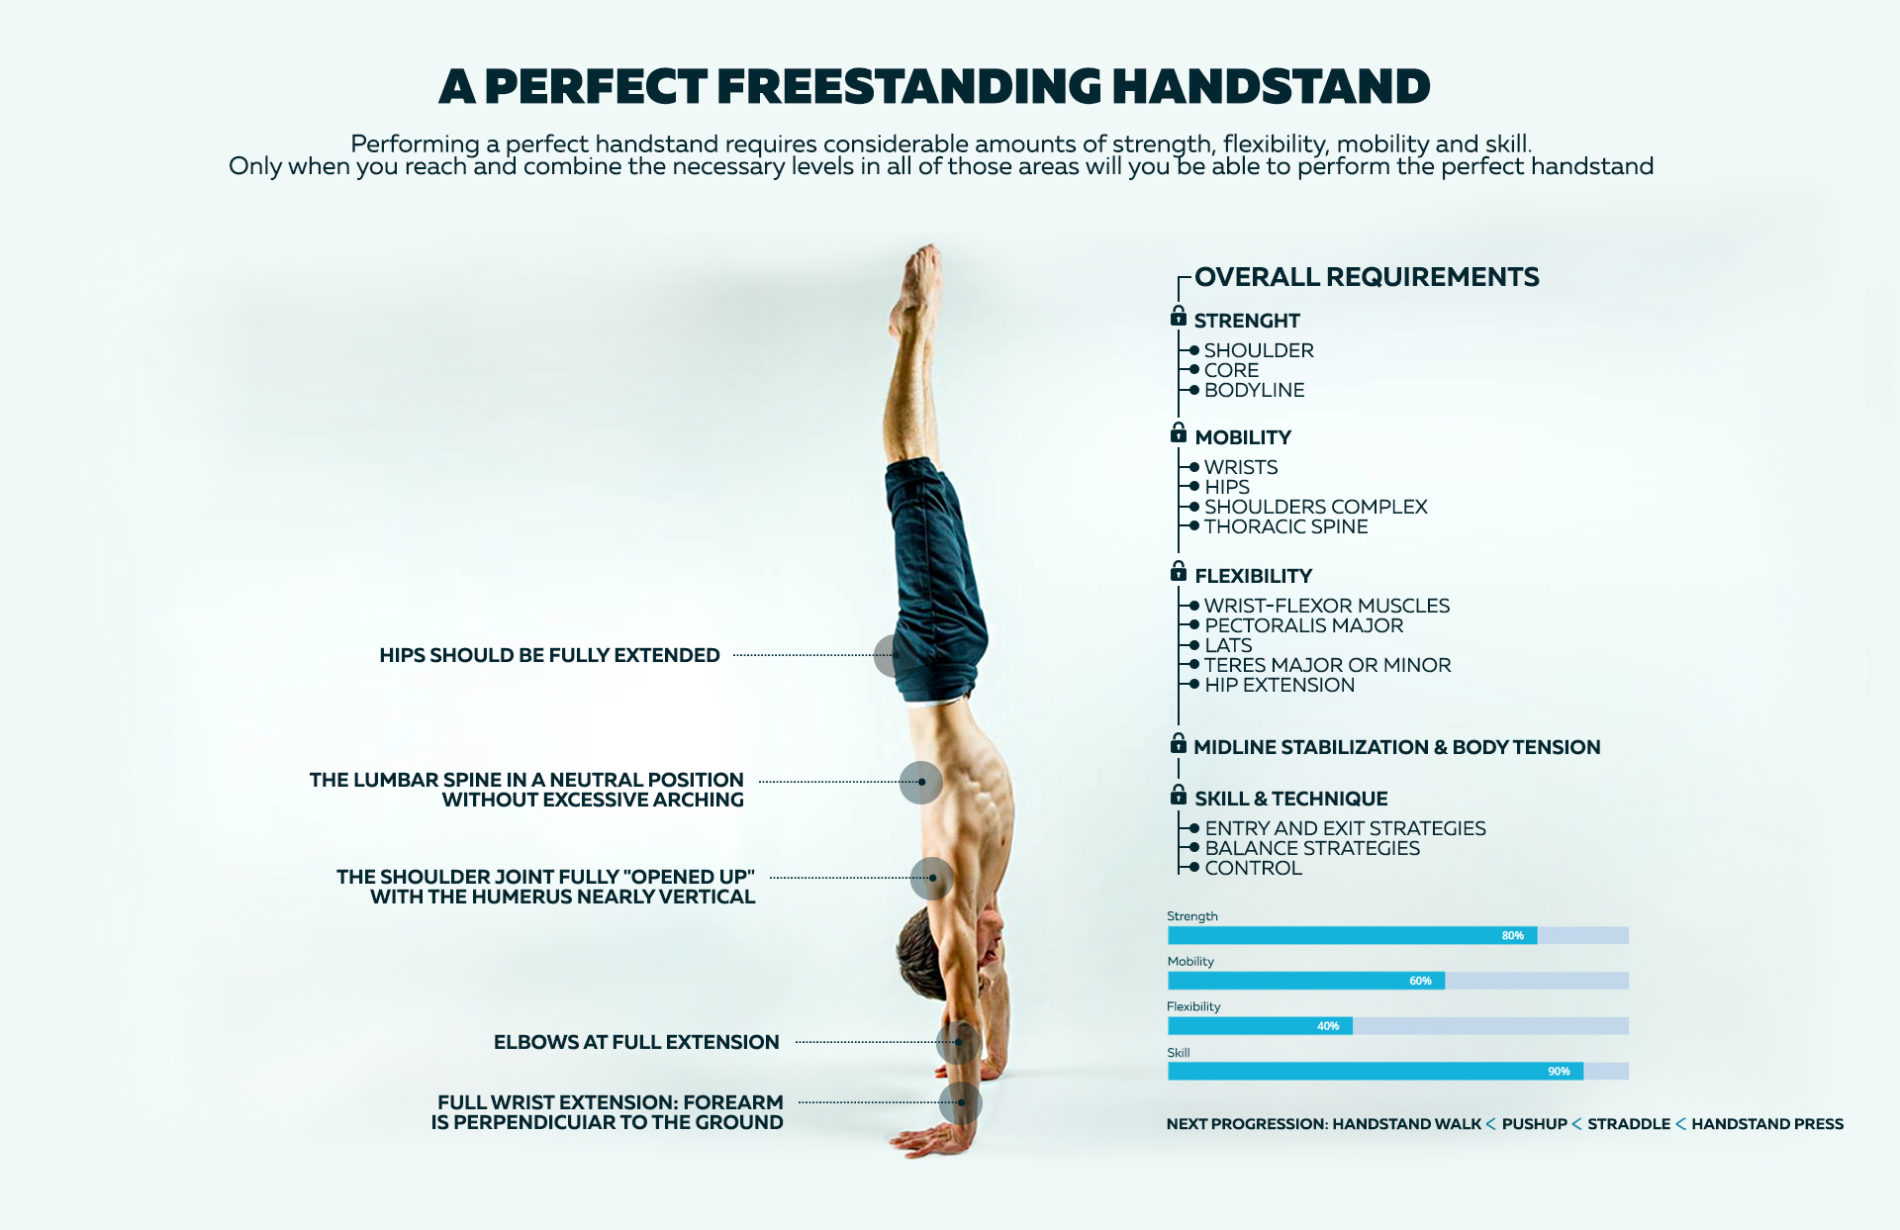
Straight body line
Think of your whole body as a straight line. From your toes, knees, leg, hips, rib cage, chest, shoulders, elbows, wrists, everything should be standing straight and stacked.
This is because holding a straight line is A LOT easier to balance than having a bent body part.
Think of it this way. It’s easy to stand upright rather than when you shift your upper torso forward. In this position, you need to push hard on the floor with your toes to maintain vertical or else you will fall over.
The same thing goes when you are upside down, when everything’s stacked the rest of your body can work less to keep you up.
Control with your fingers
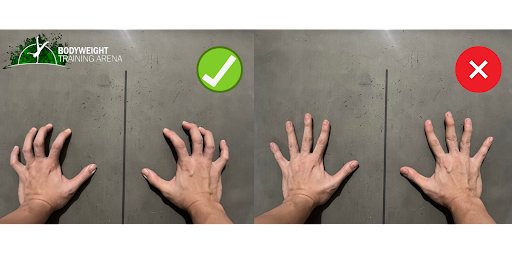
Grip the floor and don’t let your fingers stay flat. Gripping the floor gives you more control.
Here’s what many beginners fail to understand. Like in our example above, we need to use the toes to create balance. The opposite happens when you shift your weight backward. You would need to push on the floor with your heels instead.
When in a handstand, your fingers act as your toes. When you fall forward, push down the floor with your fingers. When you fall backward, push down on the base of your palm.
Your hands and fingers play a massive role in sustaining the balance and distributing weight. Usually, you would make micro-adjustments on your fingers the entire time balancing handstands. This is the major balancing mechanic you need to learn and focus on first.
To do this, you need to grip the floor rather than just having them flat on the ground. This adds control so you can easily shift your weight and counterbalance if ever you fall in a specific direction.
Straight arms
We encountered many individuals trying to hold a handstand with bent arms. The problem with this technique is it also increases the strength requirement compared to having your elbows locked out. Always have them locked out for maximum stability and push your shoulders towards the floor.
Lacking straight arm strength will put more risk of bending your arms which can potentially result in your face plummeting to the ground head-on and nobody likes that.
Not enough time to practice
The number one reason why you probably can’t balance a handstand is that you’re just not practicing it enough.
Remember this exercise is a skill and requires hours of practice to gain muscle memory. You can’t just use mobility or strength to balance a handstand even for just a few seconds. It’s not pure muscle. There’s a heavy focus on your mind to maintain that balance.
Here’s a brief on the proper handstand form:
- Full body straight
- Posterior pelvic tilt (hips tilted backward) – cue for core engagement
- Fingers gripping the floor
- Point toes for added leg tension
- Head in a neutral position
- Feet and legs together
- Chest in a neutral position
How can I fix my handstand?
Although there are ways to fix the potential weaknesses and errors in your handstand, always take note that it’s not that easy and corrections can’t always be made instantly.
Let’s say you’re able to hold solid wall handstands, but still to hold it away from the wall because you can’t hold a hollow body position, then your body will take some time getting used to the hollowed static positions before moving forward.
There’s no actual “quick fix” to a handstand and you will need to diligently work on it over time. As you’ve noticed above, the main reasons for lacking balance stem from strength, mobility, or skill curves.
Fixing the balance and coming away from wall handstands takes time.
Wall to a freestanding handstand
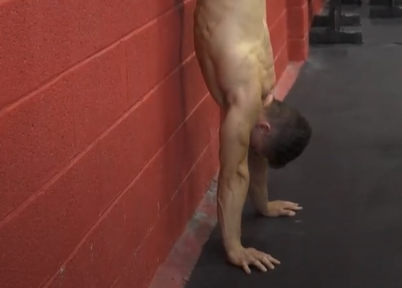
If you already have a good wall handstand with good form (everything stacked), then using your feet to assist you in finding the balance is your next step.
To do this, go into a wall handstand with your stomach facing the wall. Leave a foot of distance away from the wall. Place both feet on the wall, but slowly pull one foot away from the wall while the other one still holding
This allows you have the wall hold you up while you’re trying to feel the balance point even for a second.
Alternate both the front leg and back leg as the guiding leg for balance so you can maximize your awareness on both sides.
You can also perform this with your back against the wall.
Over time, you can gradually increase the hold of your freestanding handstand before putting your feet back on the wall.
Solidify foundations
A sticking point in handstands tends to come mostly from having a weak strength and mobility foundation. This can usually be solved by working on the calisthenics fundamentals to building the necessary foundation of strength.
Remember that the handstand doesn’t demand a lot of strength. Mastering the calisthenics basics can be enough of a guideline if you’re ready to take on the freestanding handstand.
Practice fundamentals
While it may look irrelevant as a pulling exercise, this can still build a solid core and shoulder that can assist in handstand progress.
It’s very hard to hear, but you might just not be strong enough to hold a handstand yet. And the strength we’re talking about is in regard to the amount of bodyweight you can control.
Cover your basics such as push-ups, dips, and pull-ups. Having a good level of mastery in those areas directly translates to upper body strength and control which can lead to a massive impact on your handstand balance.
Training your full core is also a great way to stay ahead. Resisting movement in the posterior pelvic tilt position offers excellent balance and control when you kick up into the handstand.
Speaking of kicking up, your legs should also be able to generate enough force to kick you into the handstand. Of course, it’s safe to assume that pressing up slowly into a handstand is not yet an option.
Flexibility testing can also offer an advantage especially for your lower body and shoulders, but it’s still best to strengthen and mobilize weaknesses.
Use handstand progressions

The best way to train the handstand is to train it directly. Now, this doesn’t mean that you need to jump into the freestanding handstand immediately.
It means you have to go through its progressions.
Regress to easier progressions to address the issues of weakness. Progressions are the best exercises to use to work towards any specific move.
Progressions generally have the same basic shape and form. The difficulty of exercises changes by removing some elements or lessening the degree of mechanical disadvantage.
Here are the general handstand progressions that you can work with arranged from easiest to most challenging:
- Wall stand
- Downward dog shrug
- L-stand hold
- Wall handstand
- Freestanding handstand
There are other variations you can place in between such as shrugs and shoulder taps, but it will depend on your current skill level and weaknesses that needed to be addressed.
Get over the fear of falling over
Getting over the fear of tipping over helps you focus more on balancing so you can worry less about falling.
The technique here is learning how to control your fall sidewards using your obliques to kick sideward or continuing that falling sensation forward into a front roll.
The latter technique is done by tucking your chin inward then leaning your shoulders forward, and slowly rolling your whole back as smooth as possible from the upper back downwards. It’s a bit scarier but effective.
Learn the two exit techniques, then balancing will become much easier.
Just practice the kick up to handstand, then proceed to your exit point.
Conclusion
As a recap, the four common and major reasons why you’re having trouble with your freestanding handstands are:
- You have strength weakness with your upper body or core
- You might be lacking shoulder, spine, or wrist mobility
- You’re not aware of the proper techniques and progressions
- You’re not just putting enough time and effort to work on your handstand
The handstand journey is a long, challenging, but highly rewarding road to take.
It might not come as easy for many and even if you’ve been able to hold it for a long time, there are always a lot of aspects you can always work on with your handstand.
Like fitness, handstand is a life-long journey that needs time and effort.
If you want a life-long partner for your fitness journey, check out The Movement Athlete for more calisthenics, and handstand help.
Begin a personalized and adaptive approach to calisthenics by first understanding your strengths and weaknesses.
TAKE THE ASSESSMENT NOW!