Have you ever marveled at those who can effortlessly defy gravity, balancing on their hands as if it were the most natural thing in the world? It’s almost like a magic trick, isn’t it?
But here’s the secret – 📍handstands are not magic; they’re a skill that can be mastered through practice and proper technique.
In the world of 📍calisthenics, achieving a picture-perfect 📍handstand isn’t just about looking impressive (although it certainly does). It’s about harnessing incredible core strength, balancing finesse, and an alignment that would make any athlete proud.
So, if you’ve ever aspired to perfect this art of balance, you’re in for a treat!
In this article, we’ll explore the mobility and body-shaping techniques essential for mastering handstands. You’ll learn to shape your body for a flawless handstand and prepare to take the world of calisthenics by storm.
🔥The Risks of the Banana Back Handstand
Banana back handstands are a frequent pitfall in handstands. This handstand variation is defined by its distinctly arched back, resembling the shape of a banana. While it might initially appear amusing, it’s vital to approach this position with the utmost seriousness.
Why?🤔
Because the banana back handstand places an excessive and potentially harmful strain on your lower back, significantly elevating the risk of injury.
In this position, you’ll invariably find yourself teetering on the edge of imbalance, requiring awkward adjustments such as bending your elbows or altering your shoulder angle to maintain balance.
Unfortunately, these adjustments inflict unwarranted stress on your joints, which leads to discomfort and potential injury. It’s crucial to understand that the journey towards mastering the handstand has evolved over time.
✨The Evolution of Handstand: From Banana to Straight Line
Notably, the banana back handstand was the default position witnessed in gymnastics several decades ago, particularly during the 1950s and 1960s. Back then, it was considered a standard practice. However, this posture has evolved over time into pursuing a straighter handstand.

While it may provoke a few chuckles today, the banana boat handstand was pivotal in developing this skill. Acknowledging this evolution, emphasize the importance of approaching the handstand seriously. Not only for the sake of aesthetics but, more crucially, for your own physical well-being.
✊The Importance of Straightening Your Handstand
Straightening your handstand isn’t just about aesthetics; it’s essential for your physical health and long-term success in calisthenics.
Achieving a perfectly straight handstand is not merely impressing onlookers; it’s fundamental for your overall physical well-being, including the following:
- ✅Spinal Health: The banana back handstand, with its exaggerated arch, can strain your lower back muscles and spine. This can lead to discomfort and, over time, more serious back issues. A straight handstand ensures that your spine remains in a neutral, healthy alignment, reducing the risk of back problems.
- ✅Joint Safety: You’re more likely to make awkward adjustments to maintain balance in the banana boat handstand. This can place undue stress on your shoulder, elbow, and wrist joints, increasing the risk of injury. A straight handstand with proper alignment minimizes this risk, ensuring your joints remain safe.
- ✅Stability and Balance: A straight handstand is a foundation for balance and stability. It allows you to distribute your weight evenly, reducing the likelihood of falling over. Mastering the straight handstand will build the core strength and coordination necessary to maintain balance in various positions.
- ✅Skill Progression: Achieving a straight handstand is a vital milestone in your calisthenics journey. It is a basis for more advanced movements and skills, such as handstand push-ups, handstand walks, and other acrobatic feats. Without a straight handstand, these progressions become exponentially more challenging.
🤸4 Handstand Shaping Drills for a Straight-Up
It is essential to understand that shaping drills are crucial to mastering the handstand. The four exercises below will help you build a solid foundation.
As you engage in these exercises, we will take a systematic approach, categorizing them into two essential aspects: body shaping and mobility.💯 Recognizing that these components are interconnected and pivotal in your handstand journey is essential.
To kick things off, you can concentrate on refining your handstand-shaping skills. This is a foundational step in achieving that picture-perfect handstand.
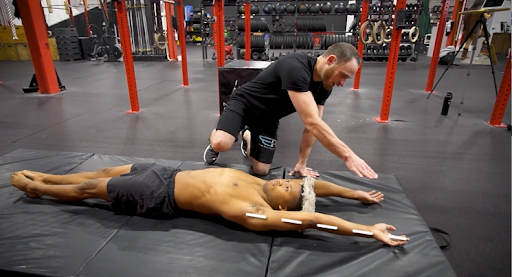
🔥Exercise 1: Lying Down Shape
This exercise for achieving that flawless handstand involves lying on the floor. The goal here is to hone your body-shaping skills while temporarily removing the elements of balance and strength.
This exercise is the foundation for perfecting your handstand shape. It helps you align your body correctly and prepare your muscles for the demands of a handstand.
☝️How to Perform
- Begin by lying on your back.
- Simulate the position of a handstand on the floor, with your wrists flexed as they would be in an actual handstand.
- Straighten your arms, aligning them with your body.
- Ensure that your ears and shoulders are in contact, maintaining a neutral head position.
- Keep the rest of your body completely flat.
👊Common Challenge
One common challenge with this exercise is maintaining regular breathing while engaging your core and shaping your body like a handstand.
- Controlled Breathing: Focus on taking deep and regular breaths. Ensure your breath is neither shallow nor labored, as maintaining proper oxygen intake is crucial.
- Mindful Muscle Engagement: As you engage your core muscles to simulate a handstand, be mindful of not over-tensing. Strive for just the right amount of engagement to maintain the position comfortably.
- Practice and Progression: Start with shorter durations and gradually extend the time you hold the position. This will allow you to adapt to the muscle engagement requirements while breathing naturally.
The idea here is to maximize the length of your body, simulating the elongated posture of a handstand. Remember, the goal is to ensure that you can maintain a straight body line.
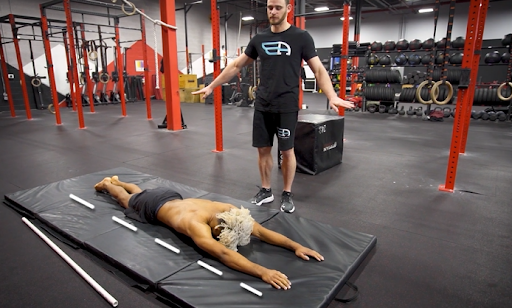
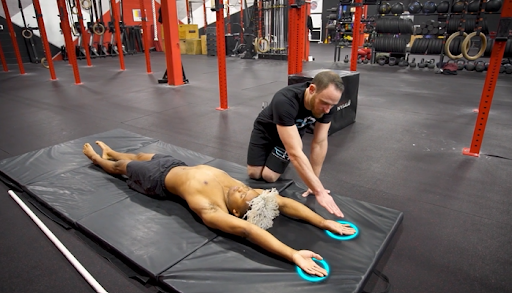
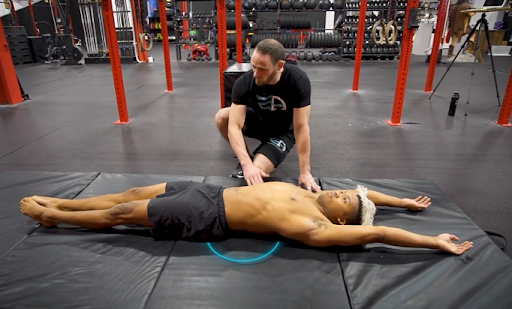
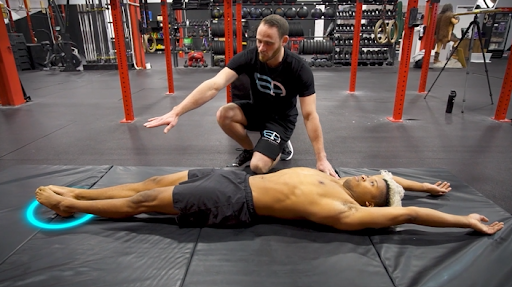
🔥Exercise 2: Supine Position
The second exercise involves a variation of the supine position, designed to help you understand the importance of body positioning in handstands.
The supine position offers a unique perspective on the handstand. By focusing on a 180-degree open angle, you’re working on not just the straightness of your body but also the flexibility of your shoulders and core engagement.
☝️How to Perform
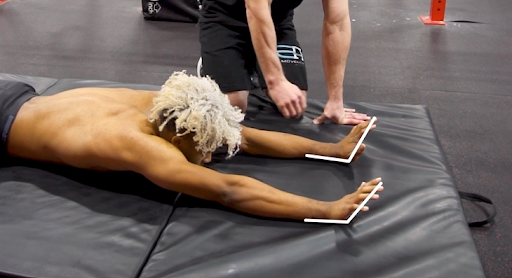
- Begin by flipping over onto your stomach.
- This time, let the back of your hands touch the floor to create an open angle of approximately 180 degrees.
- Straighten your arms and maintain a neutral head position.
- Ensure that your back and feet are in contact with the floor.
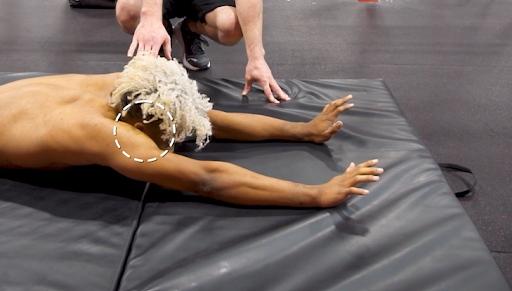
👊The Challenge
This exercise may require more core engagement than the handstand itself due to the specific plane you’re on. It’s an excellent indicator for identifying areas needing improvement, such as tight shoulders.
- Targeted Core Exercises: Include core-specific exercises to enhance core strength. Planks, leg raises, and V-sits are beneficial for fortifying your core muscles.
- Shoulder Flexibility Drills: Integrate shoulder flexibility drills into your routine. Regularly practice shoulder stretches and mobility exercises to enhance your shoulder’s range of motion.
- Body Position Awareness: Concentrate on visualizing yourself as a straight line with minimal gaps between the ground and your shoulders, back, and feet. This visualization helps you better grasp the necessary positioning.
Like the previous exercise, breathing is crucial here and should be part of your regular practice. Maintaining a straight body while breathing ensures you build the foundations for an impeccable handstand.
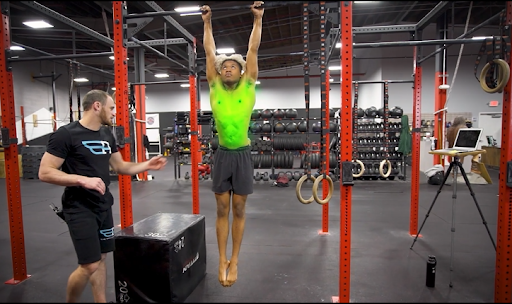
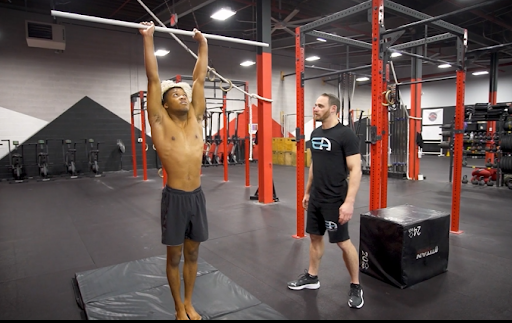
🔥Exercise 3. Hanging on the Bar
As the name suggests, this exercise involves hanging while practicing a straight body position. Hanging essentially mirrors an inverted handstand, requiring specific attention to form. To ensure success in this exercise, follow these key steps:
☝️How to Perform
- Hand Placement: Position your hands on the bar, maintaining shoulder-width spacing.
- Keep Your Arms Straight: Ensure your arms remain straight throughout the exercise. This will provide the necessary support and build strength in your upper body.
- Neutral Head Position: Maintain a neutral head position, meaning your head should align with your spine. Avoid tilting it upward or downward.
- Shoulders and Ears Contact: Aim to bring your shoulders and ears into contact with each other. This alignment is essential for creating a straight line from top to bottom.
- Torso and Hips Alignment: Keep your torso and hips in a neutral, straight position. Avoid excessive arching or curving, which can compromise your form.
- Straight Legs: Ensure your legs remain straight. This contributes to better stability and alignment.
- Feet Together: Keep your feet together. This will help you maintain a streamlined and balanced position.
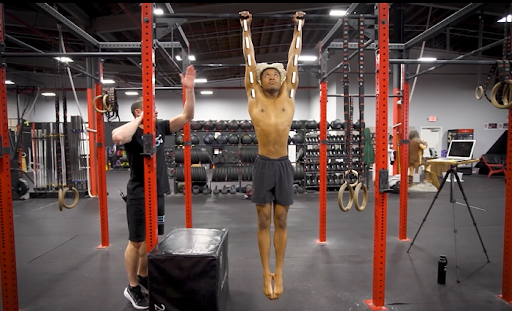
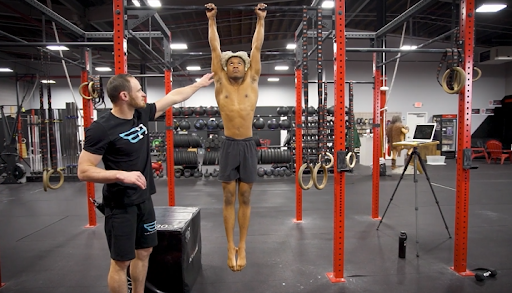
To enhance your form, think about creating a slight hollow or depression in the area of your ribs. This adjustment helps ensure that your body is as straight as possible.
👊Common Challenge
One common challenge when hanging on the bar is maintaining a perfectly straight body position, especially in the shoulders and hips. Here’s how to address this challenge:
- Focus on Form: Maintaining proper form throughout the exercise. Be mindful of your shoulder and hip alignment. Avoid letting your body sag or arch.
- Engage Core Muscles: Engage your core muscles, particularly the lower abs, to help straighten your body. This will create a stronger foundation for hanging.
- Practice Breathing: Breathing can be challenging while hanging, but avoiding holding your breath is essential. Practicing steady, controlled breathing will help you stay relaxed and focused.
Learn proper breathing by checking our article on The Proper Way to Breath during Exercise to Maximize Performance
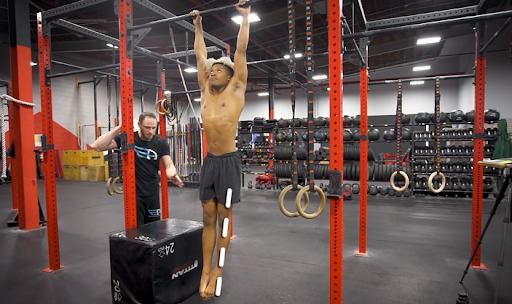
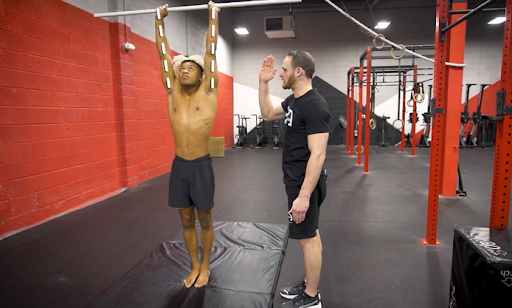
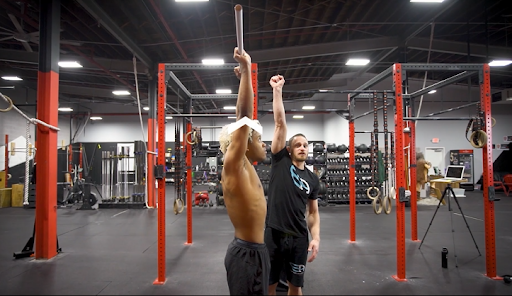
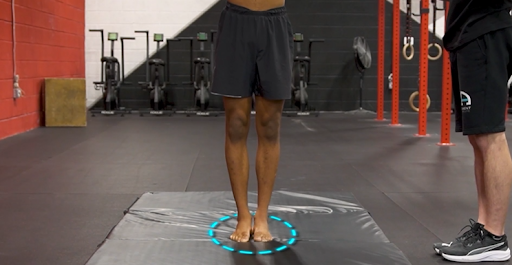
🔥Exercise 4. Standing in a Handstand Shape
Standing in a handstand shape is an advanced exercise that poses a considerable challenge. It’s regarded as one of the more demanding movements in this set of exercises. To help you succeed in this intricate pose, here’s a comprehensive guide:
☝️How to Perform
- Use a Mirror for Feedback: First and foremost, set up near a mirror. This tool is invaluable in helping you maintain proper alignment and providing immediate feedback on your form.
- Hand Placement: Begin by positioning your hands shoulder-width apart on the floor. Your fingers should be spread out to create a stable base of support.
- Straight Arms: Keep your arms completely straight. This is crucial for maintaining balance and strength throughout the exercise.
- Shoulder and Ear Contact: Aim to bring your shoulders and ears into contact. This alignment helps you maintain a straight line from your head to your toes.
- Neutral Head Position: Keep your head in a neutral position. Avoid tilting it upward or downward, as this can affect your balance and overall form.
- Maintain a Straight Body: Ensure your entire body forms a straight line. Many individuals encounter difficulties, particularly in the shoulders and back.
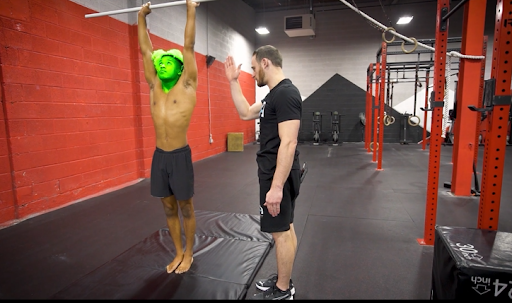
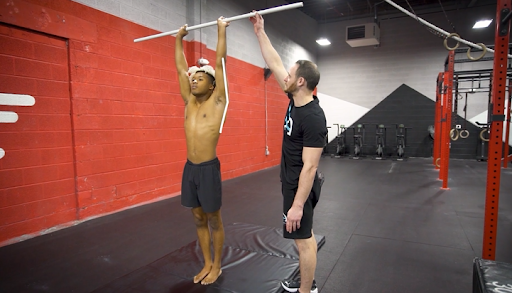
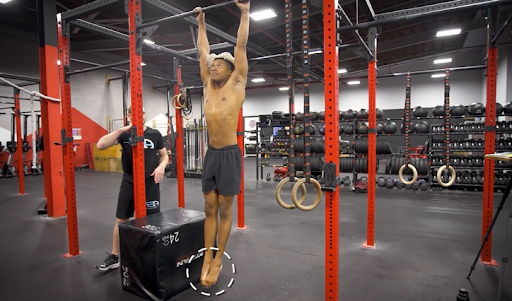
👊Common Challenge
Creating a shoulder angle and arching your back is a common issue when attempting a standing handstand shape. To address this challenge:
- Work on Your Form: Concentrate on straightening your form. Make a conscious effort to eliminate any arching in your back and maintain a straight line from your hands to your feet.
- Elevate Your Shoulders: Pay attention to elevating your shoulders. Keep them tall, which contributes to better stability and balance.
- Engage Your Glutes: Squeeze your glutes to help you maintain a strong, straight position. This engagement supports your core and enhances your stability.
- Keep Your Feet Together: Ensure your feet are held together. This will help you maintain a streamlined and balanced position.
- Remember to Breathe: Lastly, don’t forget to breathe throughout the exercise. Steady, controlled breathing will help you stay focused and maintain your form.
Check out this video showing the 4 handstand shaping drills to banana-proof your handstand: video link 🎥
🏃Why Does Shape Matter?
Shaping your body before attempting a handstand might seem counterintuitive, but it’s a game-changer.
In essence, shaping your body before tackling the full handstand is akin to laying a strong and stable foundation for a building. It’s the first step toward achieving a flawless handstand and a safer, more efficient practice.
Shaping eliminates the need for balance and strength components during the early stages of practice. Instead, it allows you to engrain the right form. You want to be able to flatten your body out, get the right ranges, and then work towards the strength necessary to do a good handstand.
🧐Frequently Asked Questions
🔎How long should I practice these shaping exercises before attempting a handstand?
There’s no set time frame, but practice these exercises until you consistently feel confident maintaining a perfect handstand shape.
🔎What’s the ideal frequency for these exercises?
Aim for at least 3-4 times a week to see significant improvement in your handstand shaping.
🔎Do I need any equipment for these exercises?
The great thing is that these shaping exercises require minimal equipment—mainly a bar and a mirror—which makes them accessible to almost everyone.
🔎Can handstand shaping drills help with injury prevention?
Yes, these drills can aid in injury prevention by promoting proper alignment and muscle engagement, reducing the risk of strain or injury during handstand practice.
🔎Are handstand shaping drills beneficial for other aspects of fitness?
Yes, handstand shaping drills improve core strength, body alignment, and shoulder flexibility, benefiting overall fitness and other exercises.
💥Conclusion
Mastering a handstand isn’t just about balance and strength; it’s about nailing the perfect body shape first. The exercises above show that shaping is the stepping stone to achieving that awe-inspiring handstand.🤸
🏆By practicing these exercises, you’re preparing your body and ensuring your handstand game is on point.
If you are just getting started with calisthenics, take advantage of the free calisthenics assessment offered by the Movement Athlete. It offers a personalized training program that will kickstart your fitness journey.💪

