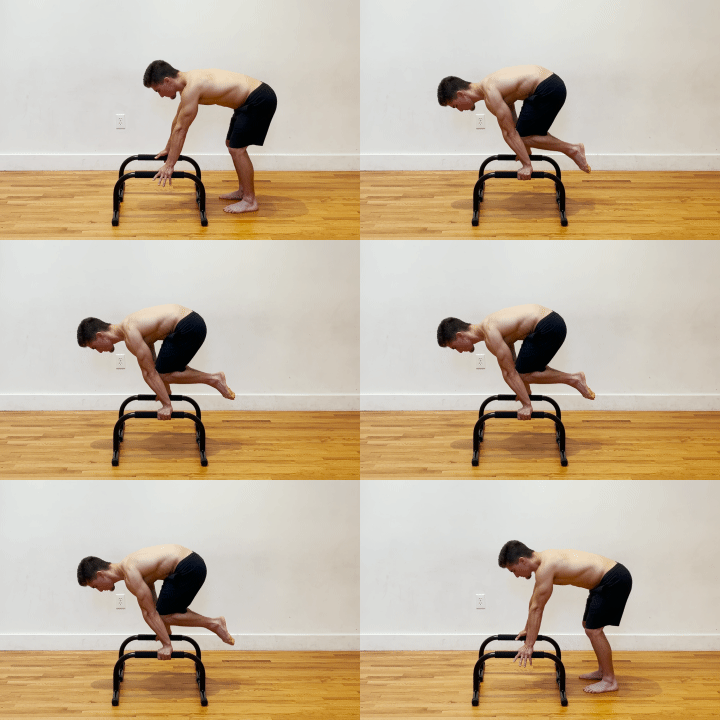
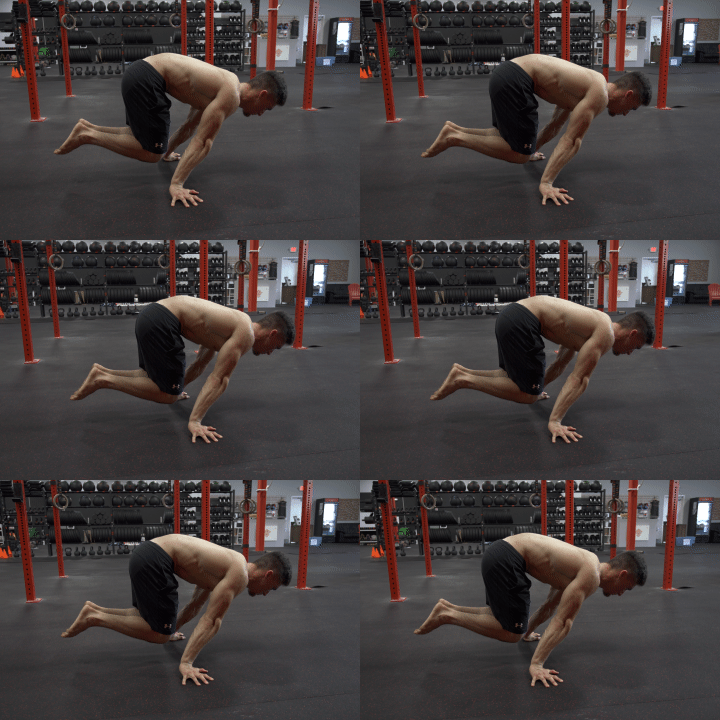
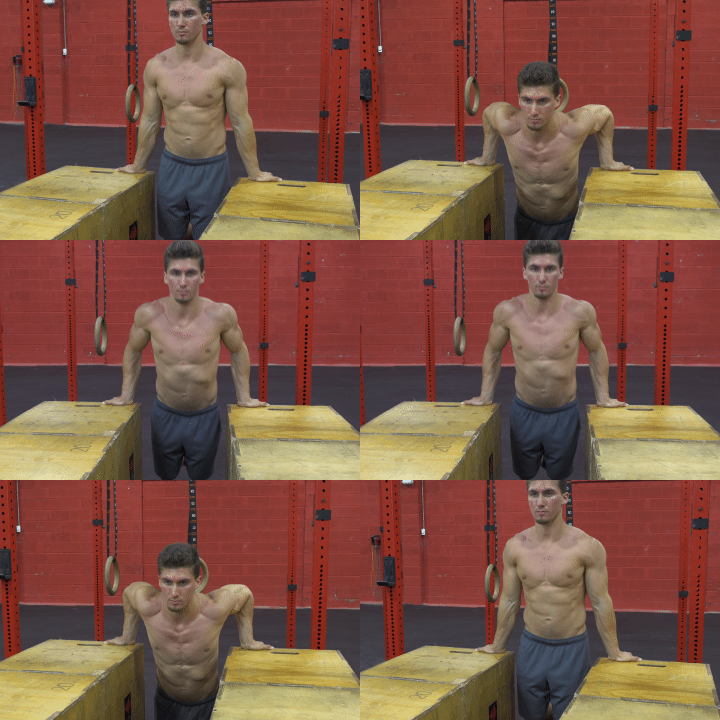
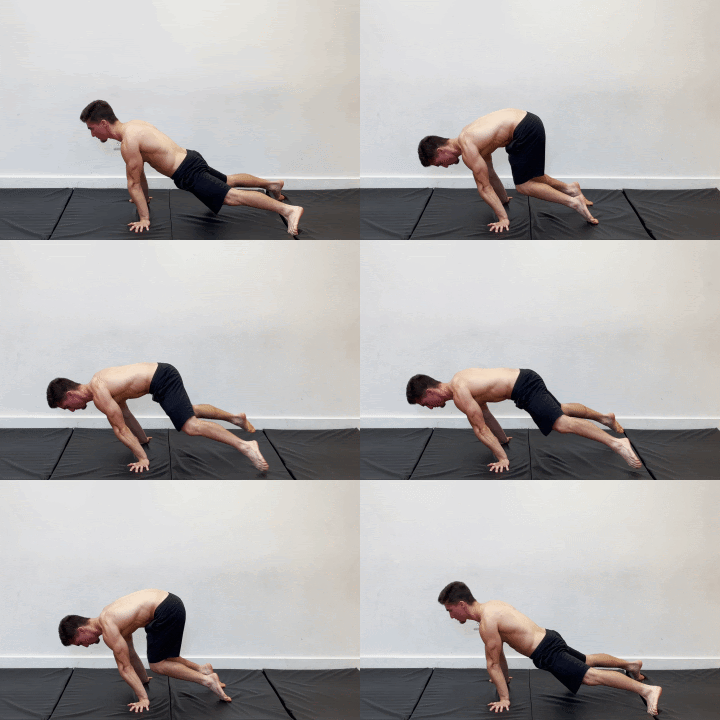
🏆After holding the tuck planche, you must be excited to move towards the advanced tuck. However, jumping from tuck planche to advanced tuck is quite an enormous task ahead.
This is a difficult skill to learn, but with proper instruction and practice, you can achieve it! We will provide you with a step-by-step guide on how to make the transition from tuck planche to advanced tuck planche.
In this article, we’ll be covering these topics:👇
- Why it’s challenging to progress towards advanced tuck planche
- Common issues hindering you from progressing
- A step-by-step guide to address progress
So let’s get started!💪
🤔Why advancing to the advanced tuck so hard?
The advanced tuck planche is still at the early stages of full planche mastery so it’s quite easy to underestimate the skill. However, it’s actually a very challenging position to hold.
This is why in The Movement Athlete app, we subdivided the planche journey into two main categories. 🏆The first step is tuck planche mastery. This is unlocked after mastery of the upper body pushing fundamentals. Tuck planche deserves a set of progression on its own because the position is unusual to hold when first beginning the planche journey.
🏆The second step is towards the full planche, but starting from the advanced tuck. The gap between tuck and advanced tuck is quite large. Mainly because of the required deeper forward lean to counterbalance hip extension.
Here are some of the common issues you might encounter when progressing toward the advanced tuck hold.
✨Common problems when advancing from tuck
✊No solid general pushing strength
The first and most common issue you might encounter is the lack of general pushing strength. You might simply be not strong enough to hold the position. General pushing strength does help in the specific pushing strength requirement of planche. This is because your chest, shoulders, triceps, and core works hard in holding the planche position.
Working on the basic fundamentals, mainly your dips and push-ups will have a dramatic effect on building the bridge towards the tuck to the advanced tuck.
✊Lack of tuck planche mastery
Maybe you’re trying to advance too soon in your planche journey.
If you already holding your tuck planche, it’s easy to underestimate the advanced tuck. You should be able to hold the tuck planche comfortably without breaking your form. This is the only time you can say that you have mastered the skill.
The tuck planche sets the proper foundation for your tuck planche journey.
✊Lack of specific strength
While tuck planche mastery has a strong transfer for making progress, it’s not enough to hold the advanced tuck planche.
You don’t need 30 seconds of tuck planche. In fact, longer hold times on tuck planche have little transfer to the strength demands of the advanced tuck position.
The advanced tuck requires a greater forward lean to counterbalance the hip extension, as mentioned earlier. As a result, this places a significant amount of loading on your anterior deltoids and wrists. This is not addressed by solely working on your tuck planche.
✨Steps to advance from tuck planche to advanced tuck planche
Assuming that you have already assessed the common issues that hinder your progress, let’s now look at a step-by-step guide on how to advance from tuck planche to advanced tuck planche.
🎯Step 1: Master foundations
The first step to progressing from tuck planche to advanced tuck planche is to master the calisthenics foundation skills. This means taking a step back and having a strong understanding of the proper technique and being able to execute basic exercises with precision.
If you are not confident in your abilities, it will be very difficult to make the transition. Spend some time working on your fundamentals:
Push-ups [Ultimate Guide to Push-ups Link]
- Pull-ups – Ultimate Guide to Pull-ups
- Squats – 📍Squat Progressions
- Dips – Ultimate Guide to Bodyweight Dips [LINK- https://docs.google.com/document/u/2/d/1_Mp8_Lofd2ZBuQrEusB_kwh8M5NzC0T8JWpo0-gavVY/edit]
- Core work
Getting stronger with your push-ups and dips is a no-brainer. A good mastery of those two exercises means you have a good level of general strength that translates to planche training.
Pull-ups are also great for general strength. In addition, this exercise helps build stronger biceps which helps in straight-arm strength conditioning.
Planche, interestingly, doesn’t require an insane level of core strength. However, there’s still a base level of strength required. If you can hold a full hollow body hold for 60 seconds, then you are good to go. Then again, there’s also nothing wrong with working on your core strength a bit more. There are plenty of benefits you can get from having a strong core.
Lower body training for planche
Squats can build bigger and stronger legs. While this might sound counterintuitive since you’re going to make your lower body heavier, you don’t have to have an unbalance body with weak legs but a strong upper body. Furthermore, training your legs can improve your general physique which, in turn, can assist you in your planche training. The better your body composition, the easier it is for you to hold this isometric skill.
In a 2018 study, experienced athletes managed to further improve their upper body strength and power thanks to muscle-building-focused lower-body training.
Bottom line, you would first want to master your fundamentals before moving towards planche training.
This is non-negotiable. Well, yes you can train planche even without the basics but your progress will be slower and riskier.
This is why in The Movement Athlete app, we focus on the calisthenics fundamentals mentioned above.
🎯Step 2: Master tuck planche
Once you have mastered your fundamentals, it’s time to master the tuck planche first. Now when we talk about mastery, we mean being able to get into the tuck planche and hold it comfortably with good form for at least 15 seconds.
So you need to focus on your technique!
- 🔥Fully protracted and depressed scapula
- 🔥Lockout arms
- 🔥Hips leveled with the shoulders
These are the most challenging cues you need to maintain comfortably.
If you find yourself losing protraction within those 15 seconds, then you need to work on your scapula strength. If you’re losing your lock-out arms, then develop your straight arms strength first. Are your hips lowering down? Then it means it can be a combination of both weaknesses, a lack of general pushing strength, or a lack of awareness of the balance component. You need to lean forward in order to raise your hips.
It’s easy to underestimate the tuck planche especially once you somehow be able to hold it for 15 seconds for the first time. Make sure you still drill this exercise to solidify your base for planche. Only after truly mastering the tuck planche can you move toward the advanced tuck planche.
Tuck planche progressions
You don’t have to jump immediately from 0 to tuck planche. You can follow this tuck planche progression to gradually build your strength, balance, and awareness for the move.
- Knee planche hold
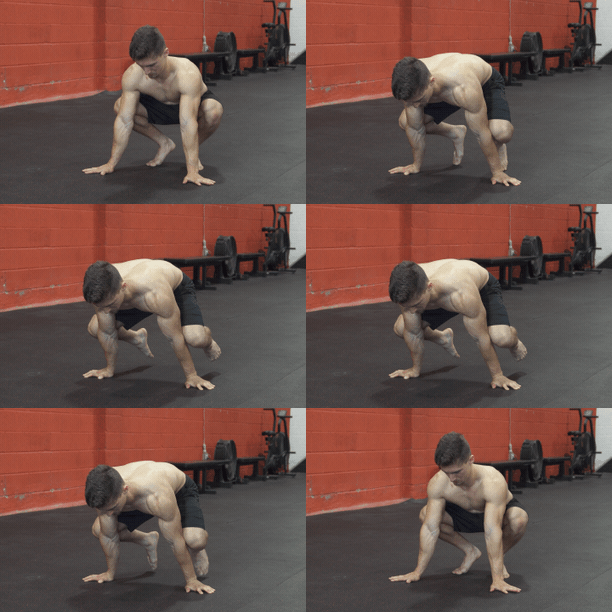
- Planche rocks
- Wall rocks
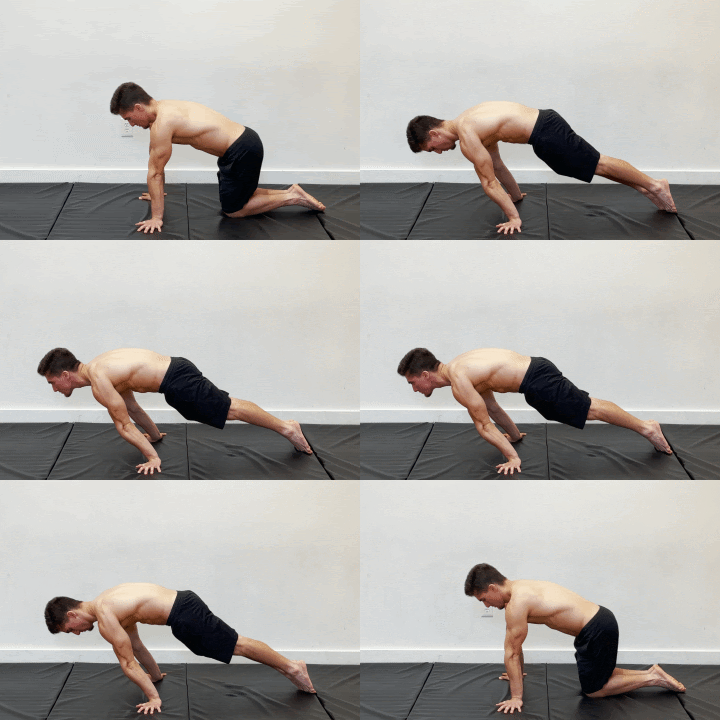
- Leaning plank hold
- Box planche rocks
- Box plank hold
- Frog plank hold
- Pseudo planche hold
- Box tuck planche (1 foot)
- Crow/frog stand
- Knees on forearms tuck planche
- Knees on forearms tuck planche moving
- Box straddle to tuck planche slides
- Floor straddle to tuck planche slides
- Tuck planche
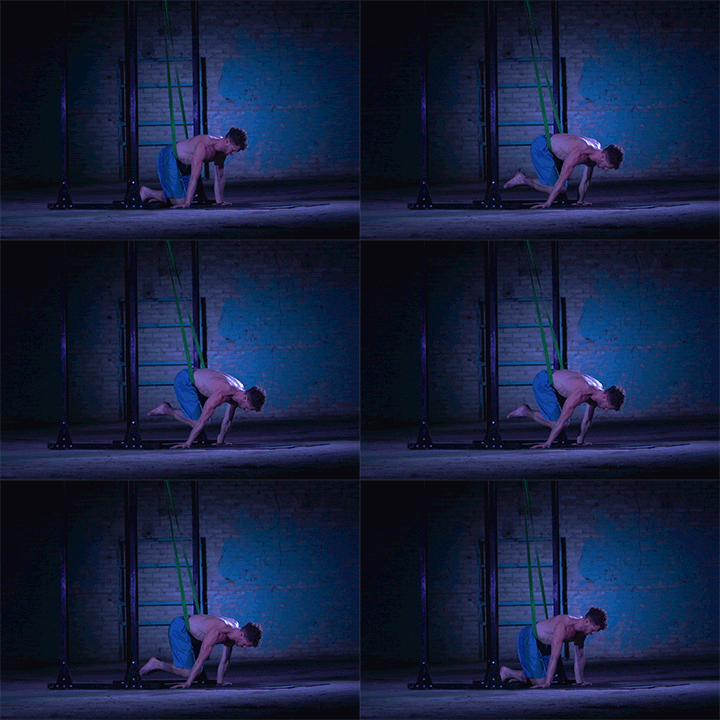
You can also include using resistance bands to develop awareness for the tuck planche while lessening the loading of the exercise.
Depending on your rate of progress, you might not need to use all of these progressions but it’s best to at least go through each progression to build optimal strength and awareness for the exercise.
This is why The Movement Athlete offers a personalized and adaptive approach to training. Not all individuals progress at the same rate and not all start at the same rate.
If you’re interested in this approach, start your journey by first identifying your body’s capabilities using the link below:
🎯Step 3: Work on bridging the gap
Mastery of the tuck planche doesn’t mean you need to be able to hold it for 30 seconds or more. Even those 15 seconds of high-quality hold is enough.
As we mentioned earlier, there’s a specific demand for advanced tuck planche that the tuck planche cannot address directly and this is the forward lean requirement. In order to progress from tuck planche to advanced tuck planche, you need to build your capacity for that forward lean. The forward lean helps counterbalance the hip extension in the advanced tuck planche position. Without the lean, you won’t be able to extend your hips no matter how strong you are.
The great news is that there are several exercises you can do to develop this strength component.
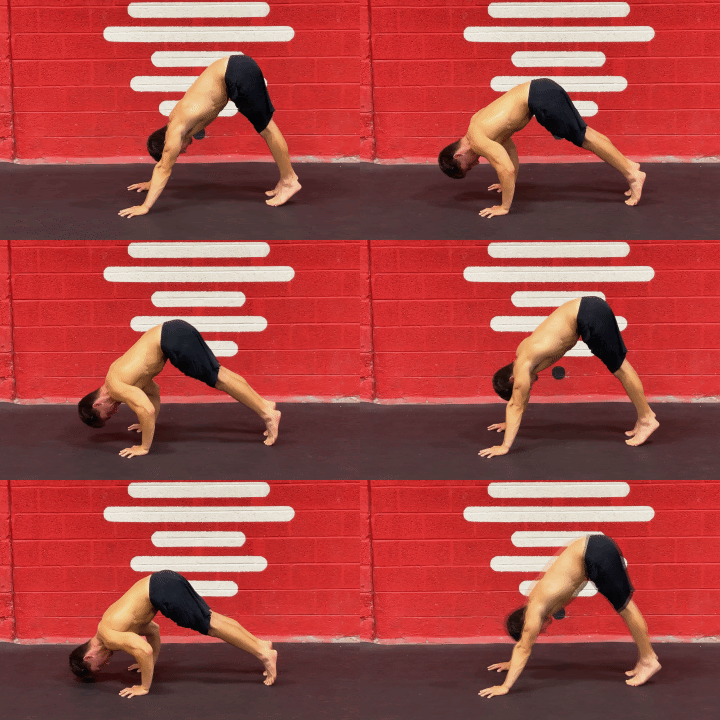
Pike push-ups and handstand push-up progressions
The pike push-up is actually part of the handstand progression. So in this sense, we’re going to consider them as one exercise. However, take note that the pike push-up is much easier and more realistic for most people.
So why is the pike push-up important?
First of all, this exercise builds the general upper body strength needed for the planche. It specifically emphasizes the front of the shoulders which will be working the most to hold the planche position.
Second, the strict pike/handstand push-up requires a forward lean to achieve balance and hit the shoulders effectively. This translates to a stronger forward lean better which is required for the planche.
Including the pike push-up is crucial to achieving the planche is an efficient and safe manner. You can get away without it, but we want to save our time and effort which is why you must add this to your planche workout.
Pseudo planche lean
The pseudo planche lean is a highly crucial exercise for planche. This is basically a lower intensity planche and also without the balancing component.
To progress from tuck to advanced tuck, you need to lean forward much harder. This exercise prepares your upper body exactly for the demands of the advanced tuck planche.
In addition, the pseudo planche lean can be scaled for all skill levels. From beginners to advanced planche athletes, you will still benefit from this exercise. Even a slight addition of your forward lean exponentially gets more challenging.
Aim to achieve the maximum lean that you can while maintaining a strong scapula depression and protraction and locked-out arms.
Banded advanced tuck planche
One of the best ways to progress in planche and many other calisthenics skills such as pull-ups and front levers is through band assistance.
Using resistance bands helps you work on your planche shape and strength with a lesser intensity of the exercise. Even if you still don’t have the strength for the advanced tuck planche, you can gradually build the skill using bands.
Use the lightest band possible. We want to keep the exercise intensity high to build strength in the position. If you can easily hold the advanced tuck planche using bands, consider using a lighter band or regress back to your tuck planche.
🎯Step 4: Master the shape
The last and final step is to gradually extend the hips to achieve the full advanced tuck position.
Gradually hip extension
If we haven’t been clear enough, the gap between the tuck planche and the advanced tuck planche is quite large. Using the exercises above and gradually moving toward the advanced tuck position.
Start in the tuck planche, then simultaneously lean forward with your upper body and extend your hips. Stop at the point where your form breaks. Build time in the position challenging for you before you add more lean and hip extension.
Quick tip
When learning the planche regardless of the progression you are in, it’s best to film yourself so you can access your technique. Without a coach, it will be difficult for you to rely solely on feel when assessing your form and technique.
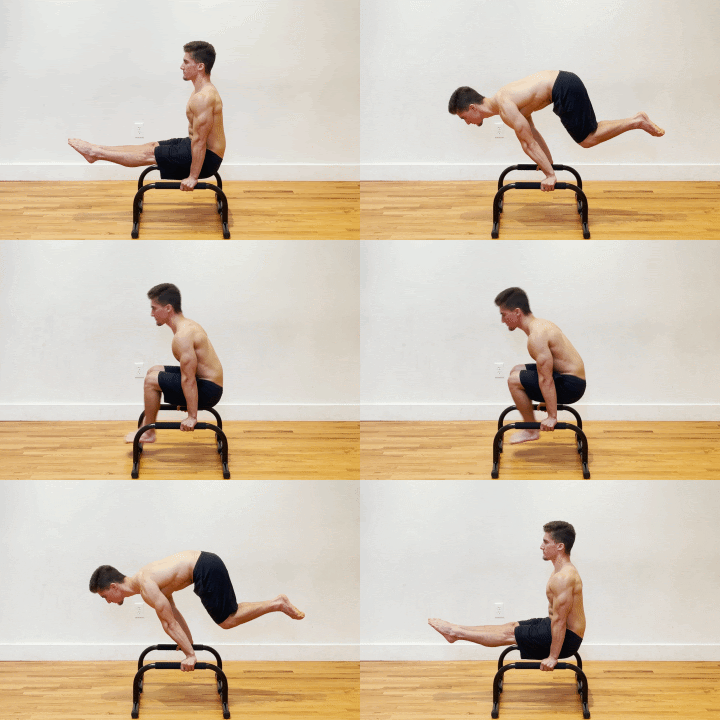
L-sit to advanced tuck
Another way to practice the advanced tuck is by using a slight momentum to get to the position. Begin with an L-sit hold then transition to an advanced tuck by leaning your upper body forward.
At first, you will feel that the advanced tuck is heavy. This is normal since you’re still building strength toward the move. As your body adapts and gets stronger, aim to transition as slowly as possible and add a slight pause at the maximum hip extension of the advanced tuck.
Keep in mind to lean forward as much as you can so you can balance the advanced tuck planche.
📌Conclusion
Taking the next step after tuck planche is a big journey on its own. However, by following the steps above, you will be sure to achieve your advanced tuck planche in due time.
As with all strength building, remain consistent with your training and have patience. The planche is a move that challenges even the most experienced athletes so don’t get discouraged if you can’t do it right away.
For a comprehensive guide towards the full planche journey, get your copy of the 📍Ultimate Guide to Full Planche
Good luck with your planche!💪

