Do you want to be able to do a pull-up? If so, you’re in luck! In this article, we will provide a step-by-step guide on how to progress through the pull-up progressions.
Here’s what we’re going to cover in this article:
- ✊ What is a pull-up
- ✊ Pull-up equipment
- ✊ Pull-up progressions & technique
- ✊ & Frequently Asked Questions about learning pull-ups
Keep reading to learn more!
📌Refresher course: What is a pull-up
🔥Pull-up is a fundamental calisthenics movement that works a variety of muscles in your back, shoulders, and arms. It is an upper-body compound pull exercise. The pull-up starts with your palms facing away from you and your hands gripping the bar at about shoulder-width apart. From there, you pull yourself up until your chin clears the bar. Finally, you lower yourself back to the starting position.
Everyone should do pull-ups!🤛
The pull-up is a fantastic exercise to build your upper body that’s for everyone. Relative strength is a measure of strength per body weight. So, if you weigh 150 pounds (68 kg) and can do a pull-up with 50 pounds (23 kg) of additional weight, your relative strength is impressive. Pull-up is a great measure of relative strength since you’ll be basically pulling your full body weight in the exercise.
✨Equipment to use for the pull-up progression
Pull-up bar or gymnastics rings or TRX set
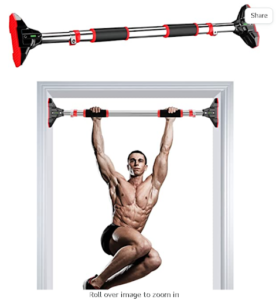
The obvious requirement for a pull-up is a pull-up bar. There are many variations and options for this equipment. Every budget and requirement provides an offer. If you want something affordable, a screwless doorframe or screwed pull-up bar will suffice. If you want something that offers more such as a dip station or a squat rack, there are power racks that have also a built-in pull-up bar.
If you don’t have access to any of these, there are a few alternatives to choose from.
Read more here: 📍How to Do Pull-up without a Pull-up Bar
Gymnastics rings and a TRX set are also good alternatives if you’re limited in space. However, both pieces of equipment are unstable so force generation is due to rings and TRX being free to move in different directions.
Get to know the difference: 📍Gymnastics Rings Pull-up VS Straight Bar Pull-up
Resistance bands

Resistance bands are an essential calisthenics tool. It’s very affordable and accessible and provides tremendous value.
Resistance bands will provide assistance in one of the pull-up progressions. If you’re a complete beginner in pull-ups, then we highly recommend opting for a set of bands. However, there’s also no need for bands if ever you don’t want to.
Can I get pull-ups in just 30 days?
YES! You can even get pull-ups in just one week, but this really depends on many factors, primarily: starting relative strength, training program, determination, and individual strength & skill learning capacity.
You’ve probably read about articles claiming that you get your first pull-up in 30 days. Yes, you can do that, but unfortunately, there are too many variables to consider from person to person.
That’s why we highly advocate a PERSONALIZED & ADAPTIVE training style like The Movement Athlete app.
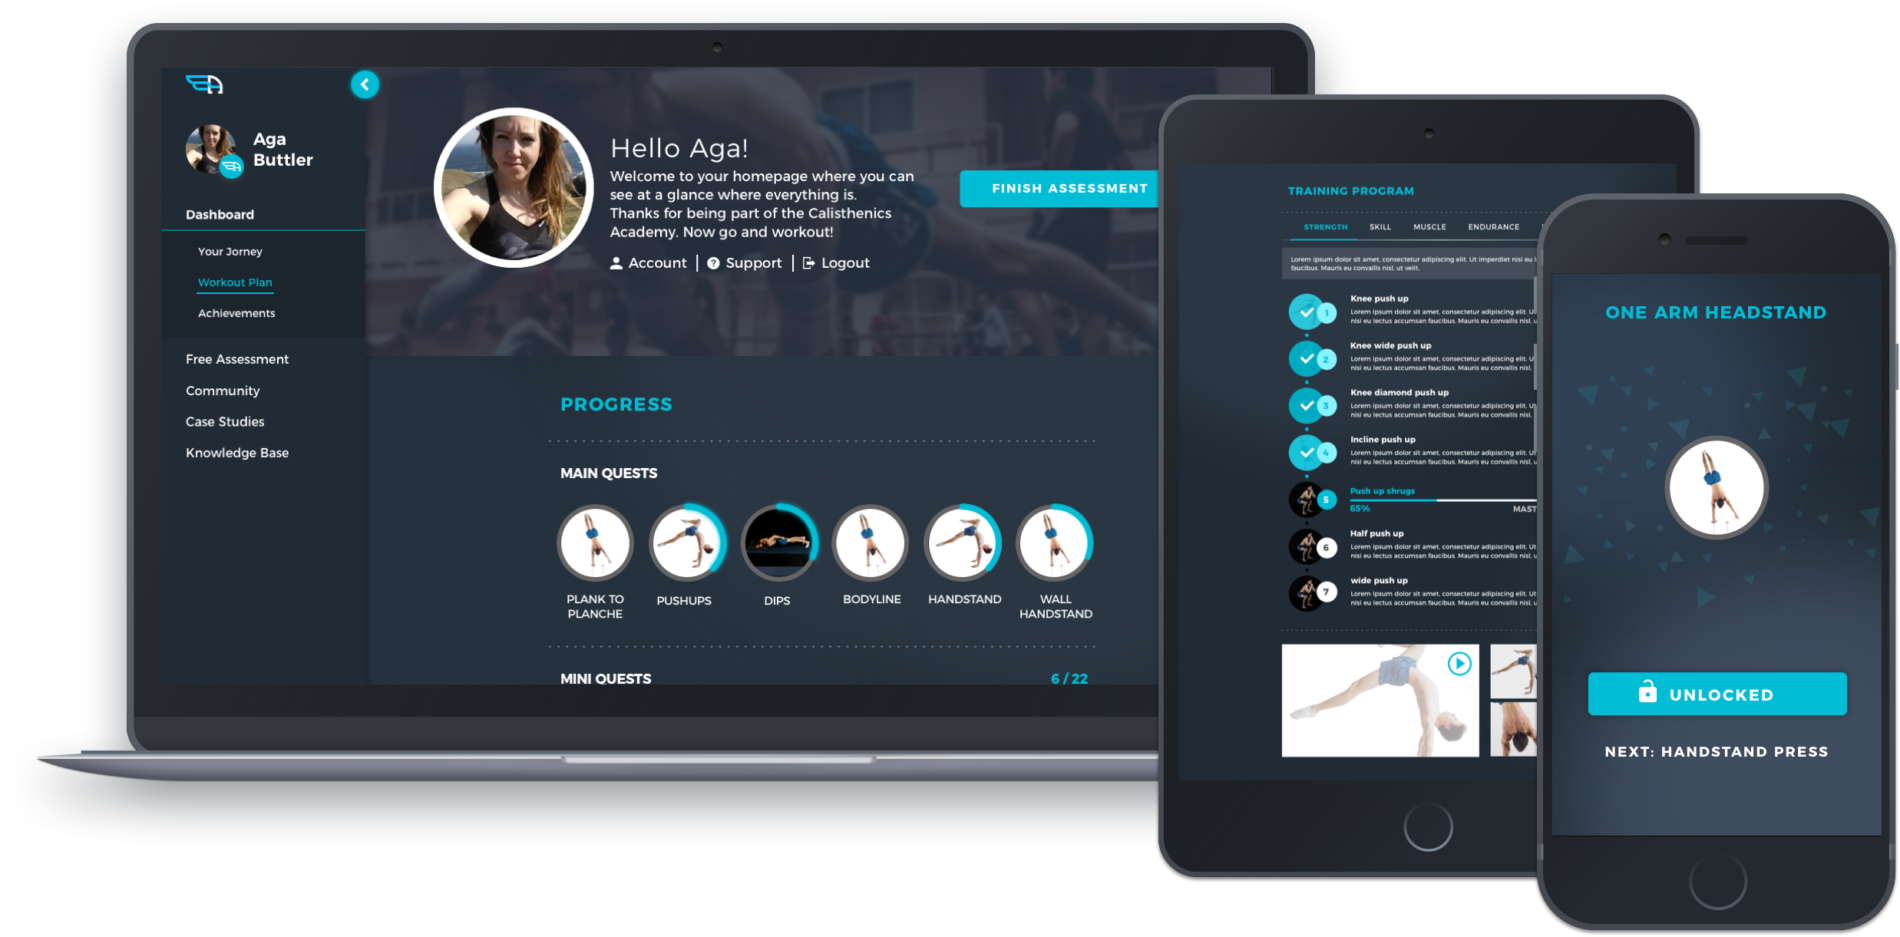
This app pushes away the traditional beginner/intermediate/advanced training programs since these are prone to injury, lack of progress, and major frustration from highly exaggerated expectations.
Get yourself a program that offers a solid progression that adapts and adapts depending on your individuality.
🎯Pull-up Progressions
Before we talk about the progressions, let’s first cover some reminders regarding this.
Reminders: What is progression?🤔
Progression is a set of exercises that gradually increase in difficulty as you get stronger. The goal of progression is to eventually be able to do the most difficult exercise in the set.
Progressions help to build strength and improve technique. They also allow you to safely increase the difficulty of an exercise as you get stronger.
Each exercise has a progression. Pull-ups have their own progression from beginner to advanced. There’s the one-arm pull-up progression for more strength gains after mastering pull-ups in case you’re interested.
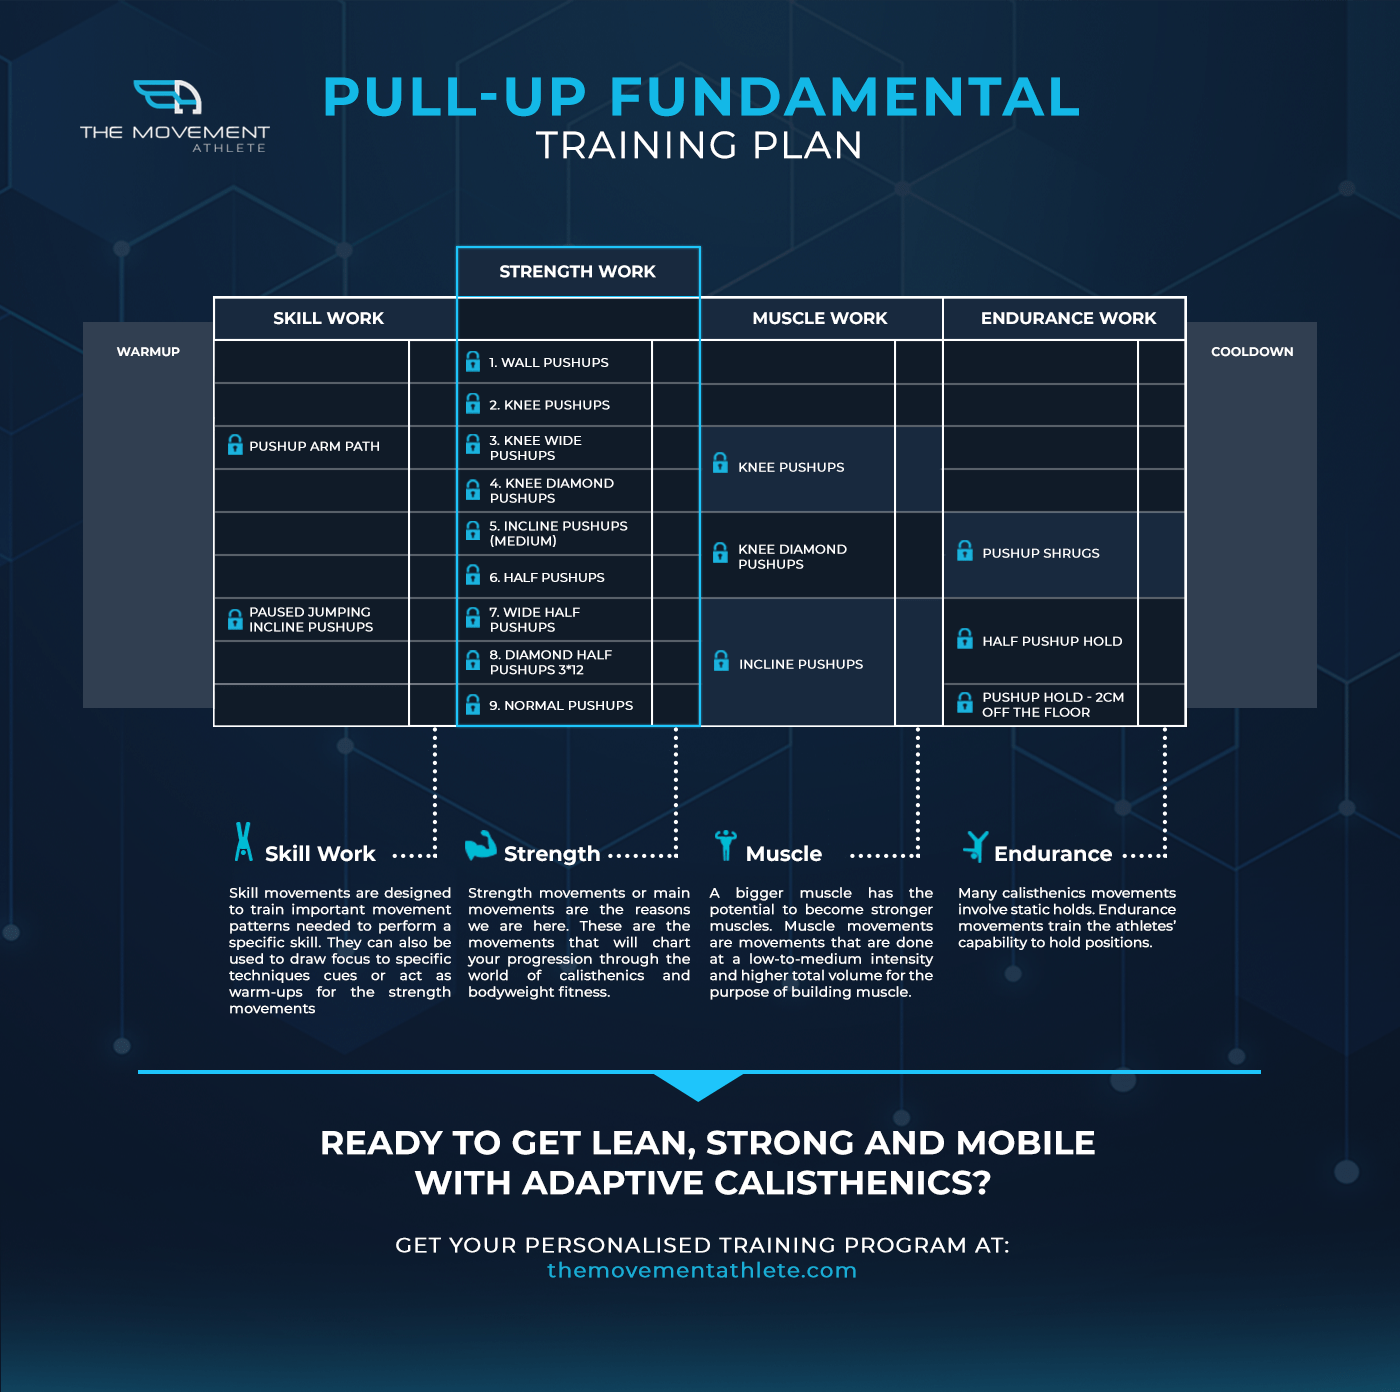
⭐️Progression integration
Keep in mind that when moving from progression to progression, you can incorporate two progressions in your workout. The idea is to use a progression that’s challenging enough for you to develop strength, then use an easier progression from the pull-up to help build additional muscle or strength endurance. Don’t get stuck up on one progression.
Using accessory exercises💯
You can definitely learn pull-ups doing the progressions alone. However, it’s best to use accessory exercises to target weak links that might be hindering you from learning the pull-up.
Use exercises to target your forearms, scapula, and core to ensure that you will be able to activate your other primary muscles for your pull-ups efficiently.
Learn more here: 📍Why I Can’t Do Pull-ups: Beginners Guide
⚡️Glossary
There are a few terminologies that we’re going to repetitively encounter when learning pull-ups and even in the calisthenics discipline in general.
There’s no need to fully memorize the terms, but over time, you’ll definitely be able to incorporate these into your vocabulary when training with calisthenics or even with weight lifting.
Scapula – The scapula is a flat, triangular-shaped bone that forms the back wall of your shoulder socket. It connects your upper arm to part of your ribcage and allows for different types of movements, especially in calisthenics. Read more here: 📍What is the Scapula
Shoulder depression – Imagine your pushing your shoulders away from your ears. The opposite of shrugging your shoulders.
Scapula retraction – Pinch your shoulder blades together as if you’re squeezing a pencil in between them.
Posterior Pelvic Tilt – Also known as PPT. This motion requires you to tilt your hips backward by pushing your glutes, hamstring, and core. This helps you hold a stable straight body line.
Dead hang – Hanging with your shoulders shrugged and scapula in neutral.
Active hang – Hanging with straight arms, but your shoulders are depressed.
✅Low Bar Hang
The first step to pull-ups for complete beginners is to develop enough grip strength with a low relatively low-intensity exercise. While a dead hang on a high bar might seem like an obvious option, this might still be too difficult for beginners who have very low relative strength.
A low bar hang provides assistance thanks to your legs supported by the ground. You can begin with a more vertical body position. As you get stronger, get lower and lower until you can hold 30 seconds with your body nearing a full horizontal plane.
🔎How to perform
- Adjust the bar or rings according to your skill level.
- Hold on to the bar with your hands shoulder width-part.
- Lower your body down into a low hang.
- Extend your legs straight and push your feet together to add body tension.
- Push your shoulders away from your ears into depression.
- Push your hips forward and tilt them back to engage your core and have a straight bodyline.
- With straight arms, hold the position for a period.
☝️Coaching Pointers
- Straight lockout arms
- Straight bodyline
- Engaged core
- Full body tension
- Depressed shoulders
🎯Aim goal before next progression: 3 sets of 30 second-hold
✅Inverted Rows
Once you get enough grip strength, it’s time to build horizontal pulling strength through inverted rows or pulls. Even though your body isn’t vertical like a pull-up, pulling strength from this exercise directly transfers to the pull-up.
The inverted row’s difficulty can be changed by adjusting your angle of incline. Similar to the
low bar hang, the more vertical your starting position is, the easier the exercise. As you get stronger, slowly get into a more horizontal starting position.
Due to the scalable nature of the exercise, you will be doing inverted rows for a long time. It’s not only for beginners. Even if you have already your pull-ups and are already an advanced athlete, inverted rows have different progressions you can use to further improve your back muscles.
🔎How to perform
- Adjust the bar or ring height.
- Perform a low bar hang.
- Retract your scapula.
- Pull your body towards the bar or ring so that your hands move towards the chest.
- A brief pause at the top position.
- Lower down with control.
- Repeat for reps.
☝️Coaching Pointers
- Depressed and retracted scapula
- Full body tension
- Elbows close to the body
- Hands close to shoulder-width apart. Whichever is most comfortable
- Straight bodyline at all times
🎯Aim goal before next progression: 3 sets of 15 reps in a horizontal position
✅Dead Hang
The dead hang is the leveled-up version of the low bar hang. In this position, you’re already holding almost your full body weight on the bar so this requires a strong grip.
A dead hang is the starting point of a pull-up. It does require some overhead shoulder flexibility and mobility. To elaborate, you need to comfortably hold the position while your hands are over you.
Some individuals who might feel pain in this position can opt for an active hang. This means depressing the shoulders and retracting the scapula while keeping your arms straight.
🔎How to perform
- Hold on to a bar with hands around shoulder-width apart.
- Lift your legs so you are in a full hang.
- Hold for an extended period.
☝️Coaching Pointers
- Hold either a dead hang or active hang whichever feels more comfortable for you. We will explain this further in the pull-up technique section
- Hands positioned around shoulder-width depending on your preference. You don’t want to go too wide or too narrow as a study shows it can change muscle activation. We just want to focus on the basic standard pull-up first.
- If the bar is too low, you can fold them behind but be sure to be in a PPT position.
- Engage your core.
- Grasp the bar with your fingers fully wrapped around the bar.
- You can incorporate the inverted rows with dead hang very early in your training.
🎯Aim goal before next progression: 3 sets of 30 second-hold
✅Leg-assisted Pull-up or Banded Pull-ups
Assistance when doing pull-ups is a secret technique to learn the movement pathway and correct technique of pull-ups.
Using assistance lessens the loading of the exercise. Instead of pulling your full body weight, the leg assistance or band assistance sheds some of the weight so you’re able to perform the pull-up.
One weak point of the band is that the assistance it provides isn’t equal throughout the range of motion. Bands set the most assistance at the bottom range which is often the easiest part of a pull-up then it decreases as you go higher when the range becomes much more difficult to accomplish. This also holds true for the leg-assisted variation.
Even with this downside, the assisted pull-up helps build crucial technique development and general pulling strength.
🔎How to perform
- Set up the band anchored on the bar or place an elevated surface behind you for your leg assistance.
- Hold unto a dead hang with your feet or knees set up on the bar or feet placed on the bar.
- Perform the regular pull-up reps for reps.
☝️Coaching Pointers
- When first beginning, use the most assistance first to gauge the motion of the exercise.
- Gradually aim to get the least assistance from the bands.
- Choose a band that lets you meet the minimum (around 3×5 reps) volume. If you’re only able to do 1 or 2 reps, then it’s too light. You have to choose a thicker band.
- For the leg-assisted pull-up, you may also opt to lower the bar so that your feet touch the ground for assistance.
🎯Aim goal before next progression: 3 sets of 12 reps
✅Chin-up
Here is a full chinup tutorial on our YouTUbe channel
When talking about pull-ups, we have actually many grip widths and hand orientations to choose from. One of the most popular (and equally effective) hand orientations is the chin-up. To do this, simply hold on to the bar with an underhand (supinated) grip so that your palms are facing you.
This slight change shifts the forearm into supination which flexes the elbow. The elbow flexion activates the biceps even more. This is the reason why many people can do chin-ups than pull-ups. The biceps helps more in performing the exercise rather than relying more on your lats (which is commonly a weak area in people).
You can first use this exercise to develop the lats. A 2013 study found that while changing the hand orientation can shift some emphasis on certain muscle groups, chin-ups and pull-ups are still both excellent back-building exercises.
You can read more about different hand grip & orientations here: What is the Best Pull-up Grip
🔎How to perform
- Hold on to a bar with your palms facing you into a dead hang.
- Depress and retract your scapula.
- Pull your body upward until your chin is over the bar.
- Lower down with control.
- Repeat for reps.
☝️Coaching Pointers
- Chin-ups, if done incorrectly and too much, can put some serious strain on your elbows. Read more here for help: 📍How to Fix & Prevent Elbow Pain from Chin-ups
- Drive your elbows towards your hip then back
- Elbows close to the body
- Full body tension
🎯Aim goal before next progression: 3 sets of 12 reps
✅Pull-up Hold
One of the hardest points of the pull-up is achieving the top position. Luckily, we can directly train this position so you can build strength reaching the top portion of the pull-up.
Isometric hold for the top position is an excellent way to build strength and muscles for this purpose.
🔎How to perform
- Prepare an elevated surface to jump or “walk” from to get to the top position of the pull-up.
- Hold the bar with the preferred pull-up grip.
- Walk or jump into the top of the pull-up position.
- Hold for a specified time.
☝️Coaching Pointers
- Be sure to depress and retract your shoulders before walking or jumping to the top.
- Full body tension.
- Drive your elbows toward your hips and back
🎯Aim goal before next progression: 3 sets of 30 seconds
✅Pull-up Negative
Performing the eccentric phase of pull-ups is a great way to increase pull-up strength and muscle recruitment for more pulling potential.
Eccentric or lengthening contractions AKA negatives of the muscles help us produce more force compared to the positive or concentric phase of an exercise according to current scientific literature. These means are stronger doing the negatives.
If you still can’t do the concentric pull-up or the going-up phase, then push-up negatives might be the solution for you. Doing the negative pull-ups also helps improve your mind-muscle connection with the back muscles as you’re focusing on the lowering phase.
🔎How to perform
- Get into position by either jumping or using a step stool.
- Walk or jump into the top portion of a pull-up.
- Slowly lower yourself down for at least 4 to 8 seconds with control.
- Reset then repeat for reps.
☝️Coaching Pointers
- It’s best to prepare an elevated surface so you just have to walk into the pull-up top position.
- Follow the same protocols for a regular pull-up motion but on for the lowering phase.
🎯Aim goal before next progression: 3 sets of 8 reps
Pull-up
If you’re now here at the actual pull-up exercise, congratulations!
But of course, this isn’t the end of your training journey for your back. There are many variations to work with and depending on your goals, you can still work with regular pull-ups for a very long time.
This amazing back builder will unleash your back muscles and strength’s full potential.
🔎How to perform
- Hold on to the bar into a dead hang with a pronated or overhand grip (palms facing forward).
- Pull your body upward until your chin is over the bar.
- Lower down with control.
- Repeat for reps.
☝️Coaching Pointers
- Arched or hollow body form depending on preference
- Hands in shoulder-width distance
- Pull your elbows to your hips then back
- Elbows close to your body
- Full body tension
- Chest over the bar
- Check out this article: 11 Dumbest Pull-up Mistakes You Need to Avoid
🎯Aim goal before next progression: 3 sets of 12 reps
📌Frequently Asked Questions
🧐Am I too old to do pull-ups?
You’re never too old to do pull-ups!
Of course, your age, current skill, training plan, and many other factors can affect your progress. However, even in you’re already in your senior years, you can still definitely smash pull-ups even if you’re starting from 0 as a complete beginner.
Here are some Movement Athletes over 50 who were able to accomplish this feat!
Don, 65- year old – “It was a slight blow to my ego to start at the very beginning but I really wanted to learn from the bottom up.”
If you have a pre-existing condition, it’s best to check with your doctor first. But in general, pull-ups are safe for people of any age and women.
Read more inspiring stories of any age here: 📍The Movement Athlete Success Stories
🧐Can women also do pull-ups?
Speaking of gender, there are plenty of women who avoid push-ups at the thought of bulking up. However, pull-ups are actually great for building the beautiful arms you’re dreaming of.
Here’s Maria, a movement athlete who smashed pull-ups thanks to The Movement Athlete app.
There’s actually no difference between men’s and women’s workouts. While there are clear physiological differences, workouts tend not to vary much. Individual differences and goals are bigger factors for differences in workouts.
Read more on Men’s vs Women’s workouts here: 📍Women’s Guide to Calisthenics
🧐How long does it take from 0 to 10 pull-ups?
There’s no clear timeline on how long you can reach the basic amount of strength to get to 10 pull-ups. Each beginner has their own strengths and weaknesses. But expect major progress around 2 to 4 weeks.
Again, this is why we stress personalized and adaptive training. If you’re following a cookie-cutter workout, you’re just setting yourself up for frustration.
📌Takeaway
Pull-ups are a great exercise for your back and overall upper body strength. By following this pull-up progression guide, you’ll be on your way to becoming a pull-up pro in no time! Just remember to focus on quality over quantity, listen to your body, and enjoy the process.
👀Where do I start my Pull-up journey?
It’s difficult to know where each beginner needs to start in order to learn pull-ups. While there can be general advice of starting with inverted rows and dead hang, it’s still best to take a personalized approach to train pull-ups for much faster, more efficient, and safer progress.
If you’re interested in learning pull-ups this way, head over to The Movement Athlete, and try out the program for free.
GET YOUR 7-DAY FREE TRIAL CALISTHENICS PROGRAM NOW! 💪