Pull-ups are a great way to build upper body strength and improve your overall fitness. They can be done by beginners and advanced athletes alike and can be incorporated into many different workouts. In this article, we will discuss the basics of how to do a perfect pull-up, as well as some more advanced techniques.
Here’s a brief guide on the topics we’re going to cover:👇
- ✊ How to do a perfect pull-up
- ✊ Coaching pointers
- ✊ Pull-up benefits
- ✊ Pull-up equipment
- ✊ Muscles used in pull-ups
- ✊ Pull-ups vs chin-ups
- ✊ Different pull-up grips and orientation
- ✊ Pull-up workout for different levels
- ✊ & Frequently Asked Questions about the exercise
Let’s get started!
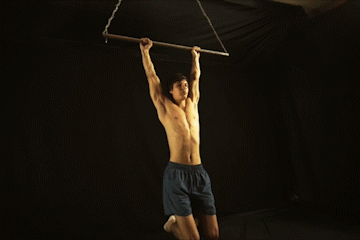
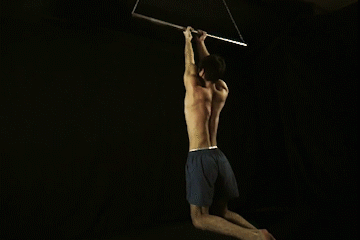
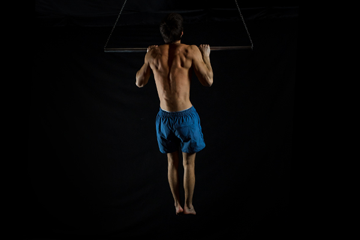
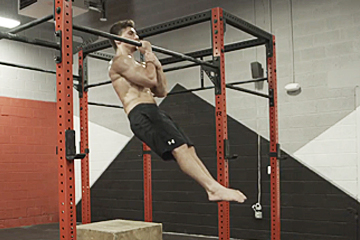
✨ How to do Pull-ups
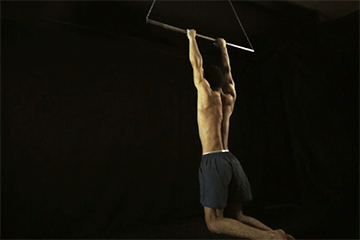
Pull-ups look simple, just pull your body towards the bar. But doing so might leave you with some missing key techniques that are needed for optimal and safe development of your posterior chain.
- Hold on to a bar with a shoulder-width overhand grip, and hang at arm’s length.
- Use your back muscles to pull yourself up until your chin is over the bar.
- Slowly lower yourself back to the starting position.
- Repeat as necessary.
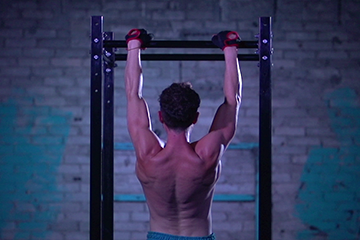
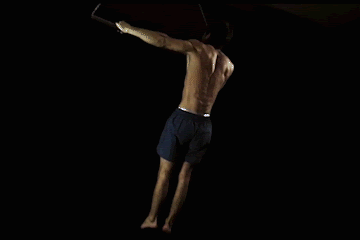
💯 Coaching Pointers
- Depress your shoulders by pressing them down and away from your ears.
- Retract your scapula by pinching your shoulder blades together.
- Perform depression and retraction before beginning the pulling motion and maintain the scapula position until you have completed the range of motion. This is for the stability of your shoulders for efficient and safe pulling.
- Core tight and engaged to minimize energy leaks.
- Full body tension to minimize energy leaks.
- Imagine driving your elbows towards your hips and then back as a good mental cue.
- The minimum height of a pull-up should be a chin over the bar. Going more than that is great, but also more difficult to perform.
Have a look at this video where we cover:
💪Muscles used
😃Benefits
⏰How long does it take to achieve Pull-ups
📜Prerequisites
🔥6 key techniques And don’t worry if you’re not a pro just yet – we all start somewhere, right?
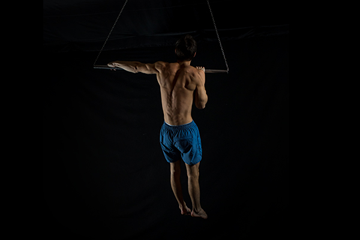
🧐 Thumbs over the bar or under?
Thumbs can be wrapped around the bar or resting over the bar. Wrapping the thumbs under the bar can provide a stronger grip. However, this can fatigue your forearms if they are not yet prepared enough. Having them over the bar will have less strain on your forearms making it ideal for weighted and harder variations.
Both are good options. Just choose whichever you prefer.
🤔 Arcking back or hollow body?
There are two ways you can position your torso when performing pull-ups. You can arch your lower back or have your hips tilted backwards into a hollow body position.
The arched back allows for maximum back recruitment especially when the pull-up is done with a complete range of motion. This means pulling until your chest nearly touches the bar. It also helps you create a wider range of motion for the pull-up for more strength and back development.
The hollow body engages the core more and is a crucial technique that translates to muscle-ups.
Both forms serve their own purpose. Choose the technique that serves you towards your goals. However, both are also good for general pulling strength development.
🦵 Folded legs or straight legs when doing pull-ups?
Ideally, you would have to have your legs straight and together for maximum lower body control, minimize shifting of weight too much at the back, and to avoid using them for generating momentum.
However, if you don’t have enough vertical clearance to extend your legs, holding them at the back is also a viable technique. You can either have them arched or hollow your body even with folded legs depending on your goal.
👊 Dead hang vs active hang pull-ups
Dead hang is basically performing the pull-ups with depressed and retracted scapula then after performing a rep, resetting into a complete dead hang with your shoulders shrugged and your scapula in neutral.
This technique adds a small but crucial range of motion for strengthening your pull-up game.
On the contrary, you can also perform an active hang throughout the range of pull-ups even when at the bottom range. Usually, this is done when lacking the necessary shoulder mobility for pull-ups or if you’re working with heavy weighted pull-ups to minimize scapula aggravation.
Both are viable techniques. You can choose what’s most comfortable and ideal for your goal.
🙌 Pull-ups vs Chin-ups
Pull-ups are done with an overhand grip; meaning palms are facing forward. Doing this pull-up technique maximizes lat engagement.
Chin-ups, on the other hand (pun unintended), are done with an underhand grip; meaning palms are facing you. This technique lets your biceps help more in completing the range of motion; making this exercise excellent for building bigger biceps.
Both are actually excellent for building a strong back according to an EMG analysis despite the minor difference in muscle engagement. However, chin-ups (if done poorly or over the limit) can result in elbow pain.
Don’t worry, you can read this article to minimize the risk of injuries with chin-ups: 📍How to Prevent & Fix Golfer’s Elbow When Doing Chin-ups
☝️ Wide grip vs Narrow grip vs Shoulder-width grip pull-up
How wide or narrow you position your hands can also affect the muscle activity you get from the exercise.
It has been a common belief that a wider grip offers more lat activation. However, current research says otherwise. Narrow (around 50% of shoulder-width), Wide (150%), and shoulder-width grips all provide around the same lat activation with insignificant differences.
But narrow and shoulder-width provide more bicep activation.
As a general rule, we recommend opting for a grip width that’s comfortable for you. Start with a shoulder-width stance then adjust gradually towards the width that offers the best comfortability so you can max out your reps.
More discussion on grip width and orientation here: 📍What is the Best Pull-up Grip
👎 Pull-up Mistakes
if your pull-up technique is not close to perfect, you are in trouble…
We all have seen this one guy ripping the half-done pull-ups in the gym, straining his neck, not engaging his scapula.
Sooner or later, those muscles might decide they’ve had enough and make the ultimate “mic drop” move: the dreaded pull or tear.
Trust me; we’ve seen it more times than we can count at The Movement Athlete Academy.
It’s like lousy pull-up form became a party crasher!
Here’s the scoop: lots of folks get caught in the “more is better” trap when it comes to pull-ups.
But picture this: you wouldn’t juggle chainsaws before mastering the tennis ball, right?
At TMA, we’re the coaches who got the memo – nailing the perfect pull-up, with all the right moves and calming breaths, that’s our jam.
It’s like a symphony of strength, a masterpiece of technique – and we’re handing you the conductor’s baton.
Say goodbye to injury roulette and hello to the proper pull-up parade! 🎉
But fear not, my pull-up padawan!
We’re about to dissect those sneaky mistakes that could turn your pull-up journey into an injury show.
Learning the mistakes you need to avoid helps you understand the exercise better and how you can get the most out of it.
Here are some of the most common pull-up mistakes:
- 🥺 Incomplete range of motion – Not going all the way down and not going all the way until your chin goes at least over the bar.
- 🥺 Unnecessary neck strain – Pushing the neck too forward to give an illusion of completing the range. Keep it in a neutral position.
- 🥺 Overtly hunching back – A close chest position can limit your range of motion. Lead the chest for maximum back engagement.
- 🥺 Arching pull – Pulling vertically is the kay. If you pull with an arching motion, you will tend to use more momentum which suits muscle-ups better. That is not the goal if you want pulling strength and muscle gains.
- 🥺 Using momentum – We want to build strength and muscle through a full range of motion. Kipping or using momentum defeats the purpose of the exercise.
- 🥺 Not retracting and depressing your shoulders – Keep your shoulders stabilized for maximum pulling efficiency and to minimize injuries.
- 🥺 Too short rest periods – Pull-ups build strength and muscle. Resting too short can minimize these gains. Unless you’re building endurance for timed pull-up tests.
- 🥺 Insufficient training reps + sets – Training volume is a huge factor in keeping the workout progressive.
- 🥺 Uncomfortable grip – Use a grip width and orientation that’s comfortable for you. Our differences in body proportions affect what will suit you best.
- 🥺 No control – Even if you pull up with control going up and then just let your body drop down from the hang, the risks of injuries will rise on your shoulders. Keep every movement in control.
An in-depth discussion about these mistakes here:📍11 Dumbest Pull-up Mistakes You Need to Avoid
🔥 Why You Should Do Pull-ups
Pull-ups are one of the best upper-body strengthening exercises.
They work a variety of muscles, including the biceps, rhomboids, traps, shoulders, and latissimus dorsi (lats).
Pull-ups are also a great compound exercise, meaning they work for multiple muscle groups at once.
This makes them very efficient for building strength and improving fitness.
In addition, pull-ups can be done practically anywhere there is a bar or other overhead structure.
So, if you’re looking to improve your upper-body strength and fitness, start doing pull-ups! Just be sure to use proper form so that you don’t injure yourself. Now let’s move on to some more advanced techniques.
💪 Pull-up Equipments
One of the main benefits of calisthenics is convenience. You don’t need fancy equipment or expensive gym memberships to get you started.
While you can train with 0 equipment at all, it’s still best to get some basic equipment to help you out.
Here are some of the most essential pieces of equipment for doing pull-ups:
🤜Pull-up Bar
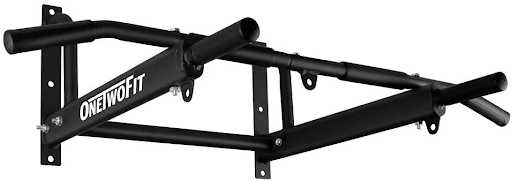
This is the most important piece of equipment. A good quality pull-up bar will last you a lifetime. There are many different types of bars available, so be sure to choose one that is suitable for your needs.
You can get a simple doorframe pull-up bar or a more advanced free-standing pull-up bar. There are even bars designed to be installed in your doorway.
The type of bar you choose will depend on your budget, the amount of space you have available, and your needs.
If you plan on doing other exercises besides pull-ups, then a free-standing bar is probably the best option. These bars are also great if you have limited space since they can be moved around and stored easily.
Doorframe pull-up bars are the most affordable option but they can damage your doorframe if not installed properly.
🤜Gymnastics Rings

Gymnastics rings are fantastic equipment for pull-ups. You can bring them anywhere so you can do your pull-ups no matter where you are. The freely moving rings also allow for better shoulder movement; decreasing the risks of joint agitation.
They’re also great for other exercises such as dips, muscle-ups, and rows: providing more intensity and adjustability to these exercises. Here are also some guides we cover for ring exercises:
📍The Ultimate Guide to Ring Dips
If you want to get serious about calisthenics, then gymnastics rings are a must-have piece of equipment.
You can read more on rings vs straight bar pull-ups here: 📍Straight Bar Pull-up VS Gymnastics Ring Pull-up
🤜Resistance bands
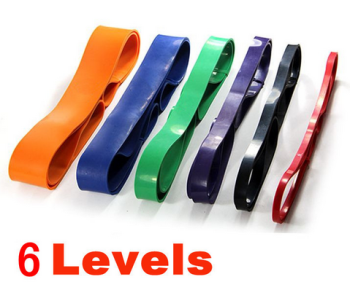
Resistance bands are a great way to add assistance to your pull-ups. They can be used to help you if you’re just starting out or if you’re trying to do more advanced exercises.
Bands come in different levels of resistance, so be sure to choose one that is appropriate for your needs.
If you don’t want to get resistance bands, you can also lower the rings or put an elevated surface near your pull-up bar so you can use assistance from your legs.
🤜Alternatives
If you’re new to pull-ups, don’t worry – they’re not as difficult as they may seem. Start by finding a sturdy bar that you can grip comfortably. If you’re doing pull-ups at home, a door frame or stair bannister will work just fine.
One major advantage of working on pull-ups is that there are many alternatives you can work with. A pull-up bar may ensure safety, convenience, and assurance of an efficient workout. However, some items around you can provide somehow similar results such as:
- House beams
- Edge of stairs
- House rafters
- Monkey bars
- A sturdy branch
When looking for alternatives, just make sure the structure is sturdy enough to hold more than your weight. There will be differences in the grip. For example, a rafter might be harder to grip due to the angled corners, but it can help you build additional gripping strength in the process.
You can always make do based on what’s available to you.
Then again, pull-up bars (especially door-frame variants) are very accessible and affordable.
For more help, read here: 📍How to Do Pull-ups Without a Pull-up Bar
🔎 Why can’t I do a single pull-up?
Some people can get pull-ups easily within the day. Some people can train for months and still not be able to get their chin over the bar.
It all boils down to individual differences.
If you’re someone who still can’t do a single pull-up YET, there here are some common issues that you need to address:
- The most probable cause: Lacking general pulling strength
- Presence of weak links (weak core, scapula strength, weak grip, etc.)
- Weak relative strength (You’re strong, but not strong enough in relation to your bodyweight)
- Lack of technique (even if looks simple, there’s a technical aspect to the skill)
- Past injuries (check with your specialist)
We dive deeper and provide solutions for these issues in this article: 📍Why You Can’t Do A Single Pull-up & How to Fix It
💥Pull-up Progressions
Just to refresh your mind, progression is a set of exercises that will help gradually increase your strength so you can do the next level of exercise.
Progressions are the key to keeping your📍workouts progressive so you can keep on progressing (hence the name).
Progressions are not just for beginners. It covers from beginners even up to the highest level of skill and strength.
Here are some progressions for the pull-up arranged according to difficulty. Take note that these are only the general progressions.
⭐️ Pull-up Progression for Beginners
Inverted rows
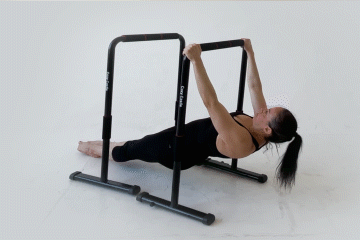
This exercise is scalable for beginners to advance by adjusting the level of decline. The lower you go, the harder the exercise. If you want to increase your pulling strength, you would want to add inverted rows throughout your training journey even if you’re already performing pull-ups.
Assisted Pull-ups
To bridge the gap of vertically pulling (compared to the horizontal pull of inverted rows), assisted pull-ups are a must. You can use resistance bands or your legs to help you perform this exercise.
Pull-up Hold
Isometric holds in different positions of the pull-up help you build additional strength, especially in weak points. You can simply jump into the top position of a pull-up and then hold that position for seconds to recruit muscles for that specific range of motion. This transfers when you perform the full range of motion of pull-ups.
Pull-up Negatives
According to current scientific literature, we are stronger when performing eccentrics, negatives, or the lowering phase of a pull-up. While you still can perform the concentric phase (going up), then performing the negatives will help you build strength and muscle for the complete range of motion.
In-depth pull-up progressions here: Pull-up Progressions: Beginners’ Guide [INSERT LINK]
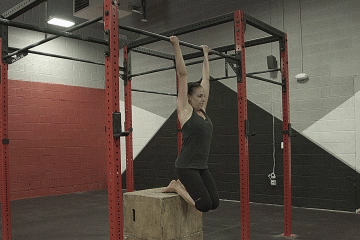
👊 Pull-up Progression for Advanced
Before moving towards these advanced progressions, be sure that you have fully mastered the regular pull-up. A good number is around 12 reps of CLEAN, PERFECT pull-ups.
Mastering the fundamental pull-up helps you minimize the risk of injuries while paving the way to efficient progress. We don’t want you to get frustrated or get injured!
Typewriter Pull-up
This variation is excellent for starting up the unilateral strength for pull-ups. Unilateral means you’re working towards one-arm pull-ups.
The typewriter pull-up develops the top range of motion. As you grow stronger, you can move to the next variation.
Archer Pull-up
The archer pull-up is an assisted variation of the one-arm pull-up. With the “non-working” arm extended (quotes added since it’s still working), the working arm does MOST of the pulling. However, there’s still a bit of assistance from the straight arm.
You can also progress towards the full archer pull-up by bending also the non-working arm. As you build more strength, you can slowly straighten your arm until you can perform the full range of motion with a completely straight non-working arm.
One-arm Pull-up
This is the pinnacle of pulling raw strength. The one-arm pull-up is a high-level pulling exercise that puts a full load of your body weight on just one arm!
There are many ways to work towards this skill. You can use negatives, assisted pulleys, and one-arm pull-up hold to build strength.
You may also choose only a specific grip. For example, use a pronated grip for one-arm pull-ups or a supinated grip for a one-arm chin-up.
Take note that this exercise has high shoulder, elbow joint, and general upper-body strength demands. Don’t go trying it out if you haven’t mastered the previous progressions.
Weighted Pull-ups
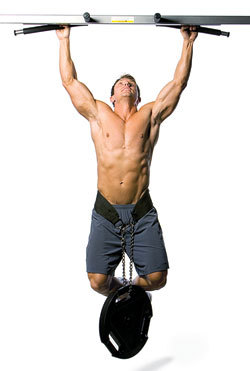
We love bodyweight exercises. However, that doesn’t mean we hate weights. In fact, WE LOVE WEIGHTS AS WELL!
Weighted calisthenics is a fantastic weight to increase both relative and absolute strength. It’s so simple and you just have to add weights to keep on progressing while performing your favourite bodyweight exercises such as the pull-up.
Learn more here: How to Use Weighted Calisthenics for Ultimate Strength Gains
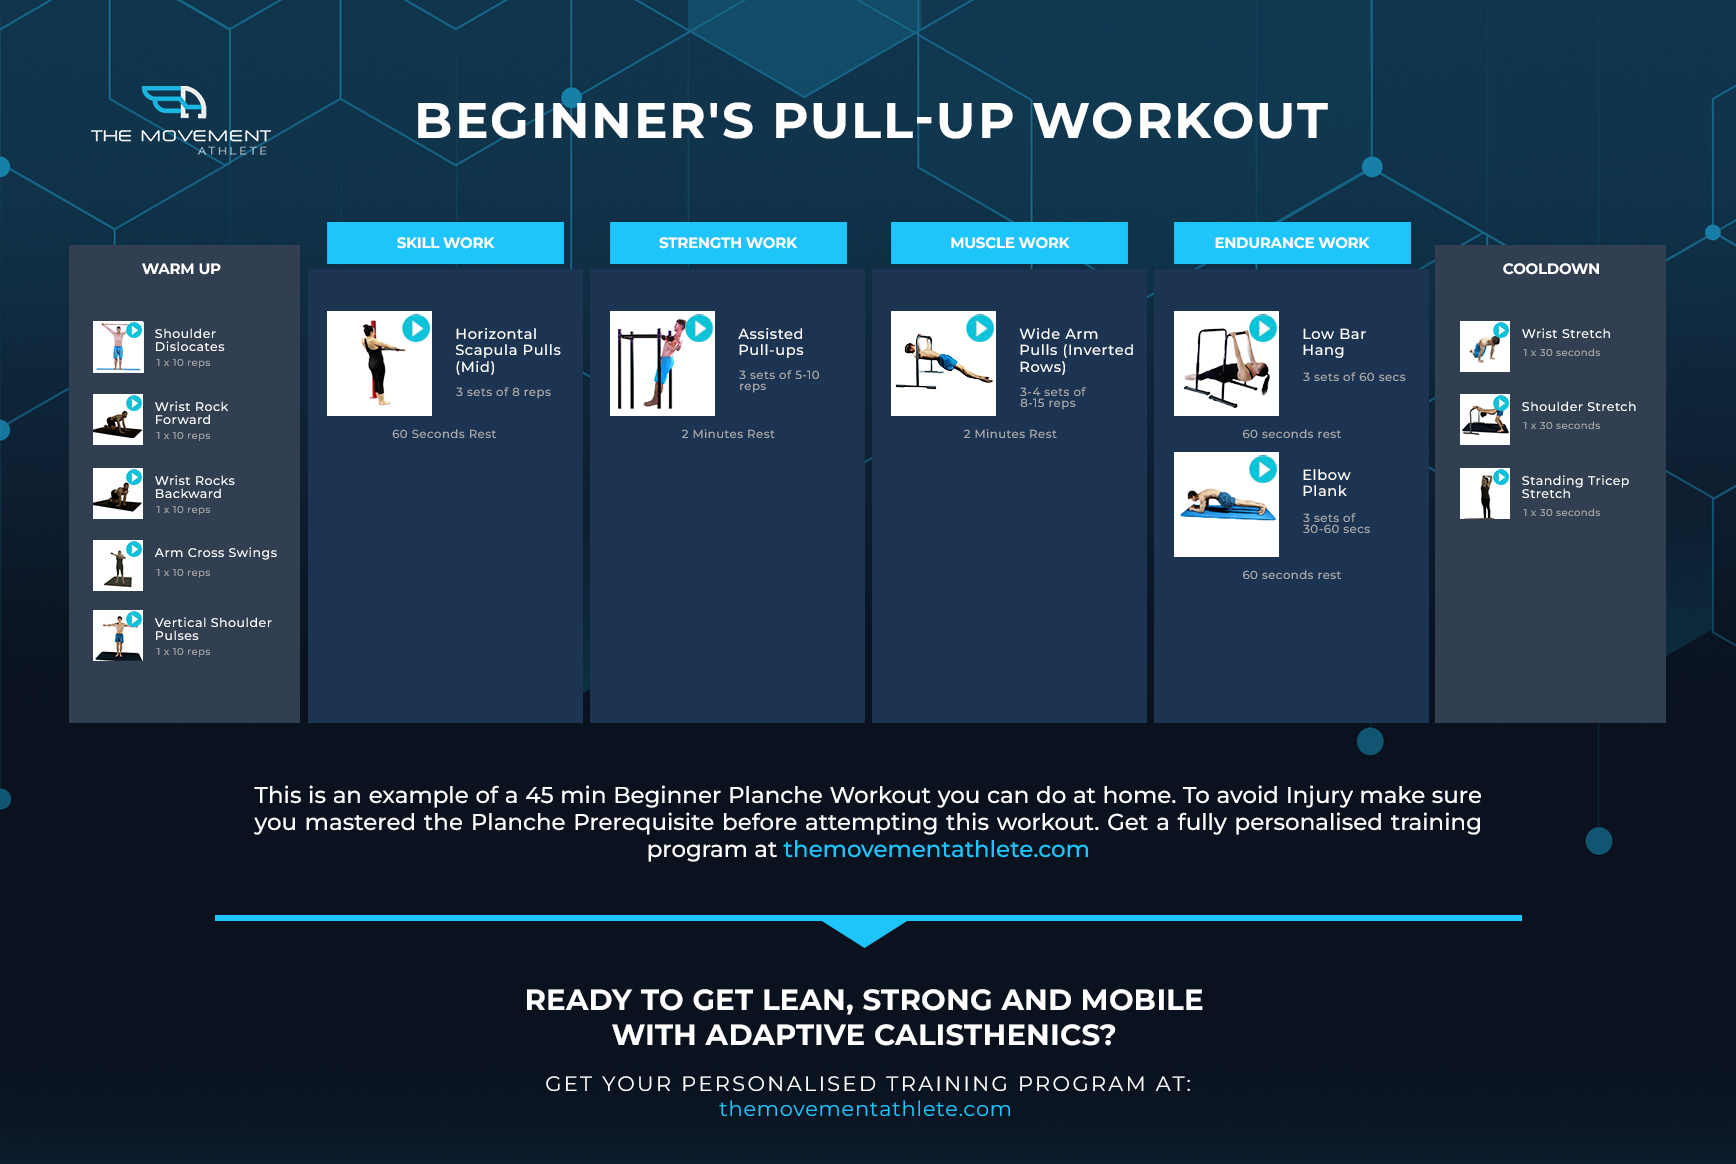
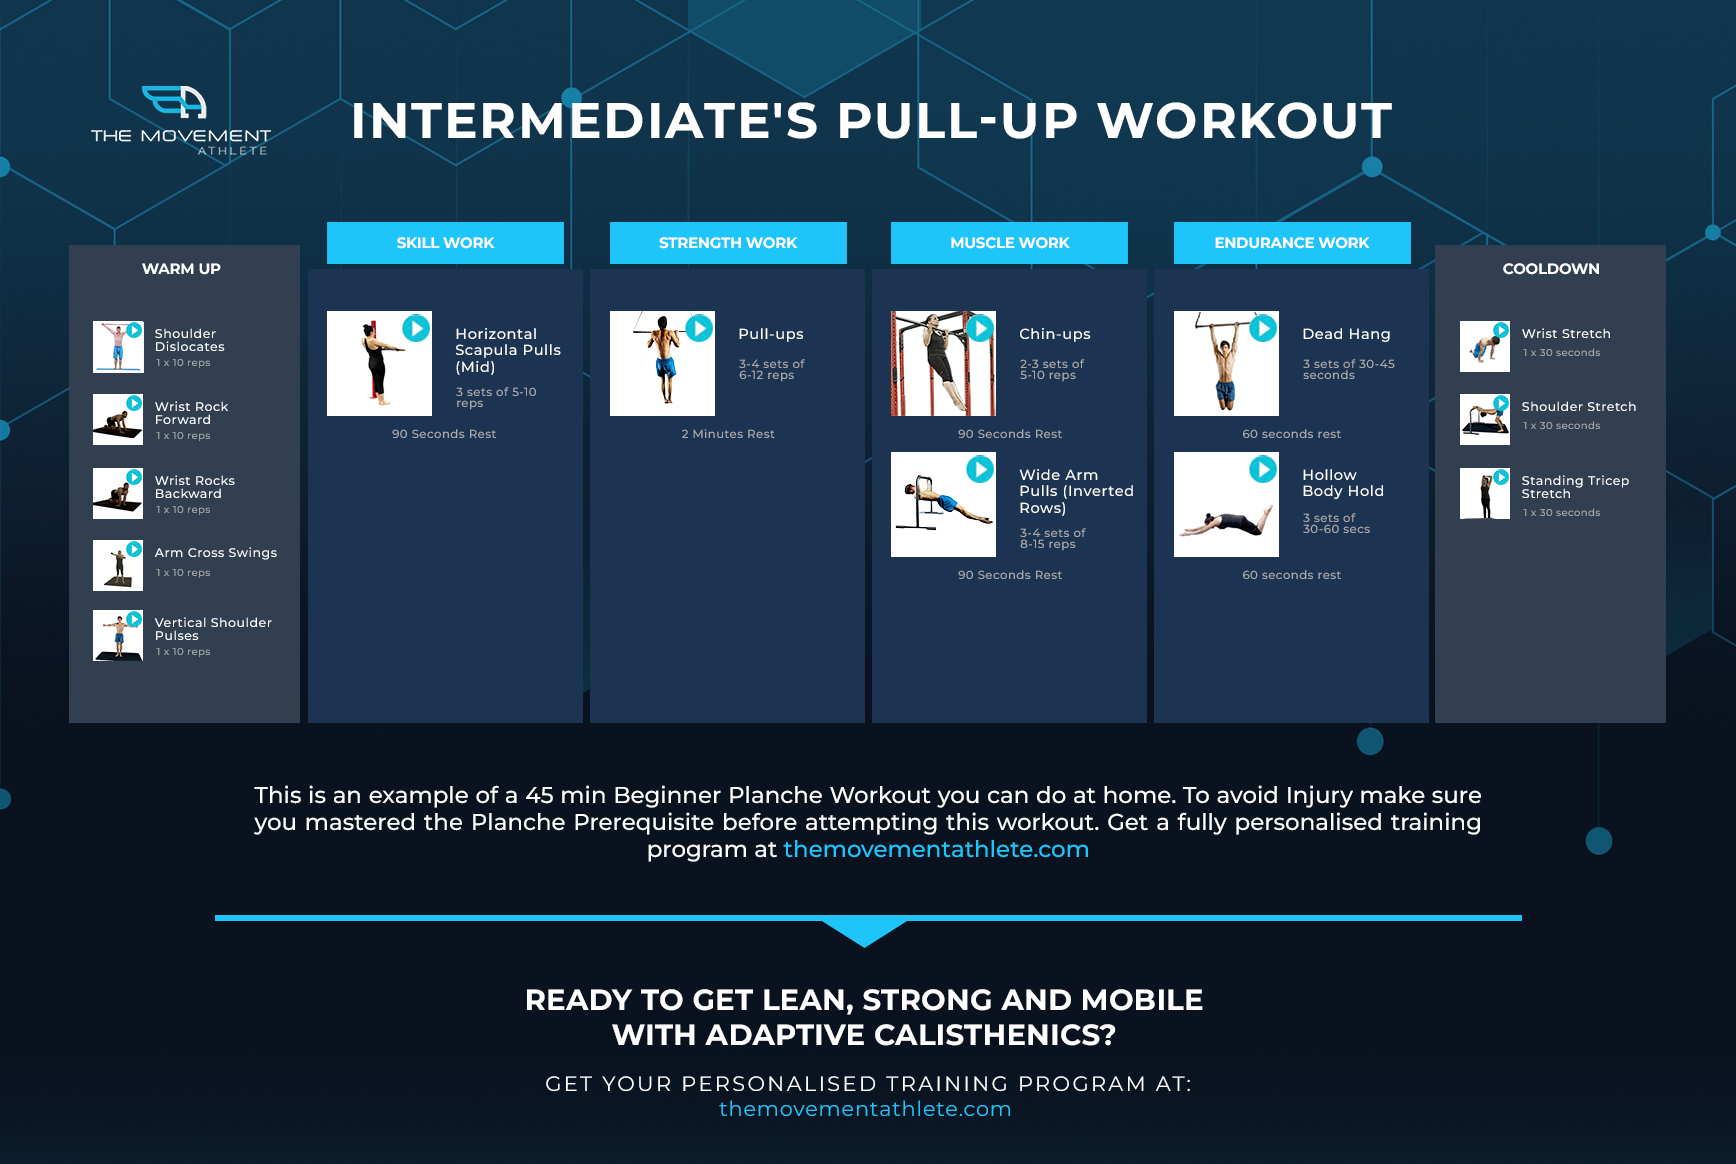
⚡️ Pull-up Workout
Key reminders:
- Always do your warm-up – Ultimate Guide to Calisthenics Warm-up
- Adjust the progression that challenging enough for you to hit at least the minimum range of reps and sets
- Don’t forget to also train your push-ups, dips, squats, core work, and other fundamentals!
- This is a sample workout. Nothing beats a personalized and adaptive workout like from The Movement Athlete
⭐️ Beginner’s Pull-up Workout
👊 Intermediate’s Pull-up Workout
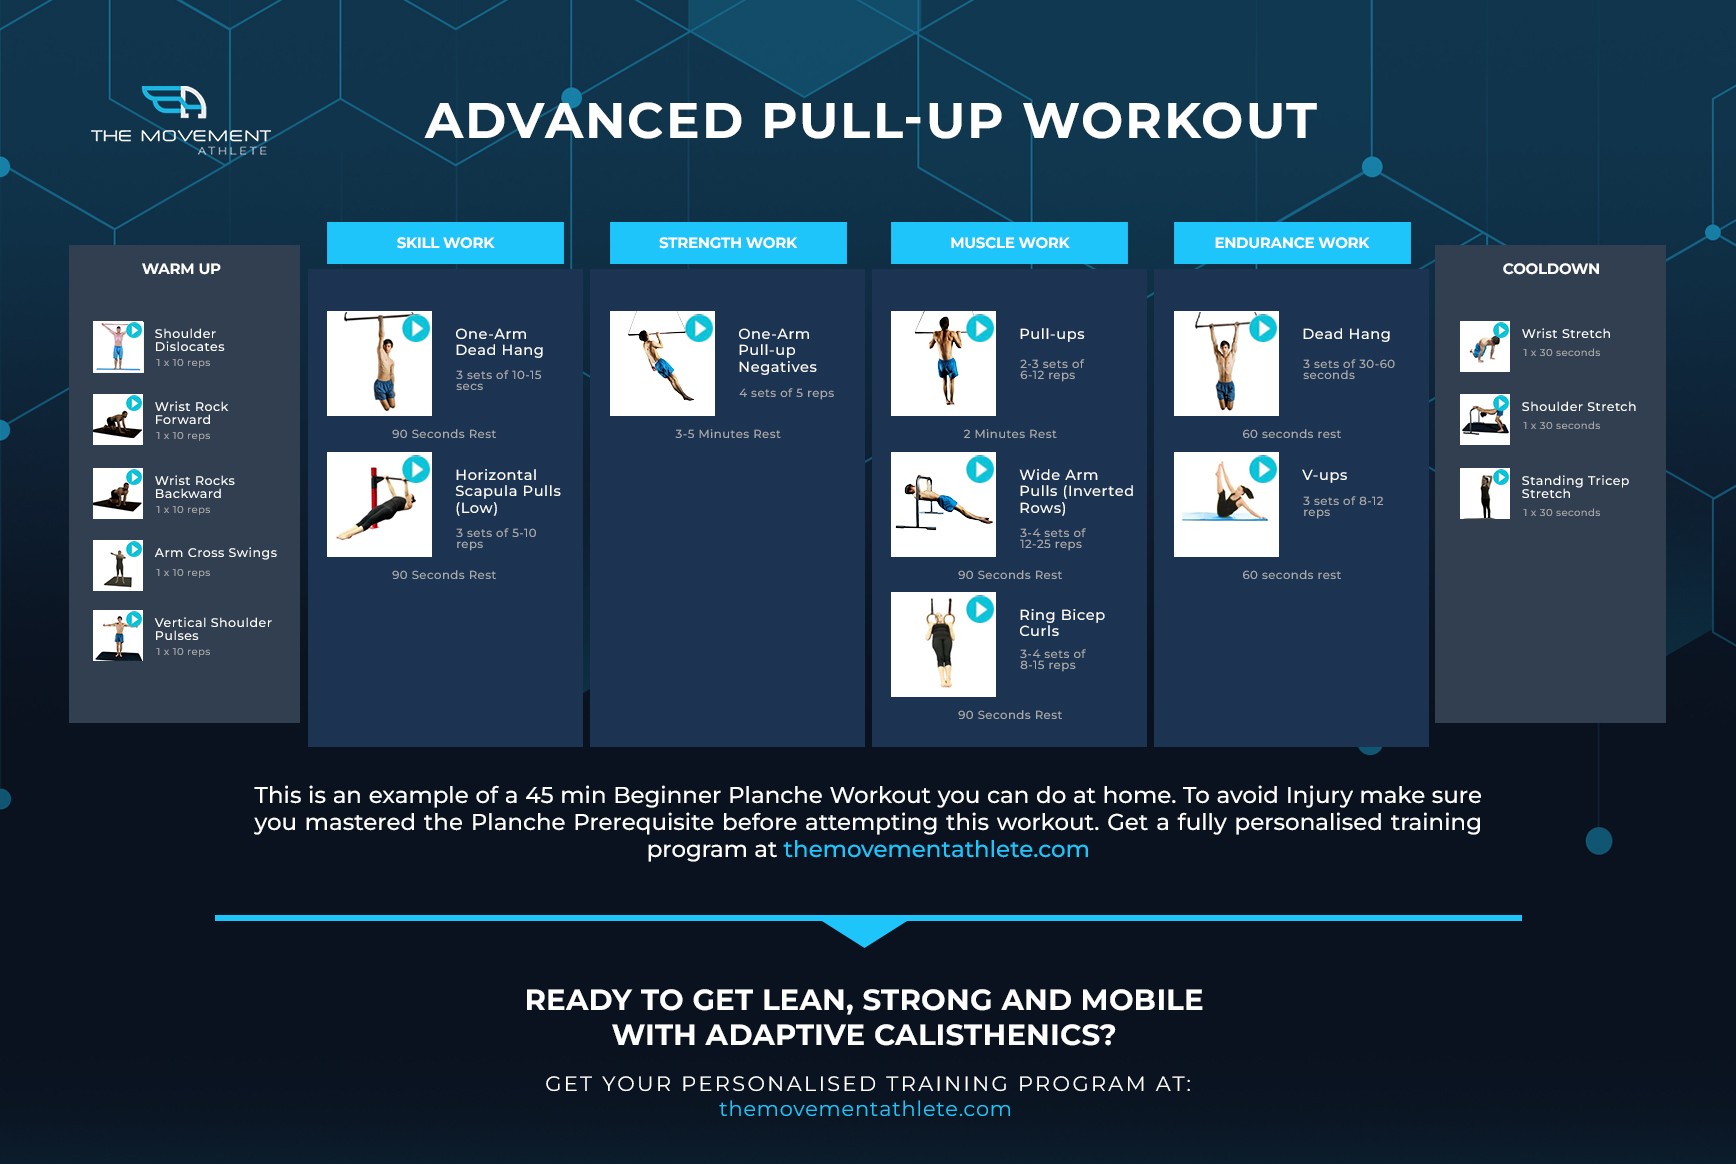
💪 Advanced Pull-up Workout
🧐Frequently Asked Questions
🔎 Am I too old to do pull-ups?
No one is too old to start learning pull-ups. However, older adults experience muscle loss or sarcopenia. This is just an inevitable fact of life. However, training your pull-ups can slow the process. If you’re at a later age (maybe 65+), make sure to prepare your body smartly by using the right progression and proper accessory exercises for the pull-ups.
Pull-ups are for everyone.
Everybody is different, so it’s important to listen to your own body and progress at your own pace.
More trained older adults can train at a faster pace.
Stories of 50+ athletes building strength here: 📍The Movement Athlete Success Stories
🔎 How to Incorporate Pull-ups into Your Workout Routine
This depends on what you are working on. But generally, pull-ups are included to also balance out your pushing exercises and to improve general pulling strength.
A general rule is to perform at 2 -3 times of pull-ups per week with sets ranging from 3 – 5 sets of 5 – 15 reps depending on your skill level. Of course, you have to choose the pull-up progression that suits your skill level.
In addition, you can also add 3 – 5 sets of 12 – 25 reps of inverted pulls for additional pulling strength and muscle size.
🔎 Can I substitute lat pulldowns for pull-ups?
Yes and No. This depends on your goals.
If you want to perform pull-ups, then there’s no substitute for the pull-up progressions. Research shows that while both exercises target the lats, the pull-up incorporates the full body more while lat pulldowns, regardless of variation, isolate the targeted muscle groups. This means that the strength you develop from lat pulldowns doesn’t directly transfer to pull-ups.
Generally, if you want to build more muscle, lat pulldowns are also excellent since you will not fatigue fast enough compared to pull-ups.
However, for building relative strength, and working towards advanced pulling skills, nothing beats the full range of motion of pull-ups with good form.
🔎 How many pull-ups should I be able to do?
This is a difficult question to answer because it depends on so many factors, such as your age, weight, gender, and training history. However, a good goal to aim for is being able to do at least 12 reps of bodyweight pull-ups. If you can do more than that, try adding weight to make the exercise more challenging or use other progressions.
There’s usually a difference in the suggested pull-up number for men and women. However, even with the obvious physiological differences, we recommend hitting the same number of reps. In fact, we recommend the same workout for men and women!
Men might progress at a faster rate compared to women, but women can also still rock the pull-ups. And we highly recommend doing so!
Read more here: 📍Women’s Calisthenics Guide
📌Final Thoughts
Learning how to do pull-ups can be daunting, but it’s definitely worth it. Not only are they a great way to build strength and improve fitness, but they’re also very convenient. With a little bit of practice and perseverance, you’ll be nailing pull-ups in no time!
Do you have any other tips or tricks for mastering pull-ups? Let us know in the comments below!
🔥 Need more help?
You can get overwhelmed by the volume of information needed to train your pull-ups. However, with The Movement Athlete app, we made it SIMPLE, PERSONALIZED, & ADAPTIVE for you.
Get started for FREE. Take our assessment and we will give you a personalised training plan and plenty of free workouts to get you started. Click here