👀 If you’re looking for an effective calisthenics push workout, you’ve come to the right place.
In this article, we will discuss:
👊 what a calisthenics push workout is
👊 how it can help you build muscle and get stronger
👊 & give you a sample for a solid calisthenics push workout
So let’s get started!
What are push exercises?
In the resistance training field, it became a common practice to split upper body exercises into two general categories based on mechanics: pushing and pulling.
For now, we’re going to focus on the upper body pushing and pulling exercises since we’d want to work on our legs on a separate day.
Check here for a solid leg workout: 📍Best Calisthenics Leg Workout
🔥Pushing exercises are movements that make you push an external resistance, such as a barbell, when doing a bench press or using your own body weight, such as when you’re pushing your body to perform a push-up. Push movements begin with the eccentric phase or when the prime mover muscles are lengthening. Think of your chest and triceps when doing a push-up.
🔥Pulling exercises are the opposite trains you to pull weight, such as pulling a barbell when performing a deadlift or pulling the whole body weight on pull-ups. They begin with a concentric phase or when muscles shorten. Think of your biceps and lats when you do a pull-up.
Read more here: 📍Calisthenics Pull Workout
Push and pull exercises complement each other. While we’re going to focus primarily on pushing for this article, it’s vital to include pulling exercises (and leg) in your overall routine too!
🤔What are the pushing muscles?
The push movement is primarily facilitated by the anterior muscle group. In a nutshell, the prime mover muscles for pushing are:
Let’s dive in a little bit deeper to understand each muscle group’s function.
⚡️Chest muscles
The chest muscles comprise of the large, fan-shaped pectoralis major and the small triangular pectoralis minor.
The pectoralis major is responsible for adduction, medial rotation, and horizontal extension of the arm. Basically, this means that it brings your arms closer to your body (adduction), rotates your arm inward (medial rotation), and moves your arm forward and backward (horizontal extension).
The pectoralis minor, on the other hand, is responsible for the depression of the shoulder girdle. This means that it pulls your shoulder down and forward.
⚡️Shoulder muscles
The shoulder muscles are a tri-headed muscle group with the anterior (front), lateral (side), and posterior (rear) deltoids. The anterior deltoid is the focus of this article since we’re discussing calisthenics push workouts.
The anterior deltoid is responsible for shoulder flexion and horizontal abduction of the arm. Shoulder flexion means raising your arm in front of you, while horizontal abduction means moving your arm out to the side.
The lateral deltoid is responsible for shoulder abduction, while the posterior deltoid is responsible for shoulder extension.
⚡️Tricep muscles
The triceps brachii is the muscle group at the back of your arm. It’s composed of three heads: the long head, medial head, and lateral head.
The primary function of the triceps brachii is to extend or straighten your elbow. This means that when you’re doing a calisthenics push-up, for example, your triceps are working to extend your elbows and keep them locked in place.
The long head of the tricep is responsible for shoulder extension, while the medial and lateral heads are responsible for elbow extension.
Now that you have a better understanding of the muscles used in calisthenics push workouts, you’ll know what you need to focus on and be engaging when performing a calisthenics push workout.
😱Why is it important to do both push and pull exercises?
But first, let’s check out the importance of training both movement patterns.
In one study, it has been found that among adults who enjoy an active lifestyle, both males and females tend to have greater pushing strength than pulling strength. While there are many factors affecting the biases on pushing movements, it’s pretty common to have stronger pushing muscles.
Aside from pushing movements being very common, the push muscles are often known as the “mirror” muscles or the muscles which are visible when checking your gains in the mirror. This is why many people tend to overtrain and focus too much on pushing mechanics.
Training a push-pull split routine offers a well-rounded approach that can help to avoid any muscular imbalances and prevent injuries. It’s important to have a well-balanced routine to not only achieve your fitness goals but also enjoy the process of working out!
Read more: 📍How to Avoid Muscle Imbalances
🏆What are some benefits of bodyweight push workouts?
Calisthenics, also known as body-weight training, is a form of exercise that uses your own body weight and gravity as resistance. This type of training can be done anywhere and doesn’t require any special equipment.
✊Push-pull split
You might be confused about the push-push split that we’re talking about.
A push-pull split is a type of upper body workout routine that splits the training focus between “push” muscles and “pull” muscles.
So for each session, you will only either perform pushing exercises OR pull exercises. Leg training is usually performed on a separate day.
Here’s a quick example of a push-pull workout in a week:
Mon: Push
Tue: Pull
Wed: Rest/legs
Thurs: Push
Fri: Rest/legs
Sat: Pull
Sun: Legs
✊Benefits of push-pull training
Higher training frequency
One benefit of the push-pull split is that you can train each muscle group more frequently.
This is because you’re only training half of your upper body muscles in each session. As a result, you can have more sessions dedicated to training your upper body without overtraining any particular muscle group.
In other words, the push-pull split allows you to hit the gym more often while still giving your muscles enough time to recover.
Shorter workout sessions
Another benefit of the push-pull workout split is that you can keep your workout sessions shorter. This is because you’re only training one group of muscles per session. So if you’re pressed for time, the push-pull split might be a good option for you.
Effective muscle-building workout for trained athletes
The push-pull split is also an effective muscle-building workout for trained athletes. This is because the split allows you to train each muscle group with more frequency and intensity.
In one study, it was found that trained athletes who performed a push-pull split routine gained more muscle mass than those who performed a full-body routine. This can be attributed to the higher training frequency and volume you can perform through a split routine.
✊Disadvantages of split training
Can be too taxing
One disadvantage of split training is that it can be too taxing on the central nervous system. This is because you’re constantly working out and not giving your body enough time to recover.
This can lead to overtraining and eventually lead to injuries. So if you’re new to training, it’s important to opt for a beginner-friendly approach such as full body training.
Scheduling is difficult when missed a session
Missing a workout session when running a split can suck. This is because you might have to wait a few days before you can train that particular muscle group again.
This can be frustrating for some people who are trying to stay consistent with their training.
If you do miss a session, it’s important to not let it derail your entire routine. Just pick up where you left off, and don’t beat yourself up over it. At the end of the day, consistency is key to seeing results from your training.
✊Full body workout
On the contrary, the full body workout is exactly what it means. It trains the full body, both push and pull mechanics and even legs, in a single session.
A full-body workout can be done up to thrice a week, with each session lasting for about an hour to an hour and thirty.
Here’s a quick example of how you can plan your full body workouts in a week:
Mon: Full Body
Tues: Rest
Wed: Full Body
Thurs: Rest
Fri: Full Body
Sat: Rest
Sun: Rest
✊Benefits of full body training
Easy to schedule
The biggest benefit of full body training is that it’s easy to schedule. You only need to train three times a week and each session lasts for about an hour. This makes it a great option for busy people who don’t have the time to go to the gym every day.
Holistic development
Another benefit of full body training is that it leads to holistic development. This is because you’re working out your entire body in each session.
As a result, you’re less likely to develop imbalances, and you can see results in all aspects of your physical fitness. It’s especially beneficial for those who often skip leg training.
Whatever routine structure you’re following, please don’t skip your legs!
Great for beginners who are new to working out
Lastly, full body training is great for beginners who are new to working out. This is because it’s a simple and easy routine to follow. The training sessions are also not frequent enough.
Don’t worry about the effectiveness of a full-body workout. A study on full-body vs splits shows that both approaches are effective for developing strength and muscles on untrained individuals.
If you’re just starting out, I would highly recommend following a full-body workout routine.
✊Disadvantages of full body training
Longer workout sessions
One disadvantage of full body training is that the workout sessions can be longer. This is because you’re working out your entire body in each session.
As a result, the sessions can last for up to an hour and thirty minutes. This might not be ideal for busy people who don’t have a lot of time to spare. If you need to spread out your training session, then a full-body routine won’t be ideal for you.
Taxing on training capacity
Another disadvantage of full body training is that it can be taxing on your training. This means that if you’re not careful, you might overtrain and eventually get injured.
Because of the length of your workout with minimal frequency, it’s easy to underestimate your workout. It’s important to listen to your body and take rest days when needed. Overreaching is a common issue among people who follow a full body routine.
🤔Which one should you choose: full or split?
The best workout routine is the one that you can stick to consistently. If you have the time and energy to commit to a split routine, then go for it. If you enjoy low-frequency training or are a beginner, then opt for full-body training.
Both options are excellent for developing strength and muscle.
At the end of the day, it all comes down to personal preference and what works best for you. There’s no wrong answer when it comes to choosing between a full or split
For a comprehensive guide on training structure, read here: 📍Full-body vs Split: Which one is for you and which is a waste of time
If ever that you’re interested in a push-pull split, then let’s get on to the top exercises you will need for your push workout.
✨3 Best Calisthenics Push exercises
🔥Dips
Dips are the squats for your upper body. It’s the king of pushing exercises. If you haven’t done them, then you better start including them in your workout routine!
The movement primarily targets your triceps, chest, and shoulders. Dips are a great exercise to build strong pushing mechanics, and they can be done anywhere as long as you have something to dip on.
You can also move to ring dips for added challenge.
Read more: 📍The Ultimate Ring Dip Guide
How to perform:
-
- Grab the edge of a bench or chair with both hands (ideally, you have a dip station.)
- Extend your legs out in front of you and cross them at the ankles.
- Slowly lower your body down until your elbows are at a 90-degree angle.
- Once you reach the bottom, use your triceps to push yourself back up to the starting position.
- Repeat for repetitions.
Coaching pointers:
-
- Shoulders depressed – pushed away from your ears
- Scapula retracted – shoulder blades pinched together
- Lockout arms at the top – this is a common concern, but it doesn’t negatively impact your elbows. In fact, straight-arm lockout strengthens the elbows!
- Elbows tuck to the body
- Straight body alignment
- Core engaged
- Posterior pelvic tilt
How to adjust intensity
👍 Easier = use band/leg assistance, eccentrics
👊 Harder = add weights, perform ring dips,
✊ Lean forward = more chest & shoulder engagement
👆Remain more vertical = emphasise tricep activation
🔥Handstand push-ups or Pike push-ups
Freestand handstand pushup
Pike push-up
This is an excellent exercise to develop shoulder and tricep strength. It’s a calisthenics push exercise that will also help you build body control and total upper body strength.
The handstand push-up seems like an impossible move for many, but don’t worry. It has 📍progressions such as the pike push-ups so you can slowly build overhead, pushing strength towards the hspu.
Facing the wall vs Against the wall handstand push-ups
A common concern for the hspu is the body position: should we face the wall or should our backs be against the wall?
Facing the wall simulates the range of motion and movement pathway for the “TRUE”, strict handstand push-ups. Notice the forward lean as you go deeper into the range of motion. When your facing the wall, you’re required to follow that range that translates to the freestanding variation better.
The against-the-wall handstand is more prone to the dreaded banana handstand push-ups. However, if you follow the correct protocols and execution, the against-the-wall hspu can help you bridge the strength needed from pike push-ups to wall hspu’s. The jump between the two exercises is drastic. The against the hspu helps you get more balance and use the larger shoulder muscles while you are still learning to perform the exercise.
Both approaches serve their own purpose. Choose what fits your current goal and situation.
Freestanding handstand push-ups vs wall handstand push-ups
The freestanding variation is obviously a different monster of an exercise. It combines the strength component and a high level of balancing when moving through the range of motion. While it’s something many people strive to achieve, it may be something you’re NOT interested in pursuing.
The main reason why you might not want freestanding hspu in your routine is because of the high demand for balance. The balance factor can limit the number of reps you can do, which means less potential for strength and muscle.
If you are purely aiming for strength and muscle, opt for the wall-assisted variation. You can grind out more reps and sets without getting restricted with the balance when fatigue sets in.
If you want to master the freestanding variation as well, go for it!
How to perform:
For pike push-ups:
- Start in a downward dog position with your hands on the ground and your butt up in the air.
- From there, lower your head down to the ground between your hands and then press back up.
- Repeat for repetitions.
For handstand push-ups:
- Start by kicking up into a handstand against the wall.
- Once you’re in a stable handstand position, lower your head down to the ground until your hair brushes lightly on the floor.
- Push back up to the starting position.
- Repeat for repetitions.
How to adjust intensity
For pike push-ups:
For handstand push-ups:
🔥Push-ups
This calisthenics staple exercise is a great way to develop your chest, shoulders, and triceps. It’s a beginner-friendly exercise that you can do anywhere.
Many beginners (even intermediate and advanced athletes!) fail to perform the correct technique. Even though it’s a basic exercise that most people know, there are some techniques that you need to master to get the most out of your push-ups.
Avoid the incorrect technique so you can maximise your gains from push-ups while avoiding injuries. Read more here: 📍10 Common Push-up Mistakes that are Sabotaging Your Gains!
If you’re a more experienced athlete who’s hesitant about the good, old push-ups, recent scientific literature comparing push-ups and the bench press might change your mind. The study shows that push-ups ( with the equated training volume & intensity) can match the strength and muscular gains bench press has to offer.
Of course, there’s the obvious limitation of absolute strength development. However, if you’re looking into absolute strength through calisthenics, then a hybrid approach of weighted calisthenics is something you should consider. Plus, there are tons of push-up variations you can work with for different goals as well!
Read here: 📍15 Challenging Advanced Push-up Variations
How to perform:
- Start in a high plank position with your hands placed slightly wider than shoulder-width apart and feet hip-width apart.
- Keeping your core engaged, lower your body down until your chest is an inch from the ground.
- Pause for a second and then push back up to the starting position.
- Repeat for repetitions.
Coaching pointers:
- Shoulders depressed – pushed away from your ears
- Scapula retracted – shoulder blades pinched together
- Lockout arms at the top – similar to the dips, lock them out for better elbow preparation
- Elbows tuck to the body
- Straight body alignment
- Core engaged
- Posterior pelvic tilt
How to adjust intensity
👍 Easier = inclined
👊 Harder = adding pauses, one-arm push-up progression, ring push-ups, weighted push-ups
🔥Special mention: Tricep extensions
Although compound exercises, such as the ones mentioned above, are excellent enough stimulate the shoulders and chest muscles, your tricep muscles might still benefit from a tricep isolation exercise.
The bodyweight tricep extension is a type of push-up that shifts the emphasis to the triceps so you can help them build more training volume while getting less assistance from the bigger muscle groups.
How to perform:
- Begin in a regular push-up position.
- Lower your elbows to the floor.
- Push through your triceps to reverse the motion.
- Repeat for repetitions.
Coaching pointers:
- Straight bodyline
- Core engaged
- Posterior pelvic tilt
- Elbows close to the body
- Hands shoulder-width apart
- Use rings alleviate possible shoulder or elbow irritation
How to adjust intensity
👍 Easier = inclined, elbows further away from the mid-section
👊 Harder: on the floor, on rings, elbows closer to the mid-section
🎯Bodyweight Pull Workout Protocols
🔎What equipment do I need for a push calisthenics workout?
For an effective calisthenics push workout, you simply need a dip station and a wall.
Dip station
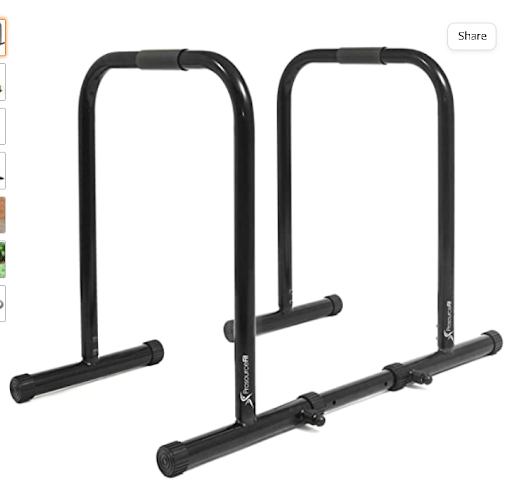
Dip stations are parallel bar simulators that allows you to train the dip movement efficiently. There are many types and forms. You can find a power rack that also has a pull-up bar as well.
If you don’t have access to this, you can always opt for two sturdy pieces of furniture to do the dips on.
Wall
A solid wall that can hold your bodyweight is good enough. Be sure to find something rigid because you don’t want to kick through your wall.
Optional: gymnastics rings
For more advanced athletes, gymnastics rings are a great option to add intensity to ANY pushing exercise. For example, if you’re very comfortable with regular dips on a dip station, moving to the ring dips will greatly amplify the whole upper-body activation.
Rings are unstable; hence, you first need to fully contract and control the whole upper body to stabilize yourself on rings. This demands greater strength. From push-ups to dips to tricep extensions, all of these turn into advanced exercises when done on rings.
Key pointers:
- Do your proper warm-up – 📍The Ultimate Calisthenics Warm-up Guide
- Follow good exercise techniques and forms – Refer to the exercise guide above
- Choose the progression appropriate for your skill level –
- Combine this push workout with pull + leg sessions on separate days
- 2-3 times per week along with Push & Leg workouts
🔥Main workout
| Exercise | Sets | Reps | Rest |
| Handstand push-up/ Pike push-up | 3- 4 | 4 -12 | 3 mins |
| Dips | 3-4 | 8 -15 | 2 mins |
| Push-ups | 3 | 15 -30 | 90 secs |
| Tricep extensions | 3 | 8 -15 | 90 secs |
If you are looking for an Advanced Push Workout, we also highly recommend watching this video:
📌Frequently Asked Questions:
🔎Can I do separate core workouts?
Yes, of course. You can add a moderate intensity-core workout prior to your main workout for additional core activation. Or you can add them at the later part of your training so you can keep your ab workout intensity high.
Read more here: 📍How to Build 6-pack Abs
🔎Does push-pull split work with calisthenics?
The calisthenics push-pull split is a great way to organise your workouts if you want to focus on building strength and muscle. If you can do them in weightlifting, you can also surely do them with bodyweight exercises.
Just like training with weights, you need to sustain a progressive overload approach in your workouts. This means keeping each session gradually more difficult than the previous one.
🔎Why is calisthenics a good workout for pushing?
Calisthenics, also known as body-weight training, is a form of exercise that uses your own body weight and gravity as resistance. This type of training can be done anywhere and doesn’t require any special equipment.
🔎What if I can’t do these exercises?
If you have followed the steps and still fail to perform the exercises correctly, then you simply have to accept the fact that maybe you’re not yet prepared to do the exercise. Lack of strength is a common issue.
If so, consider using an easier progression of the exercise. For example, if you still can’t do the push-ups, then perform inclined push-ups.
Again, if you’re someone who’s struggling with all the exercises in this push workout, you should take a step back and work on your calisthenics fundamentals first.
🧐Where to begin?
Knowing which programs will work for you can be a daunting task. While this Push workout and Leg training can produce amazing results, it’s still best to follow a PERSONALIZED training approach.
Personalization offers a workout that’s designed just for you based on your skill level, needs, goals, and lifestyle.
If this is something you’re interested in, check out our free trial of a personalized calisthenics training program.
BEGIN YOUR 7-DAY FREE TRIAL CALISTHENICS TRAINING NOW!
📌Takeaway
That’s all for this calisthenics push workout! This workout is great for those who are looking to build strength and muscle. Remember to master the techniques of each exercise before progressing to a more difficult variation. And as always, focus on quality over quantity.
Do you have any calisthenics questions? Leave a comment below!
We’re looking forward to hearing your thoughts!