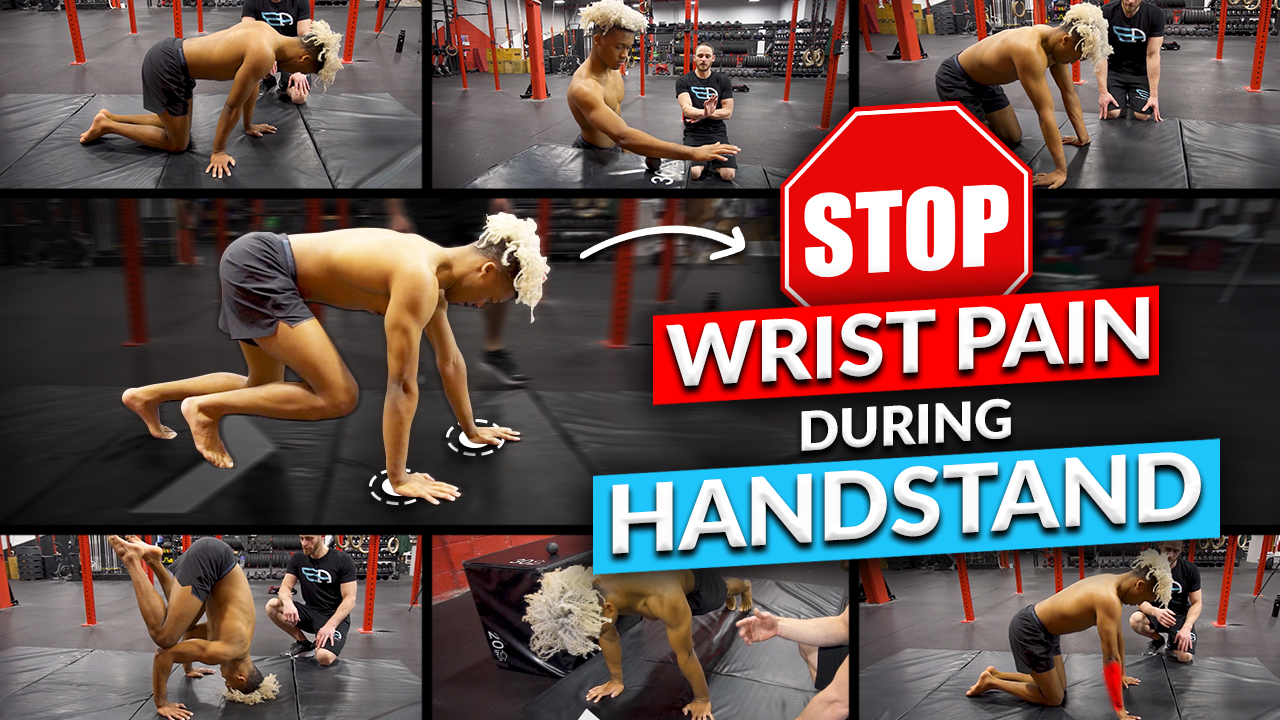
Have you ever wondered how to conquer that nagging issue of wrist pain during your handstand practice?😱🤸
Wrist pain during 📍handstands is a common concern that can significantly hinder one’s progress in mastering this impressive skill. Your wrists are the unsung heroes that bear the weight of your entire body during those impressive handstand moments.
The primary reason behind this discomfort often boils down to poor wrist flexibility. During a handstand, your wrists are subjected to substantial stress and pressure when supporting your entire body weight.
Therefore, they must be flexible and able to withstand this load comfortably.
In this article, we will shed light on the importance of wrist strength and mobility, ensuring you’re not just ready but raring to kick off your handstand journey safely and effectively.
😢Most Common Causes of Wrist Pain During a Handstand
Wrist pain during a handstand is a common issue many individuals encounter, often resulting from the significant weight-bearing demands on the wrists. Proper wrist conditioning, alignment, and gradual progression in handstand practice are essential for reducing the risk of discomfort or pain. Here are some common causes of painful wrists when doing handstands:
- 👎 Inadequate Wrist Strength: Weak wrist muscles, particularly the wrist flexors and extensors, can lead to discomfort during handstands as they struggle to support the body’s weight.
- 👎 Improper Alignment: Incorrect hand placement or handstand technique can result in the wrists being subjected to excessive or uneven pressure, leading to pain.
- 👎 Limited Wrist Mobility: Restricted wrist mobility can make it challenging to maintain the correct alignment during a handstand, causing discomfort as the wrists bear the load.
- 👎 Overuse or Overtraining: Excessive handstand practice without sufficient recovery time can lead to overuse injuries in the wrists, resulting in pain.
- 👎 Inadequate Warm-Up: Skipping a proper wrist warm-up before performing handstands can increase the risk of wrist pain. Warm-up exercises prepare the wrists and reduce the likelihood of strain.
- 👎 Medical Conditions: Underlying conditions such as carpal tunnel syndrome or arthritis can contribute to wrist pain during handstands, especially if left unmanaged.
- 👎 Improper Progression: Attempting advanced handstand variations without first mastering the foundational handstand can place undue stress on the wrists, causing discomfort.
Related article: 📍The Ultimate Guide to Wrist Mobility for Calisthenics
🔥The Significance of Wrist Preparation
📍Wrist preparation is a critical step in your handstand training journey. While many people dive headfirst into handstand training without considering their wrist health, this can lead to injuries.
Compared to ankles, wrists are smaller and less accustomed to bearing the weight of your entire body. Therefore, it’s crucial to invest time and effort in preparing your wrists for the demands of handstands.
For part one of handstand training, read our article on 📍Perfecting the Pose: Handstand Shaping Drills for Mastery
🎯Wrist Assessment
Wrist assessment for handstands is a fundamental step in ensuring a safe and successful handstand practice. Proper wrist mobility, strength, and flexibility are crucial for maintaining balance and achieving a handstand with less or without wrist pain.
Here are some critical components of a wrist assessment for handstands:
- ✔️Range of Motion: Evaluate the range of motion in your wrist joints. This includes checking your ability to flex (bend your wrist forward) and extend (bend backward). You can also assess radial and ulnar deviation, which are side-to-side movements of the wrist.
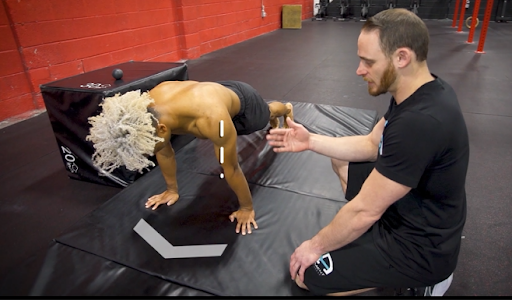
- ✔️Strength: Test the strength of your wrists by performing exercises that target wrist stability. This can include wrist push-ups, pushing your body slightly off the ground while keeping your wrists aligned.
- ✔️Pain and Discomfort: Pay close attention to any pain, discomfort, or sensations of instability during the assessment. These could be signs of existing issues or weaknesses that need addressing.
- ✔️Warm-Up: Always ensure your wrists are adequately warmed up before conducting the assessment. Gentle wrist circles and stretches can help prepare the joints for evaluation.
- ✔️Progressive Overload: If you’re planning to start or advance your handstand practice, progressively increasing the intensity of your wrist exercises over time is advisable. Gradual adaptation is key to avoiding overuse injuries.
💥Wrist Preparation Exercises
The wrists are among the most utilized joints in our bodies, playing a fundamental role in countless daily activities, athletic endeavors, and exercises.
Without proper care and attention, they can become susceptible to discomfort, pain, and even injury. Here are a set of exercises to improve wrist health:
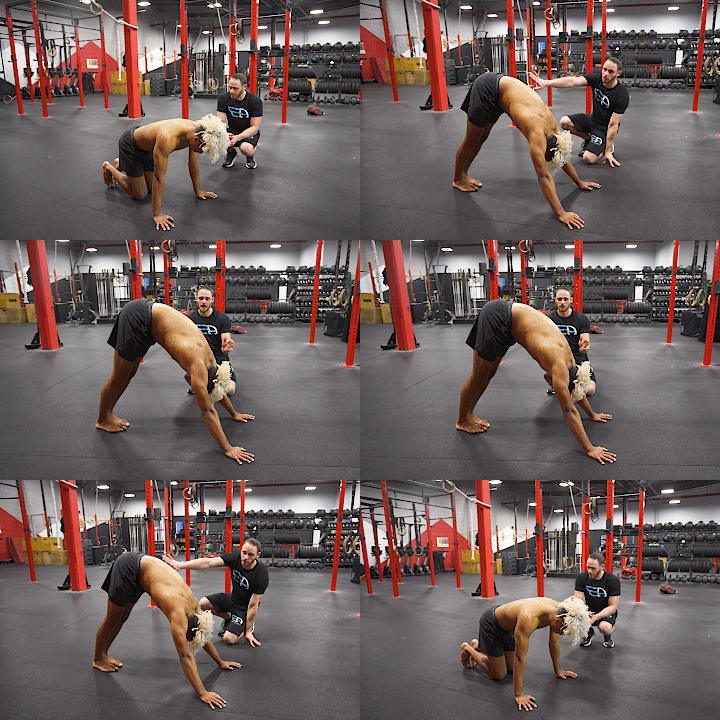
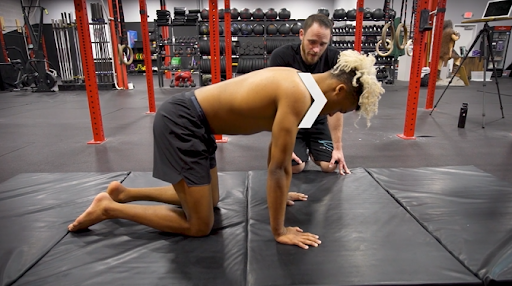
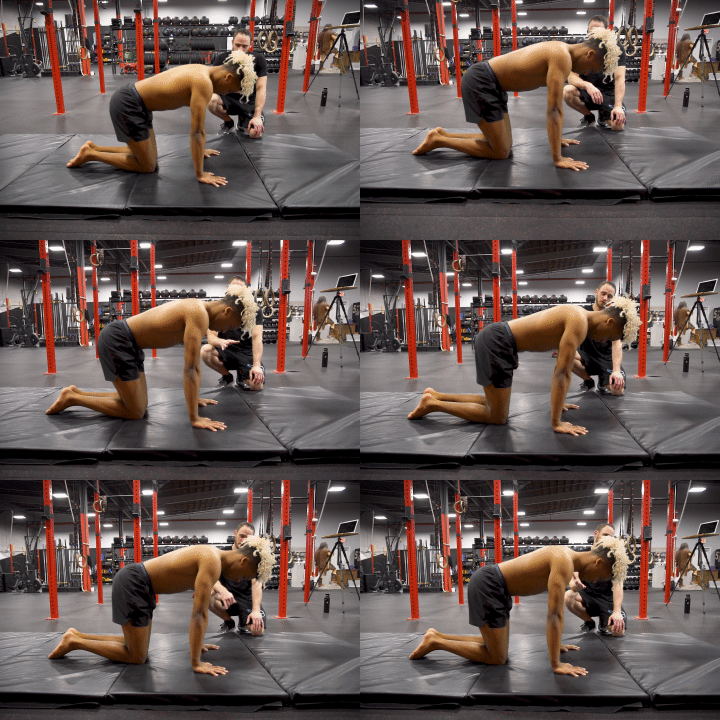
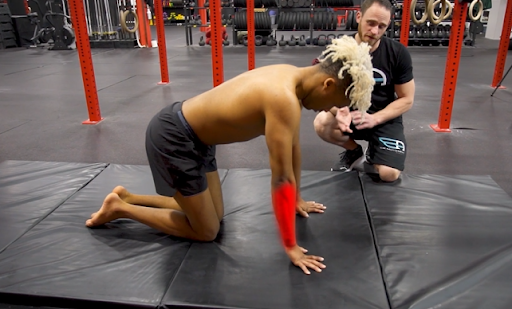
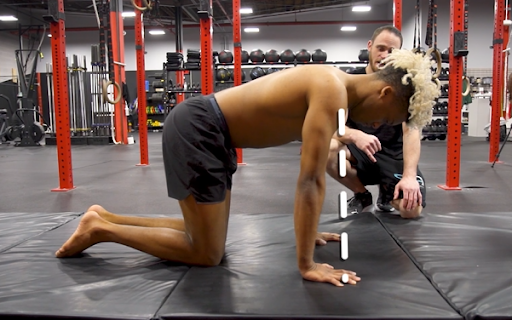
1. 🏆Downward Dog Position
While in a dog position, focus on one hand at a time. Keep your hand flat on the floor and lean forward, aiming for a 90 to 80-degree angle. You must improve your wrist mobility if you feel a stretch in the forearm or wrist tightness. Assessing each hand independently is vital, as you might have imbalances.
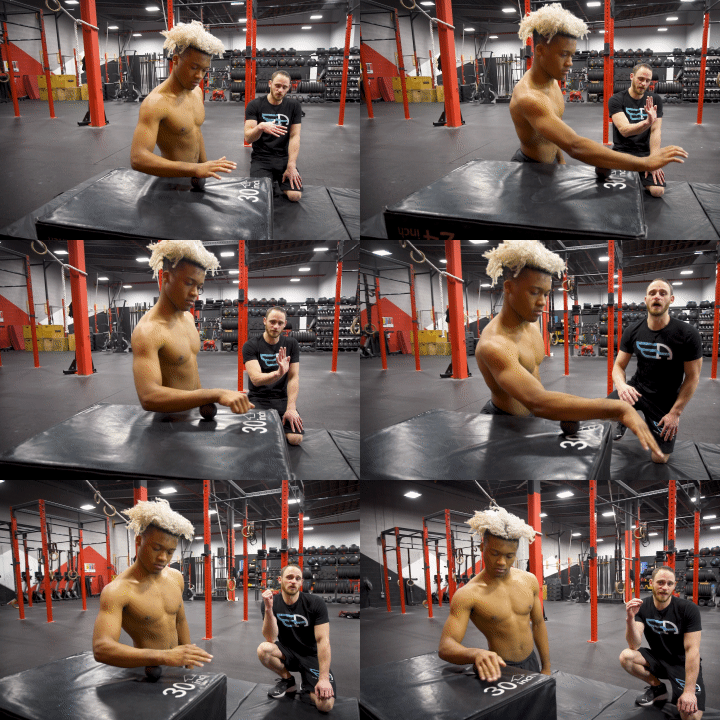
2. 🏆Lacrosse Ball Roll-Out
The lacrosse ball roll-out is a highly effective wrist preparation exercise to relieve tightness and boost blood flow in the forearm muscles. This can significantly improve wrist mobility and reduce discomfort.
To perform this exercise, start by finding a comfortable seated position with your forearm resting on a stable surface. Position the lacrosse ball near your elbow, focusing on the extensor and flexor muscles of the forearm. Apply moderate pressure to the ball and roll it up and down along the muscle fibers.
Incorporating circular motions can further address different angles and areas of tension. Flex and extend your hand and wrist while rolling the ball for added benefits. Pay close attention to areas of tightness, as these often require extra focus.
Perform the roll-out for about 1-2 minutes on each forearm, gradually increasing pressure as the muscles relax. Incorporating these details into your wrist preparation routine can improve wrist mobility and provide greater comfort during activities that stress the wrists.
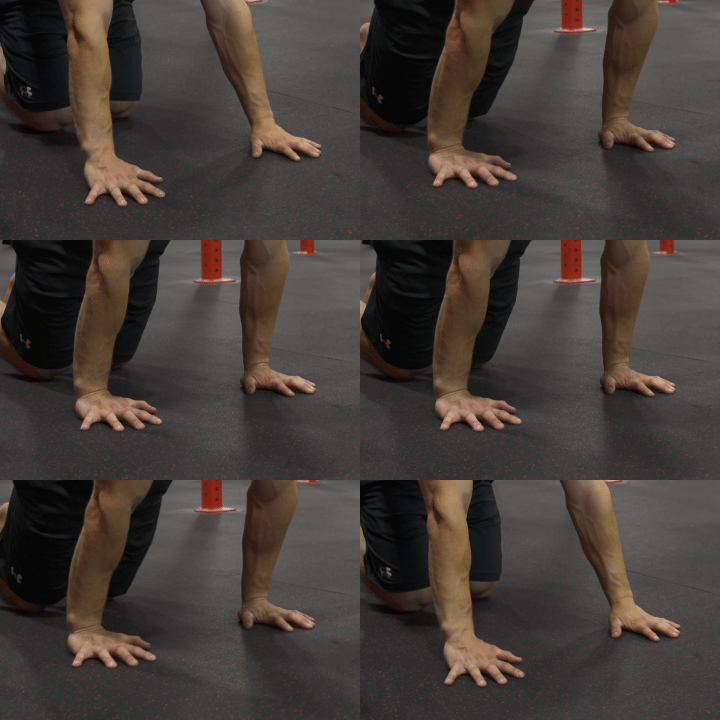
3. 🏆Wrist Stretches
Wrist stretches improve wrist mobility and flexibility and reduce strain and discomfort during and after handstand practice.
Among the effective wrist stretches, forward-backward rocking involves gentle, controlled motion of the wrists by rocking the body forward and backward. Stretching with fingers facing the knees targets wrist mobility from a different angle, and holding stretches is another method to enhance wrist flexibility gradually.
Consistency is vital, and incorporating these stretches into your warm-up and cool-down routines can lead to noticeable improvements in wrist mobility, making handstands more comfortable and less prone to wrist pain.
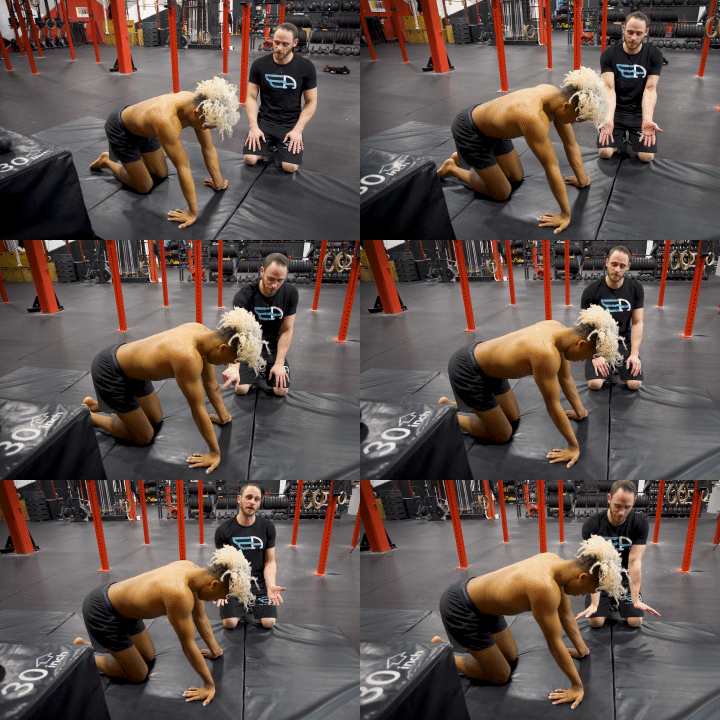
Wrist stretch Fingers Backward
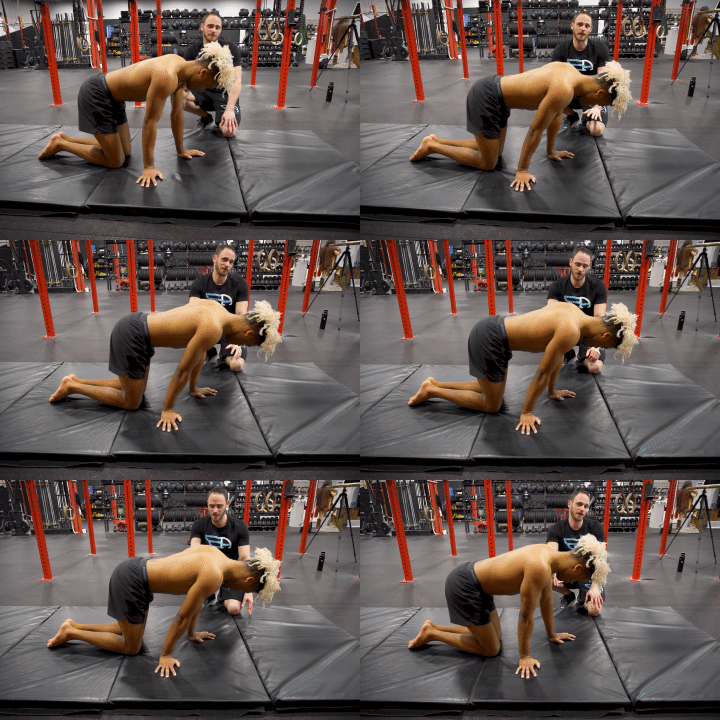
Wrist stretch Single Hands Forward
Add traction exercises by pulling your hand away from your wrist to counterbalance the compression during handstand practice.
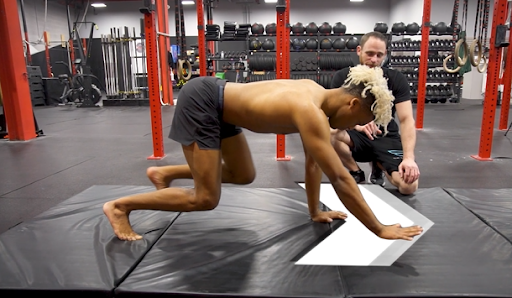
4. 🏆Quadruped Walk
This exercise helps you progressively introduce weight onto your wrists while maintaining wrist extension.
As you move forward in this position, your wrists bear the weight of your body. This weight-bearing action is foundational to building wrist strength and resilience for more advanced hand-balancing movements.
As you walk forward, you not only rely on your wrists for support but also actively engage the muscles in the entire front, side, and interior sides of your forearms and hands. This engagement is vital for maintaining wrist extension throughout the exercise.
Wrist extension involves keeping the back of the hand aligned with or extending beyond the forearm, creating a straight line from the wrist to the fingertips. This is a critical aspect of wrist stability in handstands, as it distributes weight more evenly and reduces the risk of wrist strain.
By incorporating quadruped walking with a focus on wrist extension into your routine, you can better prepare your wrists for more advanced hand-balancing movements and reduce the risk of discomfort or injury.
5. 🏆Planche Leans
The primary objective of planche lean is to introduce and gradually increase the weight placed in front of the hands. With each repetition, you must progressively shift your body’s center of gravity forward, leaning further in front of your hands.
This action intensively engages the core, shoulders, and triceps, contributing to developing the strength and endurance needed to hold the full planche position.
Keep your palms flat on the floor throughout the movement. This is a crucial aspect of the exercise, as it ensures proper weight distribution and helps maintain wrist stability. Any lifting of the palm from the floor can lead to imbalanced weight distribution and strain on the wrists, which can be problematic for executing the planche safely and effectively.
By consistently incorporating planche leans into your training regimen, you can improve your range of motion, build muscular strength, and enhance your wrist stability.
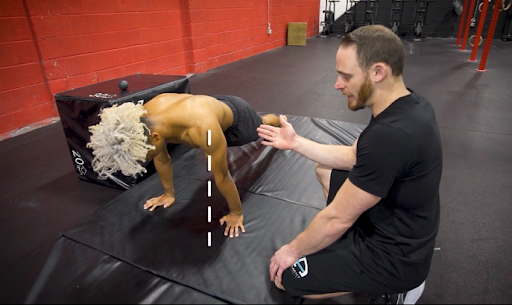
6. 🏆Headstands and Tripod
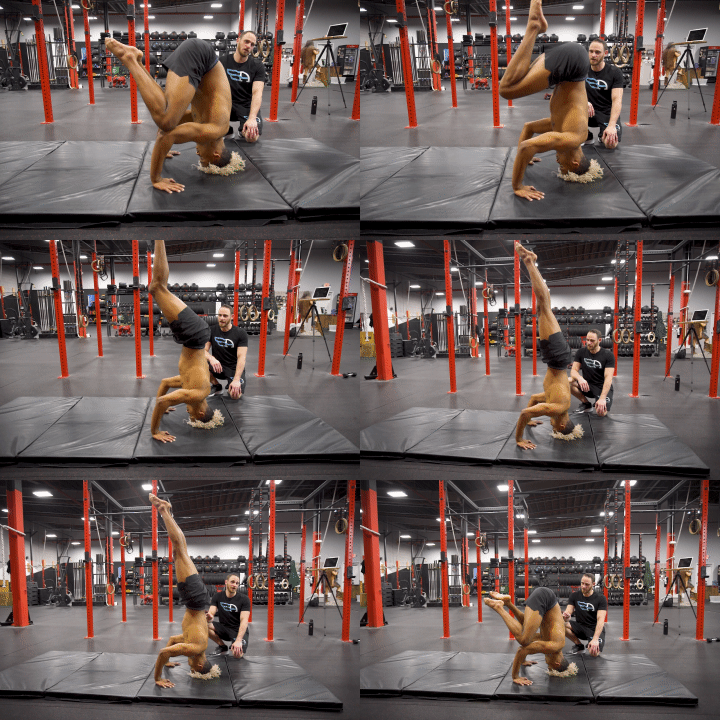
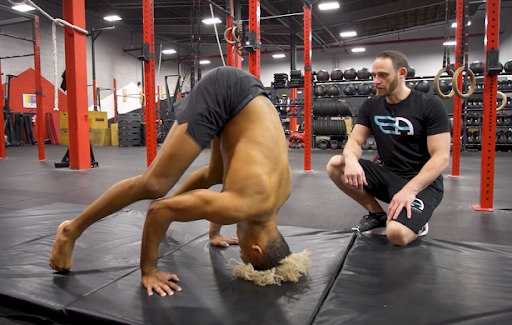
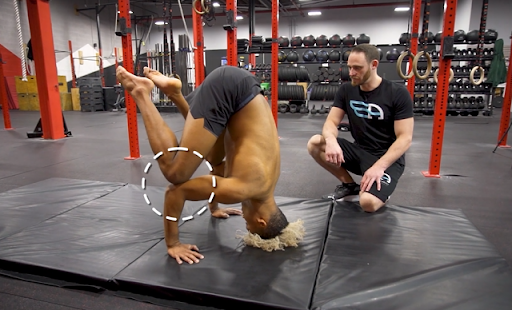
Headstands and tripod exercises mimic handstand wrist positioning, allowing you to test and build strength and mobility. These movements help you develop wrist strength, balance, and alignment, which are crucial for mastering handstands. They closely mimic the wrist positioning of a full handstand, making them effective building blocks.
Additionally, these exercises serve as mobility tests, allowing you to gauge your readiness for handstand training and identify areas that may require further development.
A more advanced variation, the straight-body headstand, adds complexity by requiring you to maintain a straight body position. While it doesn’t bear full body weight, it bridges the gap between the initial tripod and a complete handstand, helping you progressively build strength and balance.
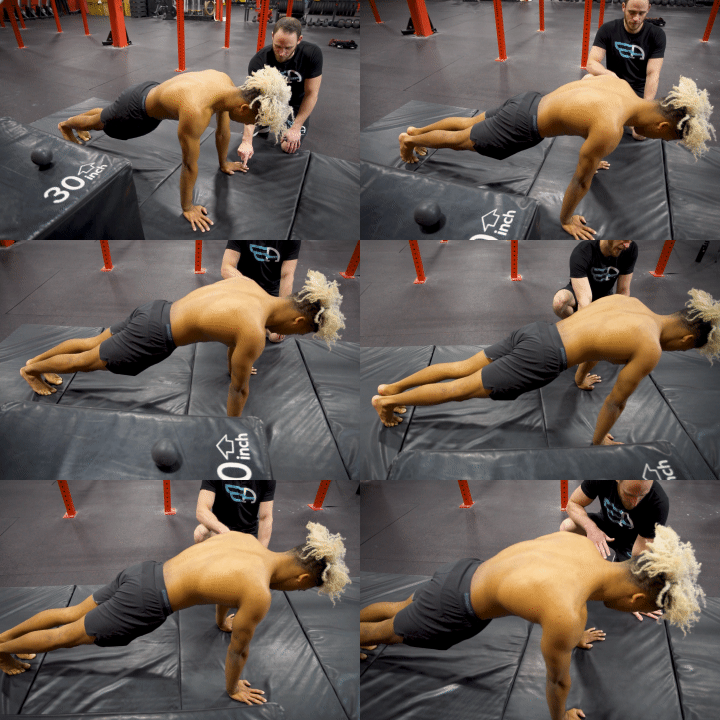
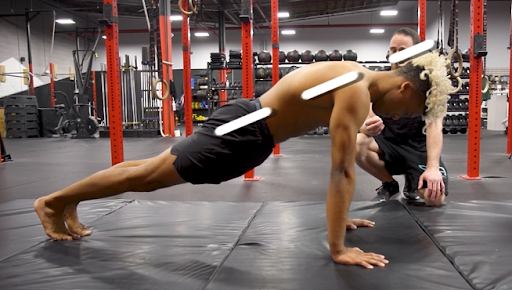
7. 🏆Wrist Push-Ups
Wrist push-ups are essential exercises for strengthening the forearms and enhancing wrist stability.
Starting with the dog position, push the heel of your hand off the floor using your forearm muscles, specifically the wrist flexors. These wrist push-ups target the forearm muscles and strengthen the wrist, essential for handstands and other weight-bearing activities.
As you become more proficient in the exercise, leaning the shoulders forward adds a degree of challenge to the wrist push-up. This variation emphasizes the wrist flexors and requires a higher degree of wrist strength and stability.
Furthermore, you can do a straight body plank as your strength and comfort levels increase. You extend your legs fully, raising your wrists off the floor. This advanced version significantly intensifies the exercise, engaging the entire body and demanding even greater wrist strength and stability.
Watch the full video to learn how to ease wrist pain, enhancing your practice during handstands.
You can also check out handstand-related articles to enhance your handstand skills further:
📍Mastering the Art of Handstand: Progression, Muscles Used, and Benefits
📍Mastering Freestanding Handstand: 11 Progressions to Success
📍Mastering Advanced Handstand Walk Progressions: Taking Your Skills to the Next Level
🧐Frequently Asked Questions
🔎What common mistakes lead to wrist pain during handstands?
Common mistakes include putting excessive weight on the heels of your palms, allowing the wrists to collapse, and improper hand placement, such as having the hands too far apart or too close together. These mistakes can result in unnecessary wrist strain.
🔎Can wrist pain be an indication of limited wrist mobility?
Yes, limited wrist mobility can contribute to wrist pain during handstands. Insufficient wrist flexibility can cause discomfort, especially when attempting movements that require a wider range of motion.
🔎Should I use wrist supports or wraps to prevent wrist pain during handstands?
While some individuals may find wrist supports helpful for added stability, it’s important not to rely on them as a long-term solution. They can provide temporary relief but should be used with proper wrist conditioning and technique improvement.
🔎How long does it take to build wrist strength and reduce wrist pain in handstands?
The timeline for reducing wrist pain varies from person to person, depending on individual factors such as current strength, consistency of training, and dedication to improving technique. Typically, with regular training, most individuals notice improvement in wrist pain over a few weeks to months.
🔎Can I continue practicing handstands with wrist pain?
Listening to your body is essential if you experience wrist pain during handstands. Mild discomfort might be manageable, but significant pain can lead to injury. It’s advisable to rest and allow your wrists to recover, consult with a professional if necessary, and focus on wrist conditioning before resuming handstand practice.
✨Conclusion
Wrist assessment and preparation are essential for anyone looking to safely embark on a handstand journey. Gradual progression and focusing on wrist health can help you avoid injuries and maintain balance during handstands.
Your wrist health is paramount, not just for handstands but for all aspects of your active life. Investing time and effort in wrist preparation is an investment in your health and safety during your calisthenics and handstand journey.🤸
☝️Remember that handstand mastery is a continuous journey, so stay dedicated to your practice and explore various exercises and progressions to improve your skills.
🎯If you’re looking for a more tailored approach to your handstand journey, consider using the Movement Athlete app, which provides personalized guidance and programs to help you reach your goals.
Take a Free Assessment now and get a personalized calisthenics training plan.

