If you’re looking for a solid front lever workout, then you’re in luck! This is not a beginner-level exercise, but with time and practice, it can be achieved!
Front Levers are one of the most difficult exercises in calisthenics. Front levers are also great for strengthening your core which will help you perform other exercises such as handstands or planches more efficiently.
How to achieve a front lever?🏆
The front lever is an advanced calisthenics skill that requires a lot of upper body strength and balance. Front levers are one of the hardest exercises to learn, but they can be achieved with patience and practice!
Just imagine pulling your full body weight to hold it in a straight line parallel to the ground on gymnastics rings or bar. That’s an insane level of strength for an exercise! Raising your feet off the floor by pulling your back is an amazing achievement enough!
So learning this skill might not sound easy, but there’s always a way to work towards it even if you don’t have any experience with the exercise.
A good starting point would be to understand what it takes to master or even first learn to be able to perform any variation of the front lever.
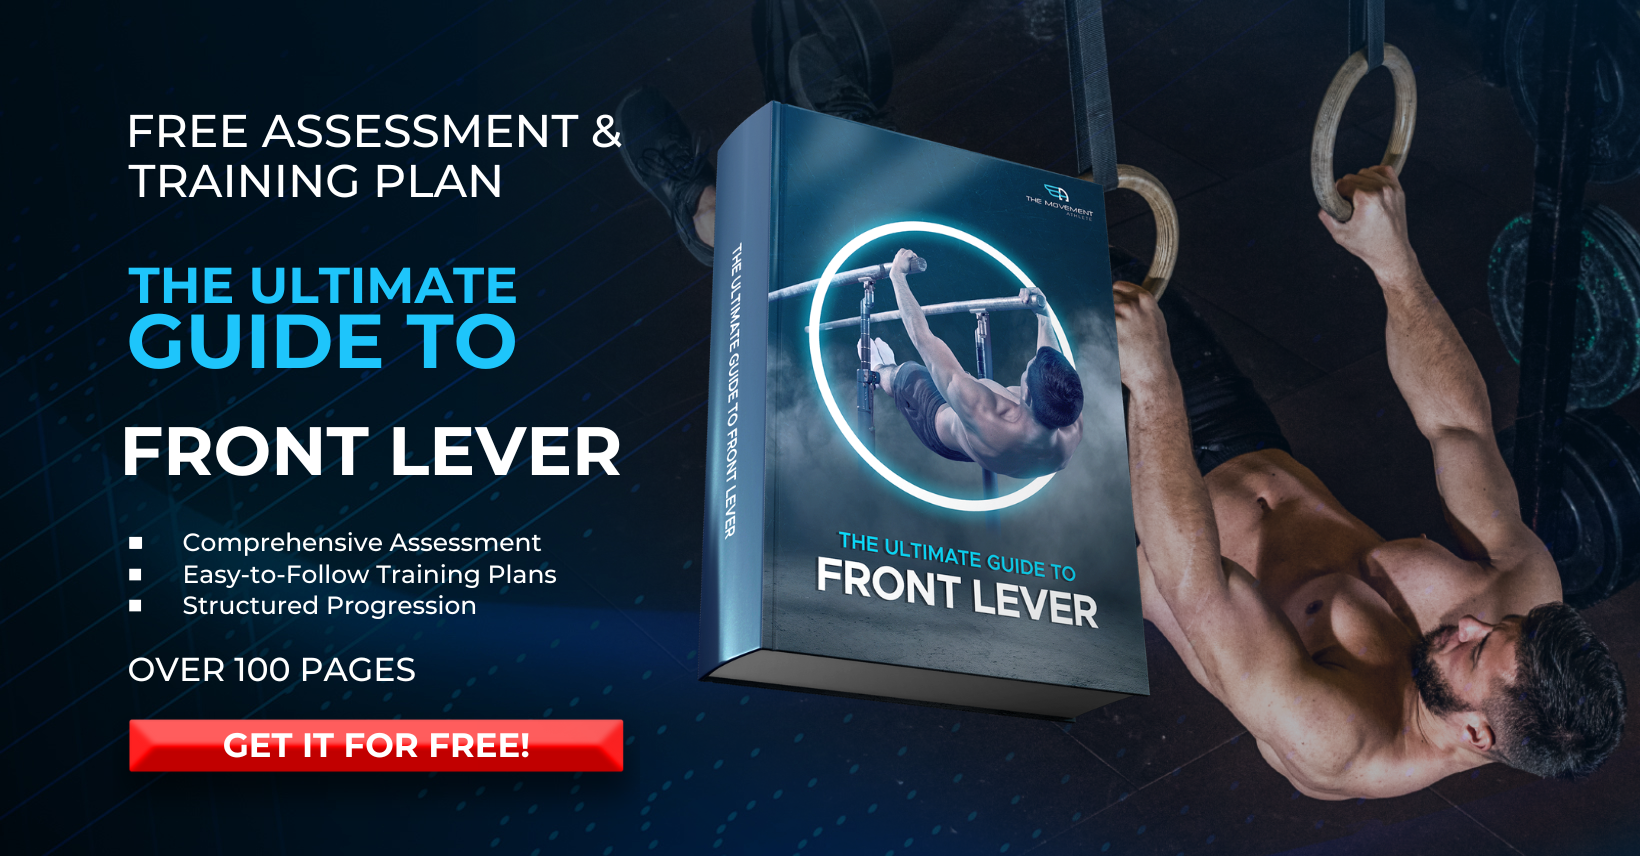
Read more: 📍Front Lever Requirements & Muscles Used
💥Mastering the fundamentals
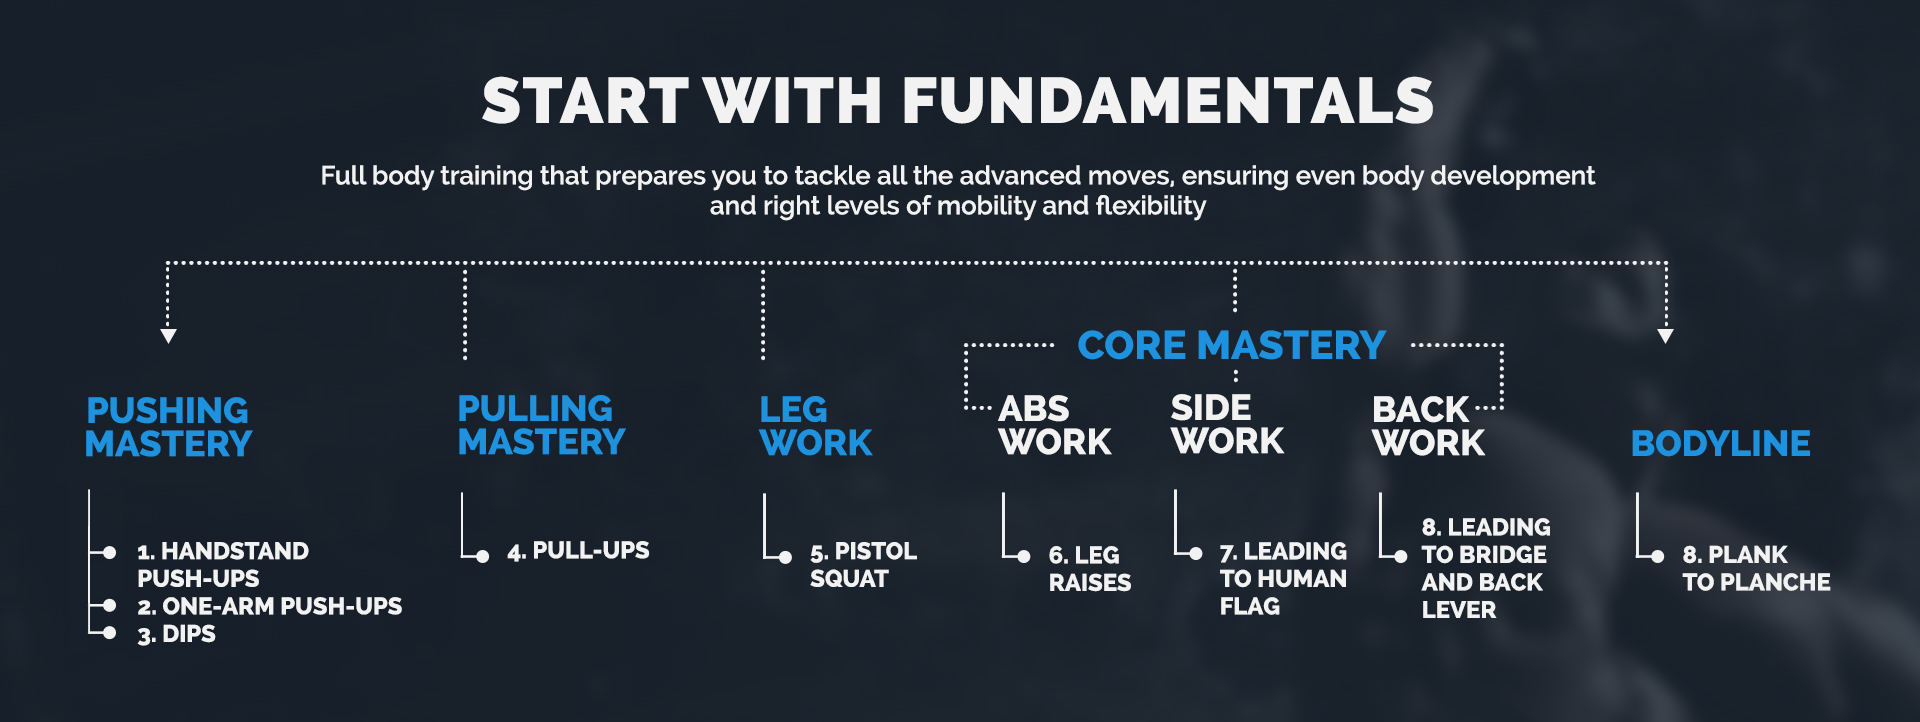
An essential component when learning any advanced skills is learning the fundamental core of calisthenics training.
Beginning directly to front lever workouts without even first mastering the fundamentals will set up for disappointment, frustration, and even worse, injury.
Fundamental calisthenics training builds strong and holistic development so you can get a headstart with your front lever training.
This involves basic calisthenics movement patterns such as bar pull-ups, push-ups, dips, handstands, squats, and proper core development and straight body line.
For those who have 0 experience with calisthenics or strengthening exercises, consider first developing your fundamentals with proper form and set the front lever as your goal in the near future.
Read this article to get an overview of what a beginner’s program should look like: 📍Basic full-body workout for beginners
Building foundation🏃
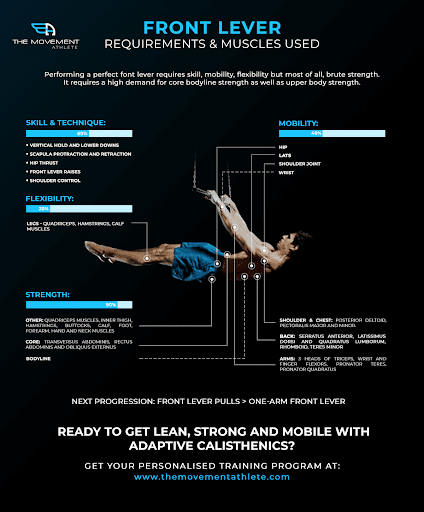
Aside from building general fundamentals, having specific foundations for the specific requirements of front lever training will also be necessary. The front lever is basically a horizontal handstand and it requires the upper back muscles to contract powerfully in order to maintain a horizontal position.
Full-body tension and correct technique are vital to holding the position efficiently without having detrimental effects on your body.
The best way to learn a skill is to 📍break down its requirements and develop each aspect so you can focus on combining it all together next.
👊Pulling strength

The front lever and back lever are pulling movements. Even if it looks static, it involved heavy pulling from your back and shoulder muscles.
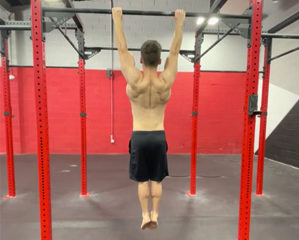
General pulling strength, built from the bar or even ring pull-ups, and chin-ups, is a fantastic way to build a strong posterior chain like the lats and upper back for pulling.
🤜Pull-ups
But the pull-up is a more ideal choice since it will hit the back muscle group better and the grip translates better to front lever progressions. When doing the skill variations of the front lever, it’s easier to hold the straight arms with a pronated grip compared to a supinated grip. The former lets you minimize arm engagement so that your bigger back muscles can do much work to hold you up into position with proper form.
🤜Inverted row
Inverted rows are also great for strengthening these back muscle groups as well as developing shoulder stability, which is key for keeping your shoulders healthy while training front levers. You can do this by hanging from a low bar or low-hanging gymnastic rings. As you get stronger with the exercise, you can get parallel to the ground or more declined to further develop your back. Gymnastic rings are a piece of ideal equipment since you can easily change the depth of the exercise to your requirement.
If you haven’t mastered basic pull-ups or haven’t done any bodyweight rows, get started!
👊Scapula strength
Most of the skills that are included in the bodyweight training method such as planches, front and back levers, flags, one-arm pull-ups, and handstand pushups are driven from one key area from the upper body or to be more precise from the back.
The SCAPULA position is probably the most underestimated position that every person who wants to perform big with the calisthenics should FIRST learn.
Learning the SCAPULA position is not a big process, but has a HUGE role in getting your first front lever, back lever, one-arm pull-up, or even as simple as a pull-up.
Proper scapula position stabilizes the shoulders to produce a maximum output of force for your lats and core so you can hold the position.
More on Scapulas here: 📍What is the Scapula?
Weakness in the shoulder girdle is often what causes people to lose their front levers or even get them into the first place. Specific scapular training involved in the front lever training can help strengthen this area!
Remember that proper technique isn’t just for aesthetics, but also for optimum and safe execution of movements.
Read more: 📍How to perform a perfect front lever
👊Core strength
If you want to hold any advanced calisthenics skills, you need a generally strong core.
For the front lever, the demand for the abs is extreme since you will need to directly fight against gravity to hold your body parallel to the ground, unlike handstands which require less core strength.
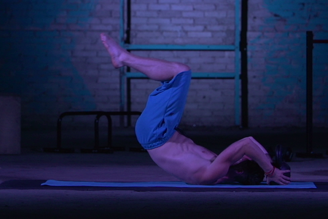
You can focus on building your abs by 📍mastering the dragon flag. When you can easily hold dragon flags, you’re almost basically holding a front lever because of the same mechanics and similar body positions.
Slowly build your way until you can fully extend your legs and hips, use straddle, one leg variation, and other body positions similar to the lever work. You can start with the negative phase at the beginning.
🔥Front lever progression
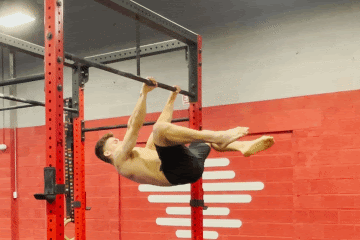
The front lever is a …. lever.
Without getting too deep into the physics of the isometric exercise, the longer the lever is, the heavier the exercise. A similar case stands with other lever exercises such as a back lever, planche, and dragon flags. The easiest way to change the lever is by modifying the leg positions. A simple extension of one leg or both legs has a massive effect on the loading of the exercise.
In the full front lever, the body is subjected to its longest possible position with both legs being straight which is why it is the hardest position.
To train for strength and technique towards the final level, it’s best to use the front lever progression.
The concept of progression isn’t new to the calisthenics community. In fact, 📍progressions are the bread and butter of bodyweight training.
There are 📍many types of progressions, but for our current purpose, we’ll talk about adjusting the body position to progress in your front lever journey which is quite similar to the back lever and planche progression as well.
Here is the front lever progression for the body position below:👇
- 🔥Tuck front lever
- 🔥Advanced Tuck front lever
- 🔥Pike Frog front lever
- 🔥Hip Ext Frog front lever
- 🔥Pike Straddle front lever
- 🔥Hip Ext Straddle front lever
- 🔥One Leg Extended front lever
- 🔥Half Lay front lever
- 🔥Full front lever
Why use progressions?🤔
Progressions allow for a gradual increase in intensity safely.
Think of it this way, weights, you’ll make progress by increasing the weight slowly. In calisthenics, you make progress by using variations that suit your current skill level.
As you’ll notice, the front lever progressions are formed by changing mostly the hips and the leg position. As a guide:
- Bent knees = easier for example tuck lever
- Straight knees = harder for example one leg lever
- Piked hips = easier for example straddle lever
- Extended hips = harder for example advanced tuck lever
Begin in the easiest progression, the tuck lever with hips and legs bent, then make your way by slowly extending your hips towards the advanced tuck.
⭐️Other ways to progress
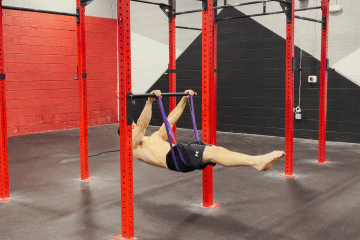
You could also benefit from using negative lower downs, or lever raises with a resistance band to get you stronger and build specific muscle groups while the actual lever hold is still out of your reach.
💯Here are methods you can use to develop the strength to hold the challenging front lever:
- ✊ Implementing eccentric phase
- ✊Using band assistance
- ✊ Using a full range of motion
- ✊ Improving general pulling strength
🧐General front lever technique
With the progression, what matters most is holding the correct form in whatever progression you are currently working on. That means:
- 👍Feet pointed
- 👍Scapula depressed and retracted
- 👍Core engaged
- 👍Hips slightly tilted forward
- 👍Body parallel to the ground
- 👍Legs tension regardless of specific variation progression
- 👍Arms straight
- 👍Back pulling hard
- 👍Upper torso in a straight line
Gymnastics rings vs Bars😲
Depends on what you have. What matters most is to stick to the setup that you have and train with it consistently.
Just in case to help you decide which to choose, here’s a quick overview.
👉Gymnastics rings are:
- easier on the shoulders for mobility
- offers ranges of motion for 360 pulls and skin the cat
- harder to control due to instability so chest, lats and shoulders will work harder
- can hang anywhere
👉With bars:
- fixed shoulder position
- easier to stabilize
Whatever you choose, just stay consistent with that specific setup.
✨The 7-day Killer Front Lever Workout
🎯Monday
- Tucked lever hold (or choose the variations you can do.) 3 sets of 15 secs
- Tucked lever raise (or choose the variations you can do) 3 sets of 6 reps
- Banded lever hold (to add volume) 3 sets of 30 secs
- Dragon flag variation 3 sets of 10 reps
- Scapula pulls variation 3 sets of 10 reps
🎯Tuesday
Push routine (handstand push-ups, pushups, dips, or whatever you choose)
🎯Wednesday
Rest day
🎯Thursday
- Tucked lever hold (or choose the variations you can do.) 3 sets of 15 secs
- Tucked lever negative (or choose the variations you can do.) 3 sets of 5 reps
- Banded lever hold (to add volume to your workout) 3 sets of 30 secs
- L-sit 3 sets of 15 secs
- Wide pull-up 3 sets of 8 reps
- Hollow body hold 3 sets of 30 secs
- Superman hold 3 sets of 30 secs
🎯Friday
Push routine (handstand push-ups, pushups, dips, or whatever you choose) OR Leg routine
🎯Saturday
*** Repeat the Monday workout
- Tucked lever hold (or choose the variations you can do.) 3 sets of 15secs
- Tucked lever raise (or choose the variations you can do) 3 sets of 6 reps
- Banded lever hold (to add volume to your workout) 3 sets of 30 secs
- Dragon flag variation 3 sets of 10 reps
- Scapula pulls variation 3 sets of 10 reps
🎯Sunday
Rest day
⚡️Follow this 4-week program and unleash your true potential.
Make sure to choose the variation of the lever that suits your current skill level. That means a progression that you can hold or do negatives with proper form and control.
The other exercises in the program are included to help you fix any weaknesses in the other elements of the front lever.
📌To Summarize
There is no one way that will work for everyone – you’ve got to find what works best for your individual situation.
So next you might ask:
But what if I can’t do some of these exercises?
That’s probably the question most of you are asking yourself.
Lack of personalisation is hurting your training performance. 📍It’s a FACT
Imagine if some of these exercises above were too hard for you. Your body will try to compensate with a poor form, movement dysfunction, and possibly risk injury if it’s too challenging. And now imagine if some of these exercises were too easy they wouldn’t challenge your muscles to grow – you’d simply be wasting your time. This is why we created The Movement Athlete: to offer a fully personalized training program reflecting exactly where your level is for optimal performance.
Take the assessment to see how do you stack up on the 8 fundamental calisthenics moves!